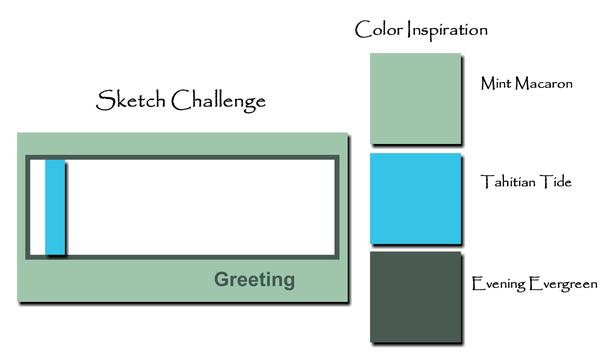
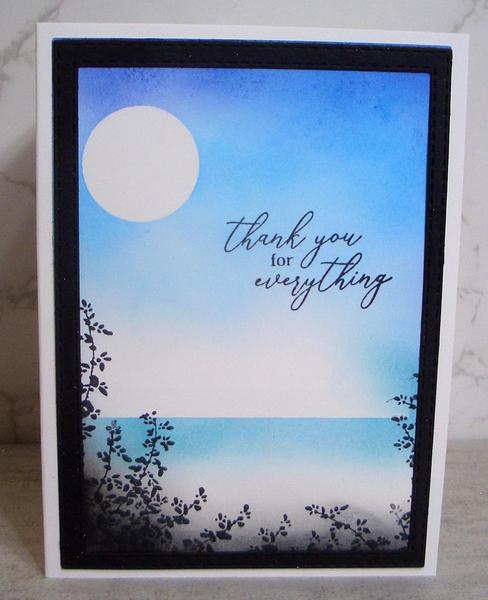
Create a serene ocean or lake nighttime landscape using Blending Brushes and the Masking Technique.
Instructions:
1. Create a mask for the moon. Punch a circle using a 1" circle punch or die out of a Post-it-Note or the new Masking Paper from Stampin' Up!
2. Place the circle on Basic White card front.
3. Add Starry Sky ink at the top of the card front with a Blending Brush*. Move lower using Pacific Point ink, working around the masked moon. Blend colors using Balmy Blue ink. Remove the mask.
4. Place a Post-It-Note mask over the top half of the card front. Create the water by adding Pool Party ink below the mask, then blend in color using Tahitian Tide ink.
5. Remove the mask and fill in the edges with Balmy Blue ink.
*Since the colors I used for this card are all shades of blue, I only used one Blending Brush specifically set aside for blue colors. You can easily clean off the color by swiping the brush on your worksheet. Honestly, I don't worry about cleaning the brush in between color. The different shades of blue just help with the shading and blending.
TIP: So you don't get splotches of color in one spot, ink the Blending Brush and blot/stamp off on your worksheet. Then move the brush towards your project using a swirling motion.
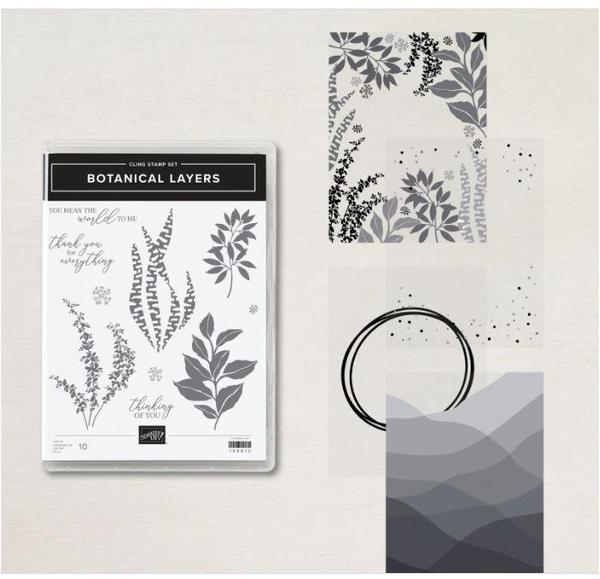
6. Stamp foliage from Botanical Layers along the bottom and edges of the card front using Memento Black ink.
7. Add Memento Black ink along the edges using a sponge or Sponge Dauber.
8. Stamp greeting using Memento Black ink.
9. Create a frame by nesting two Stitched Rectangle Dies one inside the other and cut out of Basic Black card stock using a die-cut machine.
10. Attach the frame using thin lines of Tombow Liquid Glue.
11. Attach to Basic White card base to complete.
Supplies Used:
Stamp Set: Botanical Layers
Ink: Starry Sky, Pacific Point, Balmy Blue, Pool Party, Tahitian Tide, Memento Black
Paper: Basic White, Basic Black
Accessories: Post-It-Note, 1" circle punch, Blending Brush, Stampin' Cut & Emboss Machine, Stitched Rectangle Dies, Tombow Liquid Glue