|
|
In this issue: December Challenge and
Color Inspiration December Promotion: Last Chance Products December Hostess Code December Featured
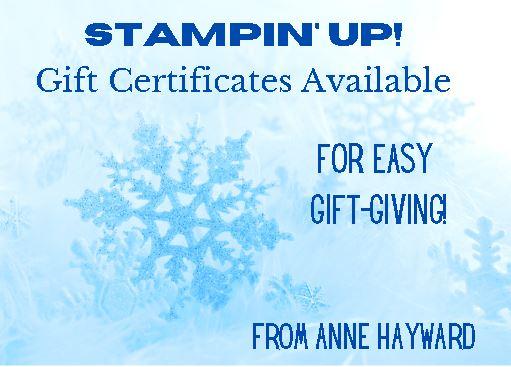
Product: December Featured Projects: Snowflakes! December Sketch Challenge and Color Inspiration Gift Certificates are Available The July–December 2022 Mini Catalog will be retiring soon! It’s always bittersweet to see a classic Stampin’ Up! catalog take a trip to retirement. But, we’re looking forward to all the new products on their way—and we
hope you are, too! Stock up on your favorite products before they’re gone for good! Save up to 60% on essential craft supplies. What are you waiting for? Start shopping! After all, this selection of Last Chance Products is only available while supplies last. Shop Last Chance
Products Last Chance List Carryover
List The Christmas season is a busy time of year for sending and receiving packages, so naturally shipping may take longer than normal in the coming weeks. If you are
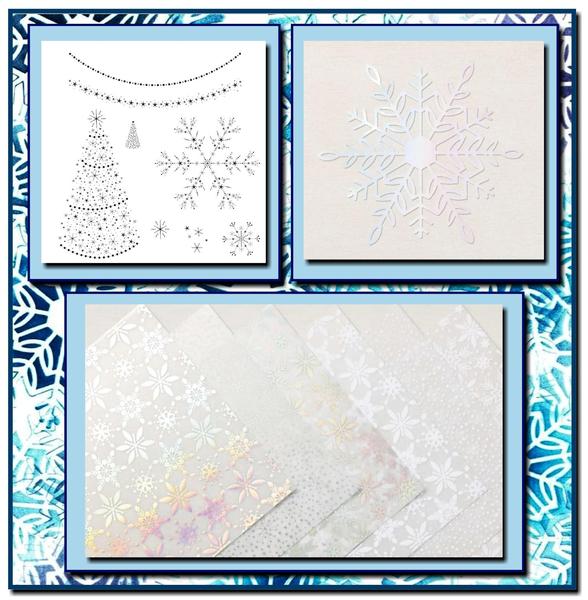
placing any orders for Christmas, please submit them by December 14th. Although SU! cannot guarantee that these orders will arrive before Christmas, they will do their best to get them out as quickly as possible. RVKJRYZP Orders using this hostess code will be combined. As always, if we have enough in sales to make the order a workshop ($150), those placing an order using the hostess code will share the hostess rewards. Hostess rewards will be based on a percentage of each order placed. Please place your order online by December 26. I will notify our hostesses by email on December 27. The workshop will need to close on December 29. If your individual order happens to total $150.00 or more, please do not use the Hostess Code above. Instead, you can be your own hostess and redeem the rewards for yourself! Place an online order or contact me, and I'll place the order for you. Thank you. Anne Snowflakes:Christmas Lights, Wonderful Snowflakes, Snowflake Vellum “Snowflakes are one of nature's most fragile things, but
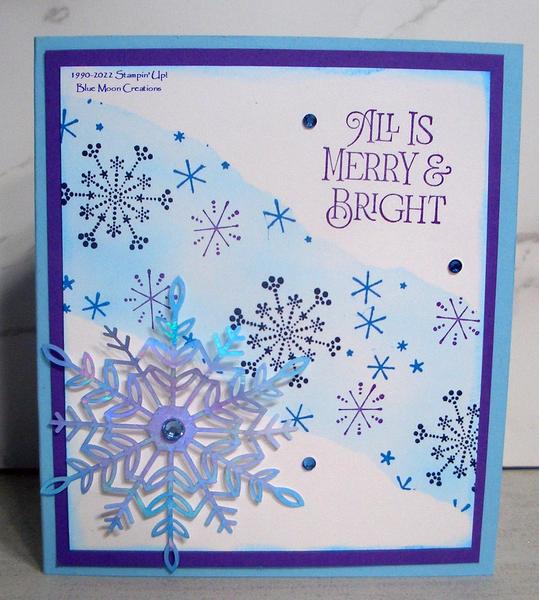
just look what they can do when they stick together.” -Vesta M. KellyAn easy technique giving the look of torn paper. Click Here for How-to Video Instructions: 1.Cut a piece of copy/computer paper to measure 5" x 6" ish.
2.Tear the piece in half, creating 2 masks.
3.Secure a piece of card stock (3 3/4" x 5" Basic White) using washi or painter's tape to your work surface.
4.Attach the 2 pieces of torn copy paper to the top and bottom of the card front. Secure using washi or painter's
tape.
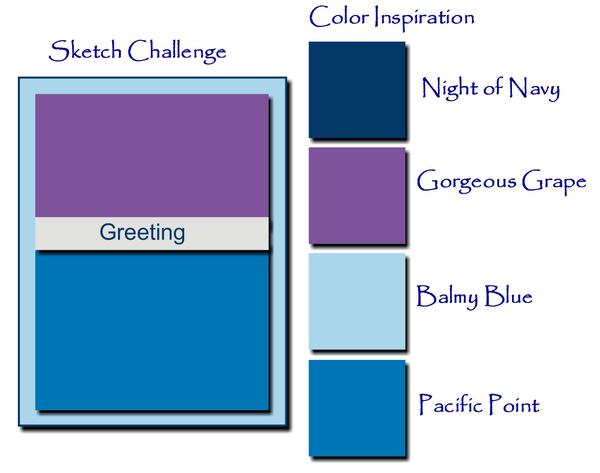
5.Add background color to the blank space in between the torn paper. I used Balmy Blue ink applied with a Blending Brush for this card.
6.Stamp snowflakes from Christmas Lights using Night of Navy, Gorgeous Grape, and Pacific Point inks.
7.Remove the masks, and you'll have the Faux Torn Paper look!
8.Stamp greeting from Brightest Glow using Gorgeous Grape ink.
9.Attach to Gorgeous Grape mat. Attach to Balmy Blue card base.
10.Add Pacific Point and Gorgeous
Grape inks to Wonderful Snowflakes iridescent foil embellishment using a Blending Brush.
11.Attach to the card front using a Mini Dimensional to pop it up.
12.Attach rhinestones to the card front to complete. Supplies Used: Ink: Balmy Blue, Night of Navy, Gorgeous Grape, Pacific Point
Paper: Basic White, Gorgeous Grape Accessories: computer paper, Blending Brushes, Wonderful Snowflakes, wash tape, Mini Dimensional, Blue Rhinestones
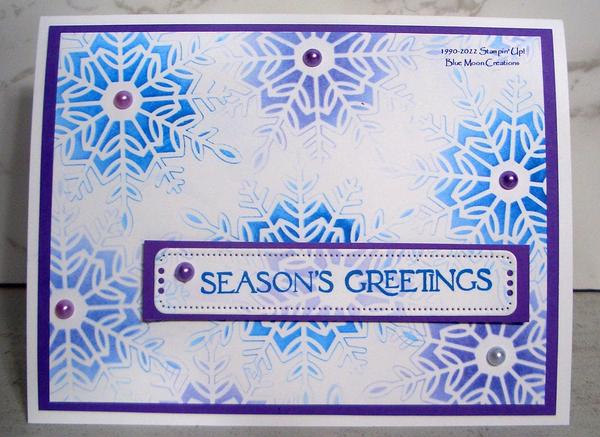
(retired) Stenciled Wonderful Snowflakes Use the Wonderful Snowflakes Embellishment to create a stencil. Click Here for How-to Video Instructions: 1.Place a Wonderful Snowflake Embellishment on a card front (3 3/4"
x 5" Basic White). 2. Add ink to the embellishment with a Blending Brush, leaving a stenciled image on the card front. Move the snowflake and repeat using different colors of ink. I used Pacific Point and Gorgeous Grape inks for this card. 3.Attach to Gorgeous Grape mat. Attach to Basic White card base. 4.Stamp greeting from Brightest Glow on a scrap piece of Basic White card
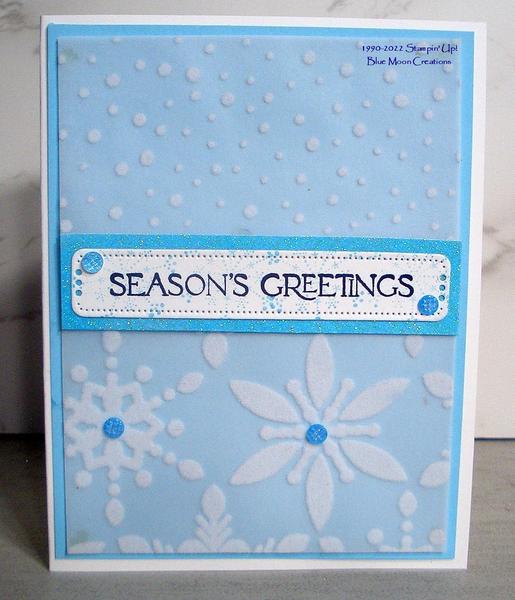
stock using Pacific Point ink. Die-cut using die-cut machine and Labels Aglow Die. Place a snowflake stencil on the greeting and apply a light touch of ink. Attach to the card front using Mini Dimensionals to pop it up. 5.Attach Pastel Pearls to complete. Supplies Used: Stamp Set: Brightest Glow Ink: Pacific Point, Gorgeous Grape Paper: Basic White, Gorgeous Grape Accessories: Wonderful Snowflakes, Blending Brush, Stampin' Cut & Emboss Machine, Labels Aglow Dies, Mini Dimensionals, Pastel Pearls Frosty Snowflakes-Sketch Challenge The Snowflake Speciality Vellum is so pretty. I love the
look and feel of the flocked designs! Instructions: 1.Cut 2 designs of Snowflake Specialty Vellum to measure 2 1/2" x 3 3/4". 2. Attach to Balmy Blue mat. Use Glue Dots placed strategically behind the snowflake designs to hide. If needed, roll the glue dot to a smaller size using the Take Your Pick Tool. 3.Attach to a Basic White card base. 4.Stamp greeting
from Brightest Glow on a scrap piece of Basic White card stock using Night of Navy ink. Die-cut using die-cut machine and Label Aglow Die. Stamp small snowflakes from Christmas Lights using Balmy Blue ink. Attach to card front using Mini Dimensionals to pop it up. 5.Attach blue dots to complete. Supplies Used: Stamp Sets: Labels Aglow, Christmas Lights Ink:Night of Navy, Balmy Blue Paper: Basic White, Balmy Blue, Snowflake Speciality Vellum Accessories: Stampin' Cut & Emboss Machine, Labels Aglow Dies, Take Your Pick Tool, Mini Dimensionals, Glue Dots, blue dots (retired) You are receiving this email from Anne Hayward because you have subscribed to my mailing list. Thank you! I am a Stampin' Up! Demonstrator, and most, if not all, of the product I use is Stampin' Up!
Usually, substitutions can easily be made with other products. If this is not for you, that is ok. To unsubscribe, please see the instructions at the bottom of this email. But please do not file a complaint or tag my emails as SPAM. To ensure that you continue to receive emails from me, please add the following to your address book: |
|
|
|
|