|
|
Free Shipping Today, October 4 On orders $75.00 or more! In this issue: October Challenge and Color Inspiration October Promotions: 12 Weeks of Christmas Newsletters October Hostess
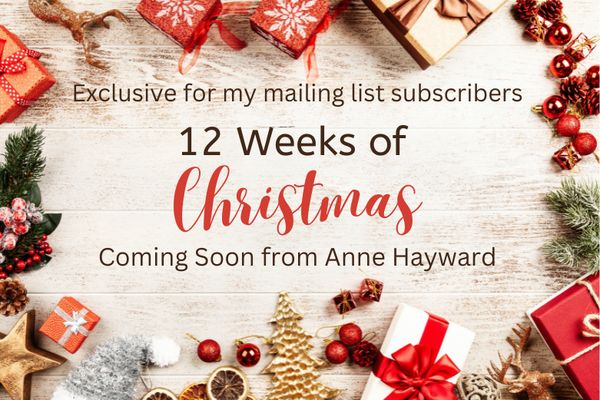
Code October Featured Product: Design a Treat Bundle October Featured Projects: Design a Treat Bundle October Sketch Challenge and Color Inspiration 12 Weeks of Christmas Newsletters 12 Weeks of Christmas Crafting Ideas The holidays are coming! It's not too early to start on those holiday crafting projects! I can help take a little stress out of your holiday season with my 12 Weeks of Christmas Newsletter Service. This year, I will share my 12 Weeks of Christmas Newsletter with my email subscribers. This is my way of thanking you for subscribing to my newsletters and reading the emails sent throughout the year. I will start my 12 Weeks of Christmas newsletters on October 5, 2022. Every week for 12 weeks, the free and exclusive newsletters will contain a Christmas/holiday project idea with easy STEP-BY-STEP instructions! Weeks 1-5 will
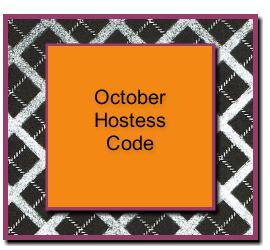
feature card ideas Weeks 6-9 will feature gift ideas Weeks 10-12 will feature bags, tags, or wraps You're already on my mailing list, so there is no need for you to do anything! BGEGZFVW Orders using this hostess code will be
combined. As always, if we have enough in sales to make the order a workshop ($150), those placing an order using the hostess code will share the hostess rewards. Hostess rewards will be based on a percentage of each order placed. Please place your order online by October 25. I will notify our hostesses by email October 26. The workshop will need to close on October 28. If your individual order happens to total $150.00 or more, please do not use the
Hostess Code above. Instead, you can be your own hostess and redeem the rewards for yourself! Place an online order or contact me, and I'll place the order for you. Thanks! The Design a Treat Bundle includes
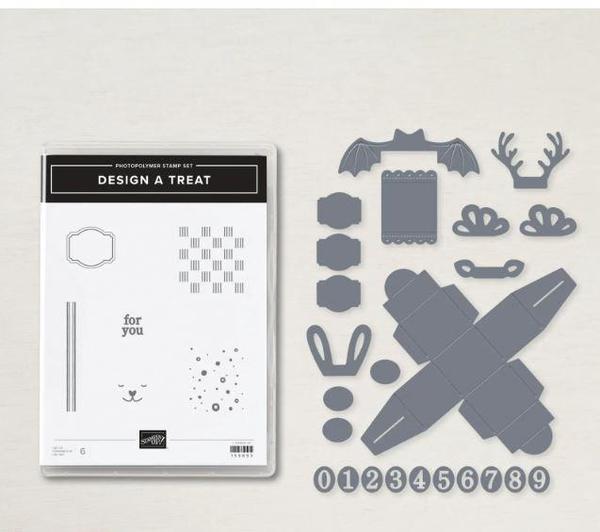
the Design a Treat Stamp Set and the Design a Treat Box Dies Themed treat boxes are the perfect way to personalize party favors for
holiday, birthday, and seasonal parties. Create the treat box of your dreams by using the Design a Treat Stamp Set and the Design a Treat Box Dies together!
DESIGN A TREAT PHOTOPOLYMER STAMP SET
We know you love designing and decorating treat boxes just as much as we do. That’s why we know that you’ll love the Design a Treat Stamp Set
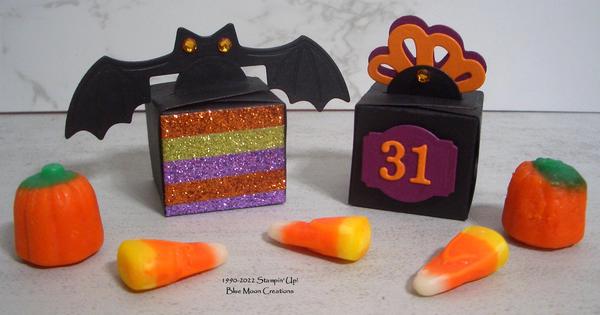
to help you design the treat box of your dreams! This stamp set comes with repeatable patterned stamps to create a checkered print in your choice of colors, or you can come up with your own prints by using the stamps in unexpected ways. There’s also a sweet animal face to stamp on the front of a treat box so you can easily create themed treat boxes for many occasions. You’re going to have a lot of fun with this stamp set! Design a Treat Halloween Boxes Perfect for Halloween! Instructions: 1. Cut box out of Basic Black card stock using die-cut machine and Design a Treat Die. 2.Assemble box, folding along score lines and using a bone folder to
get crisp score lines. Everything folds in except for the half circle tabs. 3. Fill box with candy or treats. Secure the top, folding the sides in and bringing up the half circles through the slots. - Bat Box- Attach strips of Glitter Washi Tape on one side of the front
of the box. Cut bat out of Basic Black card stock using die-cut machine and bat die. Insert in between two half circles, securing with Tombow Liquid Glue. Attach Amber Gems for the eyes. -31 Box-Cut flowers out of Rich Razzleberry and Pumpkin Pie card stock using die-cut machine and flower die. Cut label out of Rich Razzleberry card stock, and the numbers out of Pumpkin
Pie card stock. Layer the flowers and insert in between the two half circles, securing with Tombow Liquid Glue. Attach the label and numbers to the front of the box using Tombow Liquid Glue. Attach Amber Gem to complete. Supplies Used: Paper: Basic Black, Rich Razzleberry, Pumpkin Pie Accessories: Stampin' Cut & Emboss Machine, Design a Treat Dies, bone folder, Glitter Washi Tape, Tombow Liquid Glue, Amber Gems, candy or other small treat Design a Treat
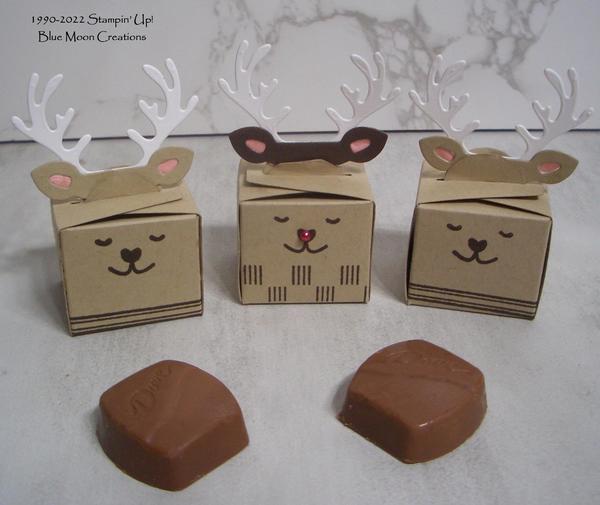
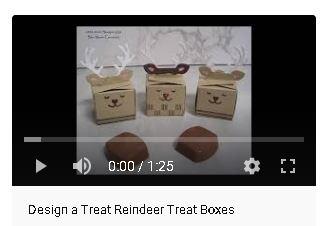
Reindeer Treat Boxes Create cute reindeer treat boxes, just in time for the Holidays! Instructions: 1. Cut box out of Crumb Cake card stock using die-cut machine and Design a Treat Die. 2. Stamp faces and lines from Design a Treat stamp set using Early Espresso ink. 3. Assemble box, folding along score lines and using a bone folder to get crisp score lines. Everything folds in except for the half circle tabs. 4. Fold in sides and adhere using Tombow Liquid Glue. Hold sides together for a minute or two, allowing the glue to
dry. 5. Fill box with candy or treats. Secure the top, folding the sides in and bringing up the half circles through the slots. 6. Cut ears out of Crumb Cake and Early Espresso card stock using die. Cut 2 flowers out of Petal Pink card stock. Save the tear-drop
inserts from the flowers. Attach tear-drops to back sides of the ears using Tombow Liquid Glue. 7. Cut antlers out of Basic White card stock. Attach the ears to the antlers using Tombow Liquid Glue. Insert antlers in between the two half circles, securing with Tombow Liquid Glue. 8. Attach Cherry Cobbler Festive Pearl to the center of one of the reindeer's nose to complete. Supplies Used: Stamp Set: Design a Treat Ink: Early Espresso Paper: Crumb Cake, Early Espresso, Petal Pink, Basic White Accessories: Stampin' Cut & Emboss Machine, Design a Treat Dies, bone folder, Tombow Liquid Glue, Festive Pearls, candy or
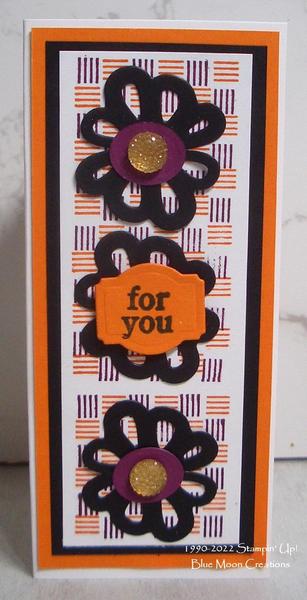
other small treat Design a Treat For You Card-Sketch Challenge Use the cross-hatch stamp to create an background. Using a Stamparatus or positioning tool makes it easy! Instructions: 1. Place the checkered print stamp from Design a Treat on a Stamparatus plate. Insert Basic White card stock, and secure with a magnet. Ink up the image using Rich Razzleberry ink and stamp.
2. Remove the stamp* and move it up,
aligning it with the first stamped image. Close the plate, picking up the stamp. Ink again with Rich Razzleberry, and stamp. Move stamp one more time and stamp. *Be sure to clean the stamp after each stamping.
3. Turn the image 90 degrees and place in between the lines on the third stamping. Close the plate,
picking up the stamp. Ink using Pumpkin Pie ink and stamp.
4. Repeat and stamp two more times using Pumpkin Pie ink.
5. Cut flowers out of Basic Black card stock using a die-cut machine and Design a Treat Dies. You will cut 2 sections for each flower.
6. Cut 2 oval pieces out of Rich Razzleberry card stock using Design a Treat Dies. Cut one label out of Pumpkin Pie card stock using Design a Treat die. Stamp greeting using Memento Black ink.
7. Attach card front to Basic Black mat. Attach to Pumpkin Pie mat. Attach to Basic White card base.
8. Attach flowers and ovals. Attach greeting using Dimensionals to pop it up. Add Gold Gems to the center of the ovals to complete Supplies Used: Stamp Set: Design a Treat Ink: Rich Razzleberry, Pumpkin Pie, Memento Black Paper: Basic White, Basic Black, Pumpkin Pie, Rich Razzleberry Accessories: Stamparatus, Stampin' Cut & Die Machine, Design a Treat Dies, Mini Dimensionals, Gold Gems You are receiving this email from Anne Hayward because you have subscribed to my mailing list. Thank you! I am a Stampin' Up! Demonstrator, and most, if not all, of the product I use is Stampin' Up! Usually, substitutions can easily be made with other products. If this is not for you, that is ok. To unsubscribe, please see
the instructions at the bottom of this email. But please do not file a complaint or tag my emails as SPAM. To ensure that you continue to receive emails from me, please add the following to your address book: |
|
|
|
|