|
|
In this issue: January Challenge and
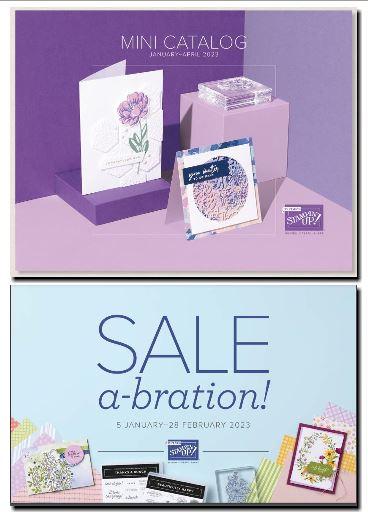
Color Inspiration January Promotion: Jan-April Mini and Jan-Feb Sale-A-Bration January Featured Product: Share a Milkshake Bundle January Featured Projects: Z Fold Pop Up, Faux Center Step January Hostess Code January Sketch Challenge and Color Inspiration Jan-April Mini Catalog and Jan-Feb Sale-A-Bration Let's celebrate Spring! This catalog is filled with
spring and summer-themed stamp sets, papers and accessories! During Sale-A-Bration (January 5-February 28), you'll earn FREE product found in the Sale-A-Bration Catalog for every $50.00 spent (before shipping and
tax). Now's a great time to stock up on essential stamping supplies and earn free product! Please be sure to let me know if you
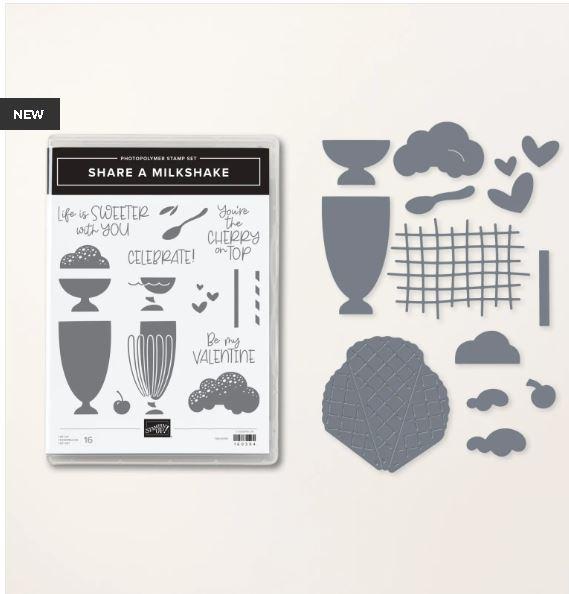
have any questions. NEW! Share a Milkshake Bundle The Share a Milkshake Bundle includes the Share a Milkshake Stamp Set
and the Share a Milkshake Dies. Nothing is more classic than a scoop of ice cream shared between
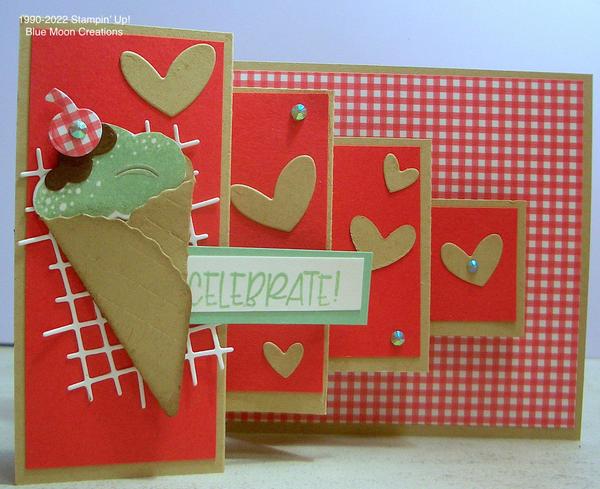
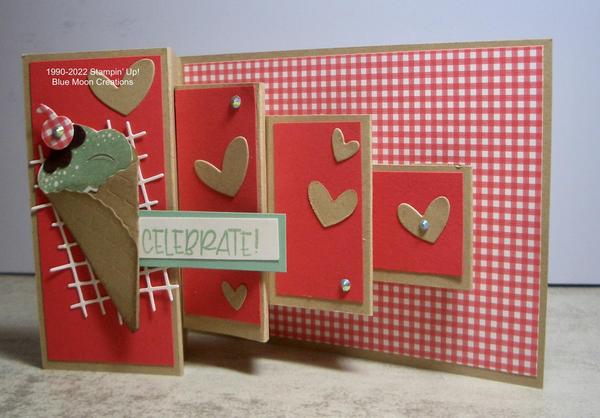
friends. Make your paper crafts and cards extra sweet with this stamp set and die bundle. Create layered looks using the dies, then add details with the coordinating stamps. Celebrate those special occasions or simply share your love of frozen treats with this delicious bundle! Z Fold Pop Up Card opened Folds flat for mailing. Popped up boxes when opened! Click Here for How-to Video Instructions: Z Fold Pop Up Card
Paper Measurements:
Card Base (Crumb Cake): 4 1/4" x 9 1/2", scored at 2" and 4"
Inside Mat (Country Gingham): 4" x 5 1/4"
Left Panel (Sweet Sorbet): 1 3/4" x 4"
Block #1
(Crumb Cake): 3 1/4" x 5", scored at 1 1/2", 3", and 4 1/2"
Block #1 Mat (Sweet Sorbet): 1 1/4" x 3"
Block #2 (Crumb Cake): 2 1/2" x 4", scored at 1", 2 1/2", and 3 1/2"
Block #2 Mat (Sweet Sorbet):1 1/4" x 2 1/4"
Block #3 (Crumb Cake): 1 1/2" x 3", scored at 1/2", 2", and 2 1/2"
Block #3 Mat (Sweet Sorbet): 1 1/4" x 1 1/4" 1. Cut paper pieces and score using the measurements above.
2. Fold card base:
mountain, then valley fold. Use a bone folder to get crisp score lines.
3. Attach Sweet Sorbet mat to left panel.
Be sure to watch How-To Video Here
4. Create blocks:
Blocks #1: fold along score lines: mountain, mountain, mountain folds. Use a bone folder to get crisp score lines.
Attach Tear & Tape Adhesive on end panels of block.
Place against
inside of inside panel and fold base to secure.
Flip to back side and fold base to secure.
Blocks #2 and 3:
Fold along score lines, add Tear & Tape Adhesive on end panels of blocks, and secure.
5. Attach Sweet Sorbet mats to blocks.
6. Decorate:
-Die-cut waffle cone out of Crumb Cake using Share a Milkshake Die. Sponge Crumb Cake ink along the edges. Fold and secure using a Mini Dimensional.
-Stamp ice cream on
Basic White card stock using Mint Macaron ink. Die-cut using coordinating die.
-Die-cut chocolate sauce out of Early Espresso card stock, cherry out of Country Gingham DSP, hearts out of Crumb Cake card stock, and cross hatch out of Basic White card stock.
-Attach crosshatch to left panel. Attach waffle cone using Mini
Dimensionals to pop it up. Slip ice cream into cone using a Mini
Dimensional to pop it up.
-Attach chocolate sauce. Attach cherry using a Mini Dimensional to pop it up.
-Stamp greeting on Basic White card stock using Mint Macaron
ink. Attach to Mint Macaron mat. Slip behind cone using a Mini Dimensional
to pop it up.
Attach hearts and dots to complete. Supplies Used:
Stamp set: Share a Milkshake
Ink: Mint Macaron, Crumb Cake
Paper: Crumb Cake, Sweet Sorbet, Basic White, Early Espresso, Country Gingham 6" x 6" Designer Series Paper
Accessories: Simply Scoring Tool, bone folder, Stampin' Cut & Emboss Machine, Share a Milkshake Dies, Tear & Tape Adhesive, Mini Dimensionals, enamel dots
Center Step cards can be tricky, requiring precise cutting and scoring. This Faux Center Step Technique is easy to put together with just a little bit of scoring. Click Here for How-to Video Instructions: Faux Center Step Card Paper Measurements:
Card Base (Basic White):
10" x 4 1/4", scored at 3 1/2", 7", and 8 1/2"
Center Panel (Basic White): 8
1/2" x 2 3/4", scored at 3"
Country Gingham Panels:
Center Panel: 2 1/2" x 5 1/4"
Bottom Panel: 1 1/4" x 4"
Side Panels: 2 @ 3/4" x 3 1/4" Be sure to watch the How-To Video HERE 1. Cut paper pieces and score using the measurements above.
2. Fold the card base:
mountain, valley, and then mountain folds. Fold the center panel: mountain fold. Use a bone folder to get crisp score lines.
3. Attach DSP to center panel.
4. Attach DSP to bottom panel.
5. Attach DSP to sides of center panel.
6. Attach strips of Tear and Tape to top and bottom of the back side of the center panel.
7. Fold card base flat and hold center panel in place, centering it on the bottom panel.
8. Flip over and attach center panel to the back of the card base.
9. Attach center panel to bottom of the card base.
10. Decorate:
-Two-step soda glass using Petal Pink and Sweet Sorbet ink on Basic White card stock.
-Stamp ice cream using Petal Pink ink on
Basic White card stock.
-Stamp cherry, two straws, greeting, and hearts using Sweet Sorbet ink on Basic White card stock.
-Die-cut pieces using coordinating Share a Milkshake Dies. Die-cut chocolate sauce topping out of Early Espresso card stock.
-Attach soda glass to card front using Mini Dimensionals to pop it up. Layer ice cream scoop and chocolate sauce using Mini Dimensionals to pop them up. Insert one straw in slit in ice cream scoop. Attach second straw behind ice cream using a Mini Dimensional to pop it up.
Attach cherry using a Mini Dimensional to pop it up.
-Attach greeting to Balmy Blue mat and attach to card front using Mini Dimensionals to pop it up. Supplies Used: Stamp Set: Share a Milkshake
Ink: Sweet Sorbet, Petal Pink
Paper: Basic White, Early Espresso, Country Gingham 6" x 6" Designer Series Paper
Accessories: Simply Scoring Tool, Bone Folder, Stampin' Cut & Emboss Machine, Share a Milkshake Dies, Tear & Tape Adhesive, Mini
Dimensionals
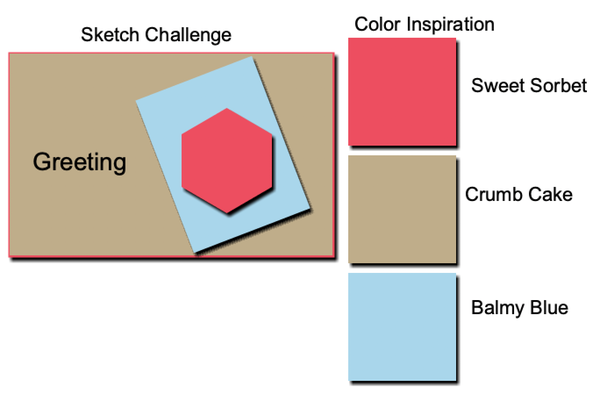
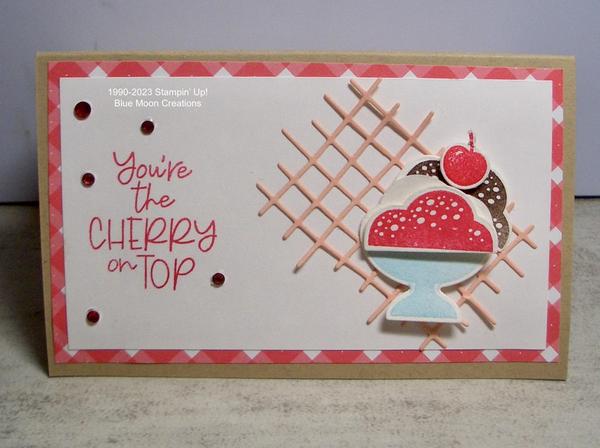
You're the Cherry on Top-Sketch Challenge Instructions: 1. Stamp ice cream glass on Basic White card stock using Balmy Blue ink. Stamp ice cream using Sweet Sorbet and Early Espresso inks.
Stamp cherry using Sweet Sorbet ink. Die-cut using coordinating die. Die-cut third ice cream out of Basic White card
stock.
2. Die cut cross hatch out of Petal Pink card stock.
3. Stamp greeting on Basic White card front using Sweet Sorbet ink.
4. Attach Country Gingham DSP to Crumb Cake card base. Attach card front to card base.
5. Attach cross hatch. Attach ice cream glass using Mini Dimensionals to pop it up. Layer ice cream using Mini Dimensionals to pop them up. Attach cherry using a Mini Dimensional to pop it up.
6. Color rhinestones using Sweet Sorbet Stampin' Blend. Attach to card front to complete.
Supplies Used:
Stamp Set: Share a Milkshake
Ink: Balmy Blue, Sweet Sorbet, Early Espresso
Sweet Sorbet Stampin' Blend
Paper: Crumb Cake, Basic White, Petal Pink. Country Gingham 6" x 6" Designer Series Paper
Accessories: Stampin' Cut & Emboss Machine, Share a Milkshake Dies, Mini Dimensionals, rhinestones
Y2RFGUZM Orders using this hostess code will be combined. As always, if we have enough in sales to make the order a workshop ($150), those placing an order using the hostess code will share the hostess rewards. Hostess rewards will be based on a percentage of each order placed. Please place your order online by January 26. I will notify our hostesses by email on January 27. The workshop will need to close on January 29. If your individual order happens to total $150.00 or more, please do not use the Hostess Code above. Instead, you can be your own hostess and redeem the rewards for yourself! Place an online order or contact me, and I'll place the order for you. Thank you. Anne You are receiving this email from Anne Hayward
because you have subscribed to my mailing list. Thank you! I am a Stampin' Up! Demonstrator, and most, if not all, of the product I use is Stampin' Up! Usually, substitutions can easily be made with other products. If this is not for you, that is ok. To unsubscribe, please see the instructions at the bottom of this email. But please do not file a complaint or tag my emails as SPAM. To ensure that you continue to receive emails from me, please add the
following to your address book: |
|
|
|
|