|
|
In this issue: July Sketch Challenge and
Color Inspiration July/August Promotion: Bonus Days July Hostess Code July Featured Product: Sending Smiles and
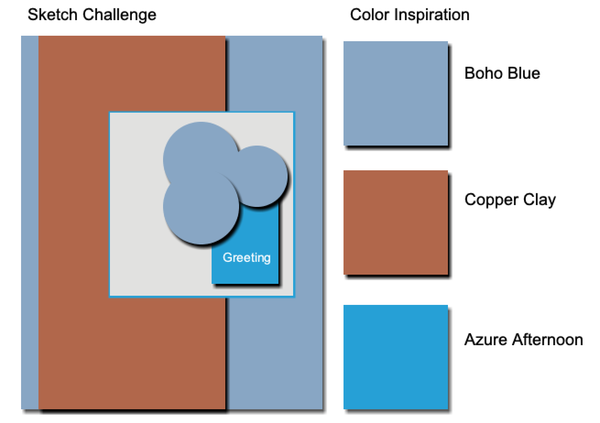
Sending Dies July Featured Projects: Whirly Twirly and Shadow Box Cards July Sketch Challenge and Color Inspiration Bonus Days-purchase in July, Redeem in August! Stampin' Up! is bringing back one of their favorite
promotions—BONUS DAYS! Because do you know what’s a great deal? Getting rewarded for all the crafting supplies you’re already going to buy! When you shop between 6–31 July and spend $50 USD you will
earn a $5 USD coupon (no limits!) Make sure you save all your coupons because you can redeem them (and we mean ALL of them) between 1–31 August. Coupons will be sent via email to the address associated with the order. Check your SPAM folder if you don't receive the
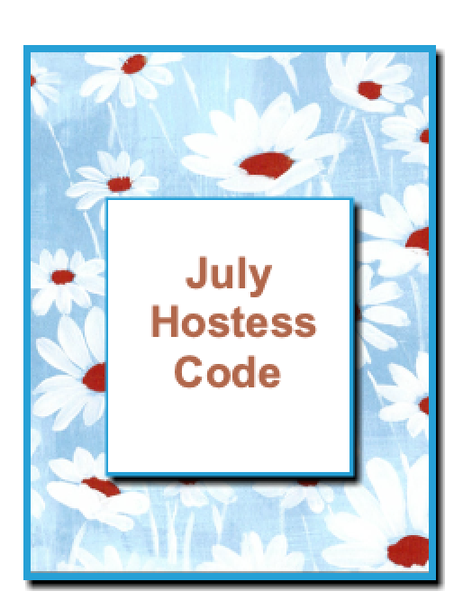
code(s). Be sure to contact me if you have any questions or issues. 6DRSGASV Orders using this hostess code will be combined. As always, if we have enough in sales to make the order a workshop ($150), those placing an order using the hostess code will share the hostess rewards. Hostess rewards will be based on a percentage of each order placed. Please place your order online by July 25. I will notify our hostesses by email on July 26. The workshop will need to close on July 28. If your individual order happens to total $150.00 or more, please do not use the Hostess Code above. Instead, you can be your own hostess and redeem the rewards for yourself! Place an online order or contact me, and I'll place the order for you. Thank you. Anne Sending Smiles and Sending Dies Create thoughtful cards for every occasion with the
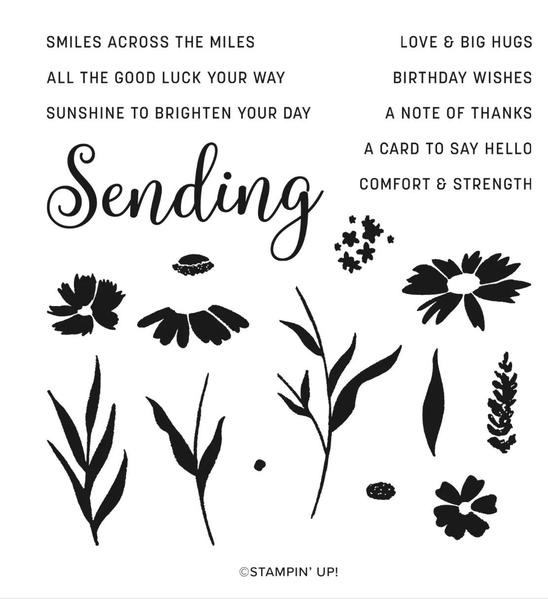
Sending Smiles Stamp Set. Send sunshine to brighten someone’s day, comfort and strength, a note of thanks, or birthday wishes. Whatever the occasion, you can create beautiful cards with heartfelt thoughts that will bring a smile to whoever receives it! Elevate your cards and
craft projects with the Sending Dies. Perfect for any occasion, this set includes a large text die and shadow die of the word “Sending” to emphasize whatever sentiment you want to convey. Make labels from two different sized label dies, or create floral accents that pop by combining flower,
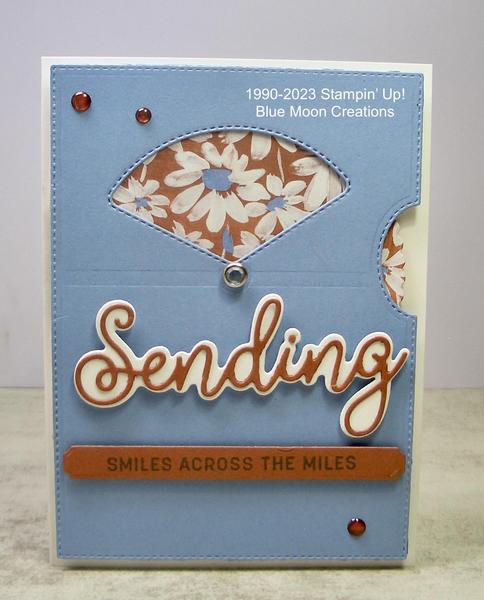
stem, and leaf dies. Use different colors and textures from our Designer Series Paper collection to make jaw-dropping designs. Sending Smiles Whirly Twirly Card A fun interactive whirly twirly card! Instructions: 1.Cut pieces for Whirly card using Give it A Whirl Dies:
-card front out of Boho Blue, then cut out the opening
-twirly mechanism out of Fresh As a Daisy Designer Series
Paper
2.Insert a brad through the small hole in the card front and the small hole in the twirly mechanism, opening the wings. Done! You now have a whirly, twirly card!
3.Attach the card front to the Basic White card base using Adhesive Foam Strips to pop up fit rom the base.
4.Die-Cut solid "sending" background out of Basic White card stock using the Sending Die. Die-cut greeting out of Copper Clay card stock using the coordinating Sending Die. Attach to the background using a small amount of Liquid or Fine Tip Glue.
5.Stamp greeting on Copper Clay card stock using Azure Afternoon ink. Die-cut using coordinating banner
die.
6.Attach greetings to the card front using Mini Dimensionals to pop them up.
7.Attach Copper Clay Dots to complete.
Supplies
Used: Stamp Set: Sending Smiles
Ink: Azure Afternoon
Paper: Basic White, Boho Blue, Copper Clay, Fresh as a Daisy Designer Series Paper
Accessories: Stampin' Cut & Emboss Machine, Sending and Give it a Whirl Dies, Adhesive Foam Strips, Tombow Liquid Glue, Mini Dimensionals, brad
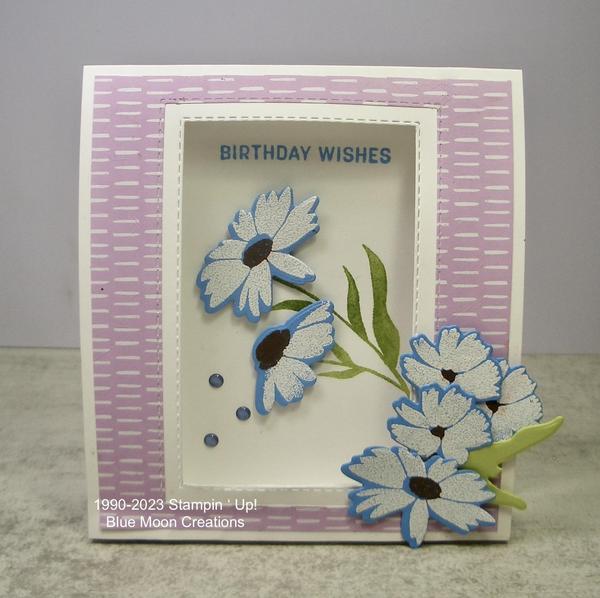
from my stash, 2023-2023 In Color Dots Sending Smiles Shadow Box Card Shadow Box Card Side View Instructions: Card Base (Basic White) 4 1/4" x 11" scored at 1/2", 1", 1 1/2" and 6 1/4"
Designer Series Paper 4" x 4 1/2" (Fresh Freesia Subtles Designer Series Paper)
Basic White for inside 4" x 4
1/2"
Fresh Freesia or Basic White for the back of the card (write greeting) 4" x 4 1/2"
1.Score and fold Basic White card base.
1.Die-cut or punch an opening out of the Designer Series Paper card front. I used a Stitched Rectangle die, but any shape
would work (circle, square, etc.)
3.Attach the designer paper to the card base.
Punch or die-cut an opening out of the card base and designer paper using a smaller-sized punch or die.
4.Inside panel and front decoration:
-Stamp flowers from Sending Smiles on Azure Afternoon card stock using white craft ink. Heat emboss using a heat tool and white embossing powder. Stamp flower centers using Copper Clay ink.
-Die-cut using coordinating Sending Dies.
-Stamp the flower stem
and leaf images on the Basic White panel using Granny Apple Green ink. Stamp the greeting using Azure Afternoon ink. Attach heat-embossed flowers using Mini Dimensionals to pop them up.
5.Attach the panel to the inside of the shadow box. Attach the back panel for sentiment to the back of the card base.
6,Fold bottom score
lines (valley, mountain, valley). Attach a strip of Tear & Tape Adhesive along the upper tab. Remove the tape, fold the card front closed, lining up the bottom edge of the card front and panel to secure.
7.Attach flowers and leaves to the front of the card using Mini Dimensionals to pop them up.
8.Add Boho Blue Dots to
complete. Supplies Used: Stamp Set: Sending Wishes
Ink: Azure
Afternoon, Copper Clay, white craft
Paper: Basic White, Azure Afternoon, Granny Apple Green, Fresh Freesia, Subtles 6"x6" Designer Series Paper
Accessories: heat tool, white embossing powder, Stampin' Cut & Emboss Machine, Sending and Stitched Rectangle dies, Tear & Tape Adhesive, Mini Dimensionals, 2023-2025 In Color
Dots
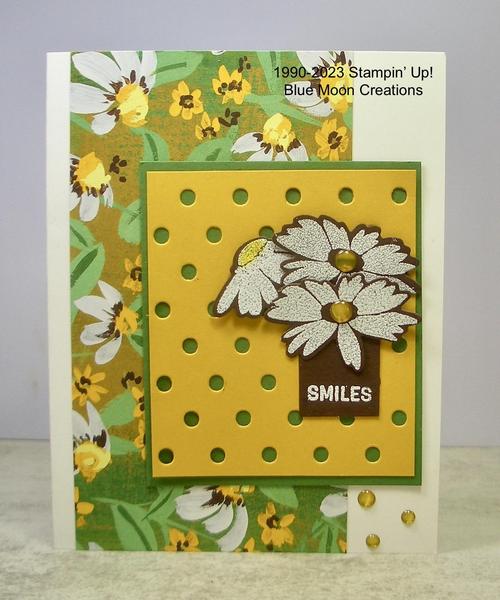
Spots & Dots-Sketch Challenge Instructions: 1.Attach Fresh Flowers DSP panel to
Basic White card base.
2.Die-cut Crushed Curry card stock using Dots & Spots Die.
3.Attach to Garden Green mat. Attach to the card front.
4.Stamp flowers and flower center on Early Espresso card stock using white craft ink. Heat emboss using
a heat tool and white embossing powder.
5.Die-cut flowers using Sending Die.
6.Partial stamp greeting on Early Espresso card stock using white craft ink. You only want to stamp the "smiles." Heat emboss using white embossing powder.
7.Attach flowers to the card front using Mini Dimensionals to pop them up. Slip the greeting underneath the flowers.
8.Add Wild Wheat Dots to the centers of the large flowers. Color the center of the partial flower using Crushed Curry Stampin' Blend. Supplies Used:
Stamp Set: Sending Smiles
Ink: White craft, Crushed Curry Stampin' Blend
Paper: Basic White, Garden Green, Crushed Curry, Fresh as a Daisy Designer Series Paper
Accessories: Stampin' Cut & Emboss Machine, Dots & Spots and Sending Dies, heat tool, white embossing powder, Mini Dimensionals, 2023-2025 In Color Dots
You are receiving this email from Anne Hayward because you have subscribed to my mailing list. Thank
you! I am a Stampin' Up! Demonstrator, and most, if not all, of the product I use is Stampin' Up! Usually, substitutions can easily be made with other products. If this is not for you, that is ok. To unsubscribe, please see the instructions at the bottom of this email. But please do not file a complaint or tag my emails as SPAM. To ensure that you continue to receive emails from me, please add the following to your address book: |
|
|
|
|