|
|
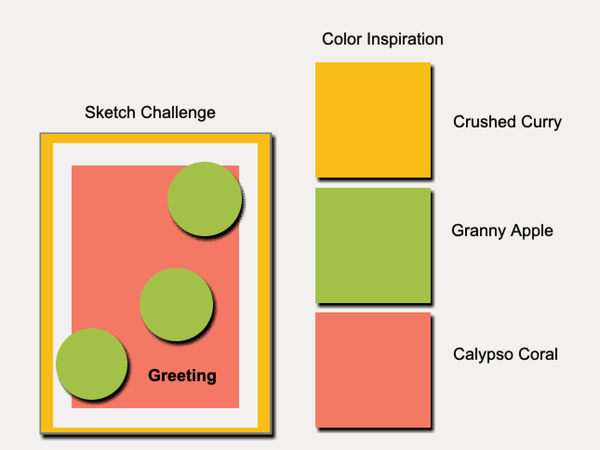
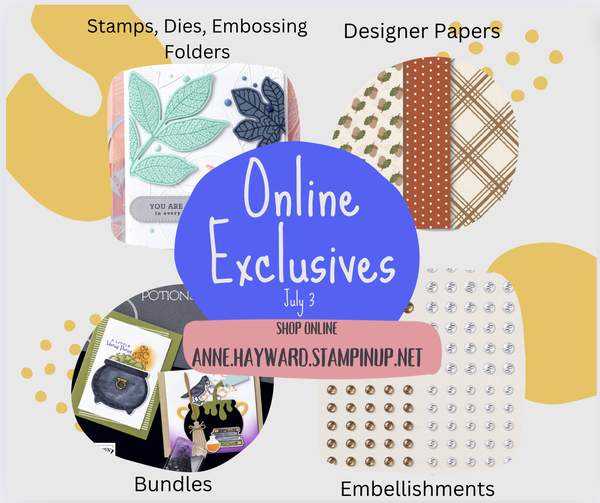
In this issue: July Sketch Challenge and Color Inspiration July Promotion: Online Exclusives and Bonus Days July Featured Product: Cheerful Daisies July Featured Projects: Cheerful Daisies July Sketch Challenge and Color Inspiration New Online Exclusives, July 3 Available July 3! A new line of Online Exclusive products are here! Suites, Bundles, Dies, Embossing Folders, Designer Papers, Embellishments! You won’t find these products in any catalog. New Online Exclusives, just in time for Fall, Halloween, Winter, and Christmas projects! Shop Online Exclusives HERE Let me know if you have any questions. [email protected] It’s time for one of our favorite promotions—BONUS DAYS! Because do you know what’s a great deal? Getting rewarded for all the crafting supplies you’re already going to buy! When you shop between July 3-31 and spend $50 USD, you will earn a $5 USD coupon! Make sure you save all your coupons because
you can redeem them (and we mean ALL of them) between August 1-31. There's no limit on the number of coupons that can be earned. All coupon codes will be emailed right after a qualifying purchase has been made. Shop Online HERE
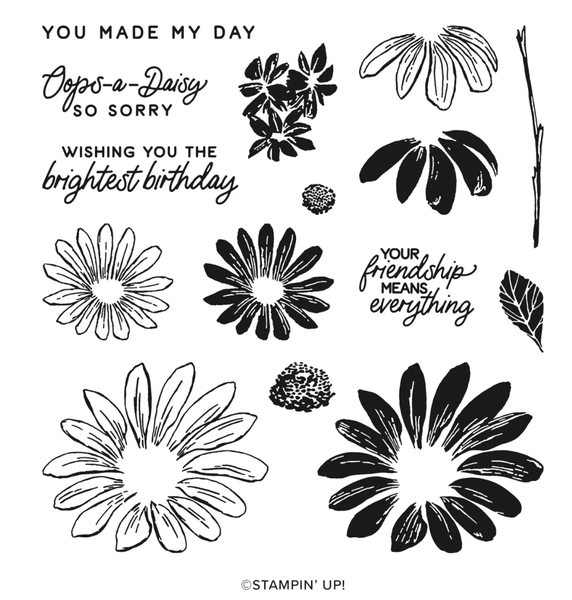
Stamp a happy garden or bouquet of daisies with the Cheerful Daisies Stamp Set. You'll love everything you can do with this set. Do you like bold and simple stamping? Use the solid images, perfect for quick stamping in one color. Do you want to add detailed color? Use the open line-art images, perfect for watercoloring. The flowers, flower centers, leaves, and stems are on separate stamps so you can create customized flowers. Finish with
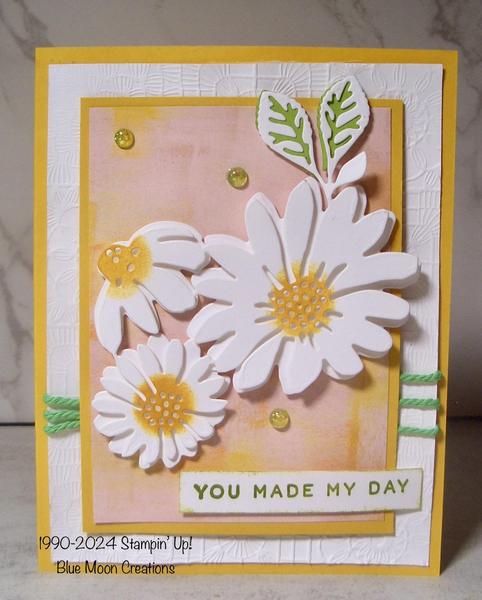
a sentiment—birthday, thanks, thinking of you, sorry—for unique cards for many occasions. Coordinates with Cheerful Daisies Dies Cheerful Daisies You Made my Day-Sketch Challenge Instructions: 1.Die-cut solid and
detail daisies out of Basic White card stock using Stampin' Cut & Emboss Machine and Cheerful Daisies Dies. Die-cut coordinating leaves out of Granny Apple card stock. With a Sponge Dauber or Blending Brush, add Crushed Curry ink to the flower centers. 2. Layer flowers using Mini Dimensionals in the flower centers. Layer leaves using a small amount of Liquid
Glue. 3. Dry emboss Basic White card front using Stampin' Cut & Emboss Machine and Cute Crochet Embossing Folder.* Wrap Baker's Twine around the front, securing it in the back. Attach to Crushed Curry card base. *Lighly spritz card stock with water before
embossing. This will help get a deeper embossed image. 4.Attach Meandering Meadow DSP to Crushed Curry mat. Attach to card front. 5. Attach flowers using Mini Dimensionals to pop them up. 6. Stamp greeting from Simply Zinnia on scrap piece of Basic White card stock using Granny Apple ink. Sponge Granny Apple ink along the edges. Add to card front using Mini Dimensionals to pop it up. 7. Add opals to complete. Supplies Used: Stamp Set: Simply Zinnias Ink: Crushed Curry, Granny
Apple Paper: Crushed Curry, Basic White, Granny Apple, Meandering Meadow 6"x6" Designer Series Paper Accessories: Stampin' Cut & Emboss Machine, Cheerful Daisies Dies, Cute Crochet Embossing Folder, Sponge Dauber, Liquid Glue, Mini
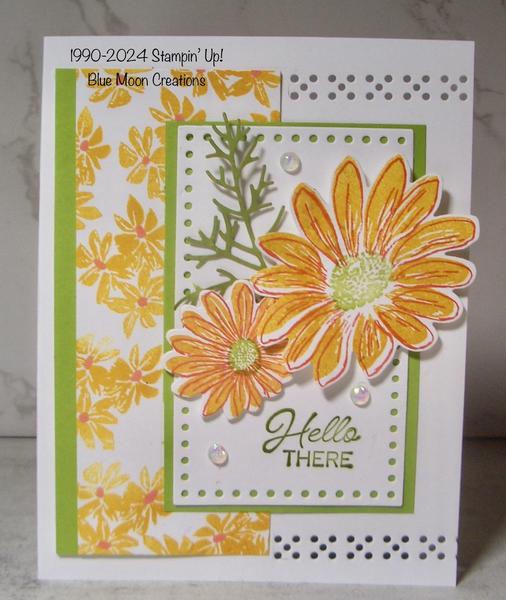
Dimensionals, opals and green Baker's Twine from my stash Cheerful Daisies Hello There Instructions: 1.Two-step stamp
daisies. Stamp the solid image first in Crushed Curry. Over-stamp the detail image using Calypso Coral ink. Die-cut using Stampin' Cut & Emboss Machine and coordinating Cheerful Daisies Dies. 2. Die-cut leaves out Granny Apple card stock. 3.
Stamp flower clusters on Basic White panel using Crushed Curry ink. Color in the flower centers using a Calypso Coral Stampin' Blend or Stampin' Write Marker. Attach to a strip of Granny Apple card stock. 4. Die-cut rectangle out of Basic White card stock using Stampin' Cut & Emboss Machine and Everyday Details Die. Stamp greeting from Blueberry Bunches using
Granny Apple ink. Attach to Granny Apple matting. 5. Die-cut dotted strips from Basic White card base using Stampin' Cut & Emboss Machine and Everyday Details Die. 6. Attach stamped panel to card base. Attach matted rectangle to card base. Attach daisies
using Mini Dimensionals to pop them up. Slip leaves behind the flowers. Attach opals to complete. Supplies Used: Stamp sets: Cheerful Daisies, Blueberry Bunches Ink: Crushed Curry, Calypso Coral, Granny Apple Calypso Coral Stampin' Blend Paper: Basic White, Granny Apple Accessories: Stampin' Cut & Emboss Machine, Cheerful Daisies and Everyday Details Dies, Liquid Glue, Mini
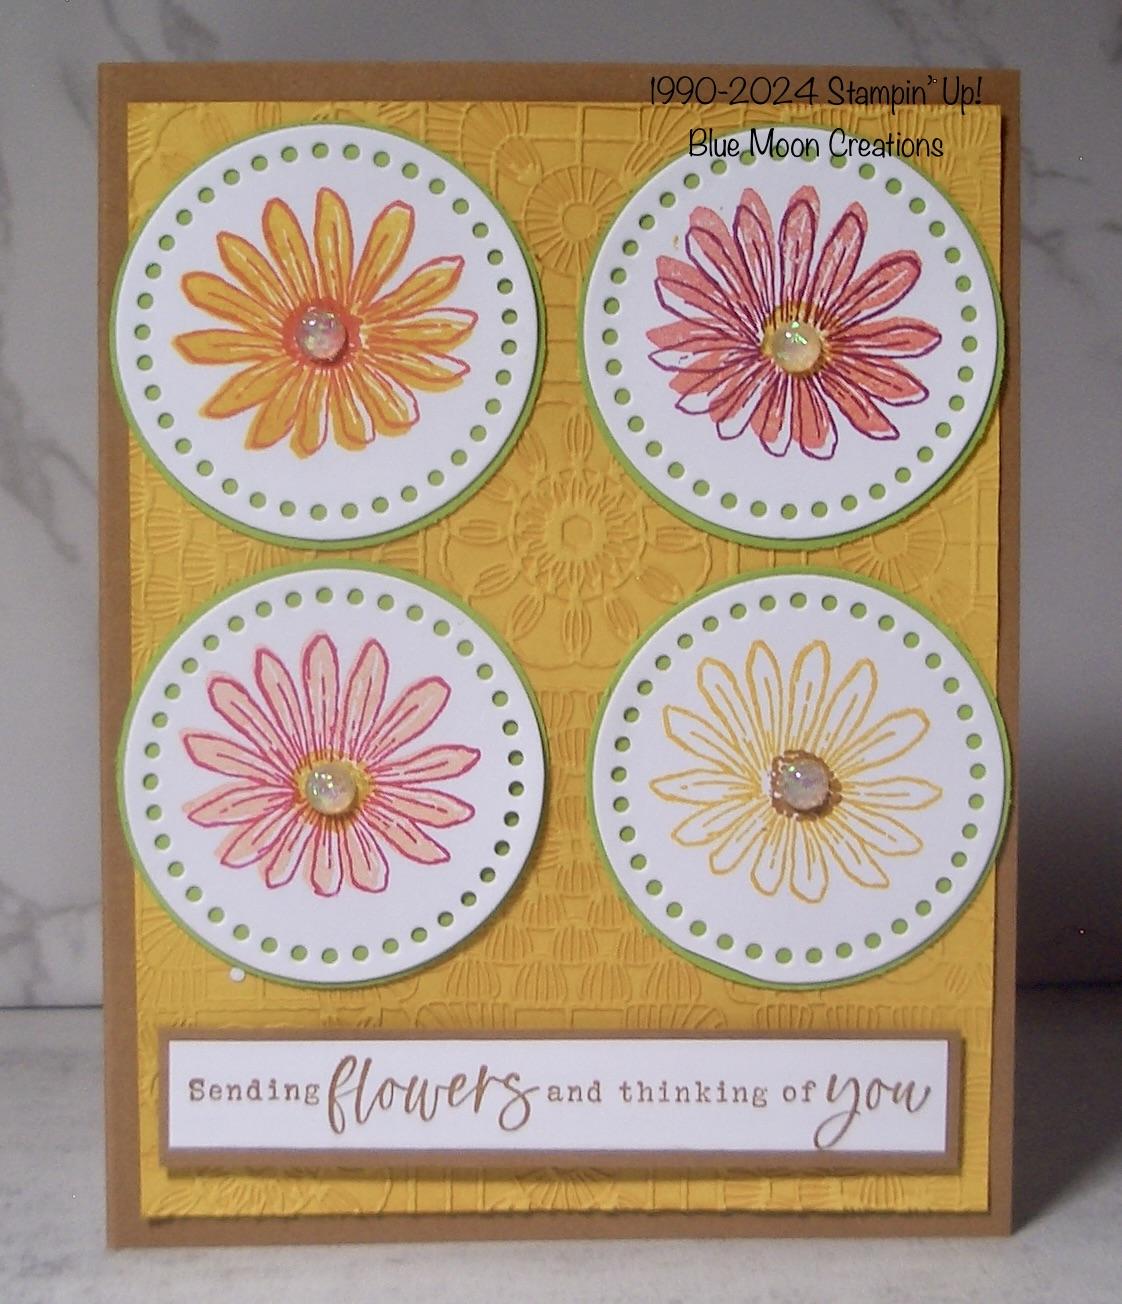
Dimensionals, opals from my stash Instructions: 1.Two-step daisies on Basic White card stock. Stamp detail image using a lighter ink. Then, use a darker ink to stamp the detail image. Die-cut using Stampin' Cut & Emboss
Machine and Everyday Detail Die. Die-cut or punch a 2" circle out of Granny Apple card stock. Layer flowers to matting. 2. Dry emboss Crushed Curry card stock using Stampin' Cut & Emboss Machine and Cute Crochet Embossing Folder. Attach to Pebble Path card base. 3. Attach flowers to card front. 4. Stamp
greeting from Simply Zinnias on Basic White card stock using Pebble Path ink. Attach to Pebble Path matting. Attach to card front using Mini Dimensionals to pop it up. 5. Add opals to flower centers to complete. Supplies Used: Stamp Set: Cheerful Daisies, Simply Zinnias Ink: Crushed Curry, Calypso Coral, Flirty Flamingo, Berry Burst, Petal Pink, Melon Mambo, Pebble Path Paper: Pebble Path, Crushed Curry, Basic White, Granny
Apple Accessories: Stampin' Cut & Emboss Machine, Everyday Details Dies, 2" circle punch, Cute Crochet Embossing Folder, opals from my stash
You are receiving this email from Anne Hayward because you have subscribed to my mailing list. Thank you! I am a Stampin' Up! Demonstrator, and most, if not all, of the product I use is Stampin' Up! Usually, substitutions can easily be
made with other products. If this is not for you, that is ok. To unsubscribe, please see the instructions at the bottom of this email. But please do not file a complaint or tag my emails as SPAM. To ensure that you continue to receive emails from me, please add the following to your address book: |
|
|
|
|