INSTRUCTIONS
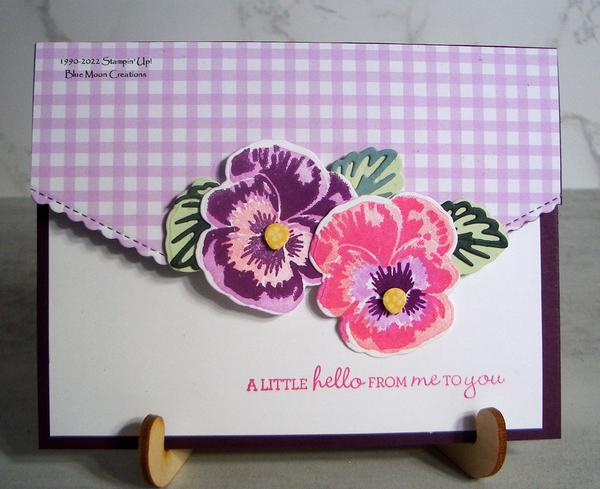
1. Stamp pansies using the Pansy Patch stamp set. This is a 5-step image. Stamp solid image using a lighter colors (Flirty Flamingo and Fresh Freesia). Over-stamp detail stamp using darker color (Polished Pink and Blackberry Bliss). Stamp larger center (Fresh Freesia and Flirty Flamingo. Next stamp next smallest center (Blackberry Bliss). Finally stamp small center using
Bumblebee. After stamping, I decided I wanted the center to be raised. So, I cut the centers out of Pansy Patch DSP using the Pansy Die. I popped them up using a Mini Dimensional.
2. Cut leaves out of Soft Sea Foam, Soft Succulent, and Evening Evergreen card stock. Attach detail to solid piece using a small amount of Tombow Glue.
3. To create the envelope flap, score a piece of 11" x 4 1/4" Blackberry Bliss card stock in half at 5 1/2". Cut a piece of Pansy Petals DSP measuring 5 1/2" x 4 1/4" and attach to the card base front.
4. Create the envelope flap by cutting the card base and DSP using a Basic Border die placed about 1/2 down.
5. Attach pansies and leaves using Mini Dimensionals on the upper part of the pieces only.
6. Attach 5 1/4" x 4" Basic White insert. Stamp greeting using Polished Pink ink. I used the Stamparatus.
Supplies
Ink: Flirty Flamingo, Polished Pink, Fresh Freesia, Blackberry Bliss
Paper: Blackberry Bliss, Basic White, Soft Sea Foam, Soft Succulent, Evening Evergreen, Pansy Petals Designer Series Paper
Accessories: Stampin' Cut & Emboss Machine, Pansy and Basic Borders Dies, Tombow Glue, Mini Dimensionals, Stamparatus
Do you have a friend you think might like to receive my newsletters?
Referrals are the highest compliment!
Thank you!