Instructions
Paper Measurements:
Hues of Happiness Designer Series
Paper-
card front: 2 3/4" x 3 3/4"
Dainty Flowers Designer Series Paper-
backing: 2 1/2" x 3 1/2"
Window Sheet-2 1/4" x 2 1/4"
Basic White-
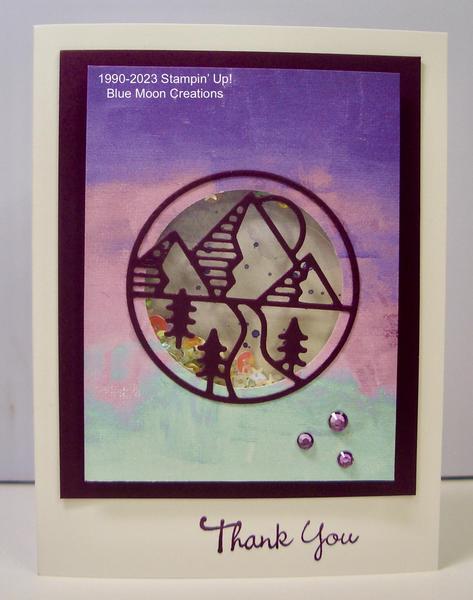
card base: 5" x 3 3/4"
Rich Razzleberry-
matting 3" x 4", scrap for Rugged Icon
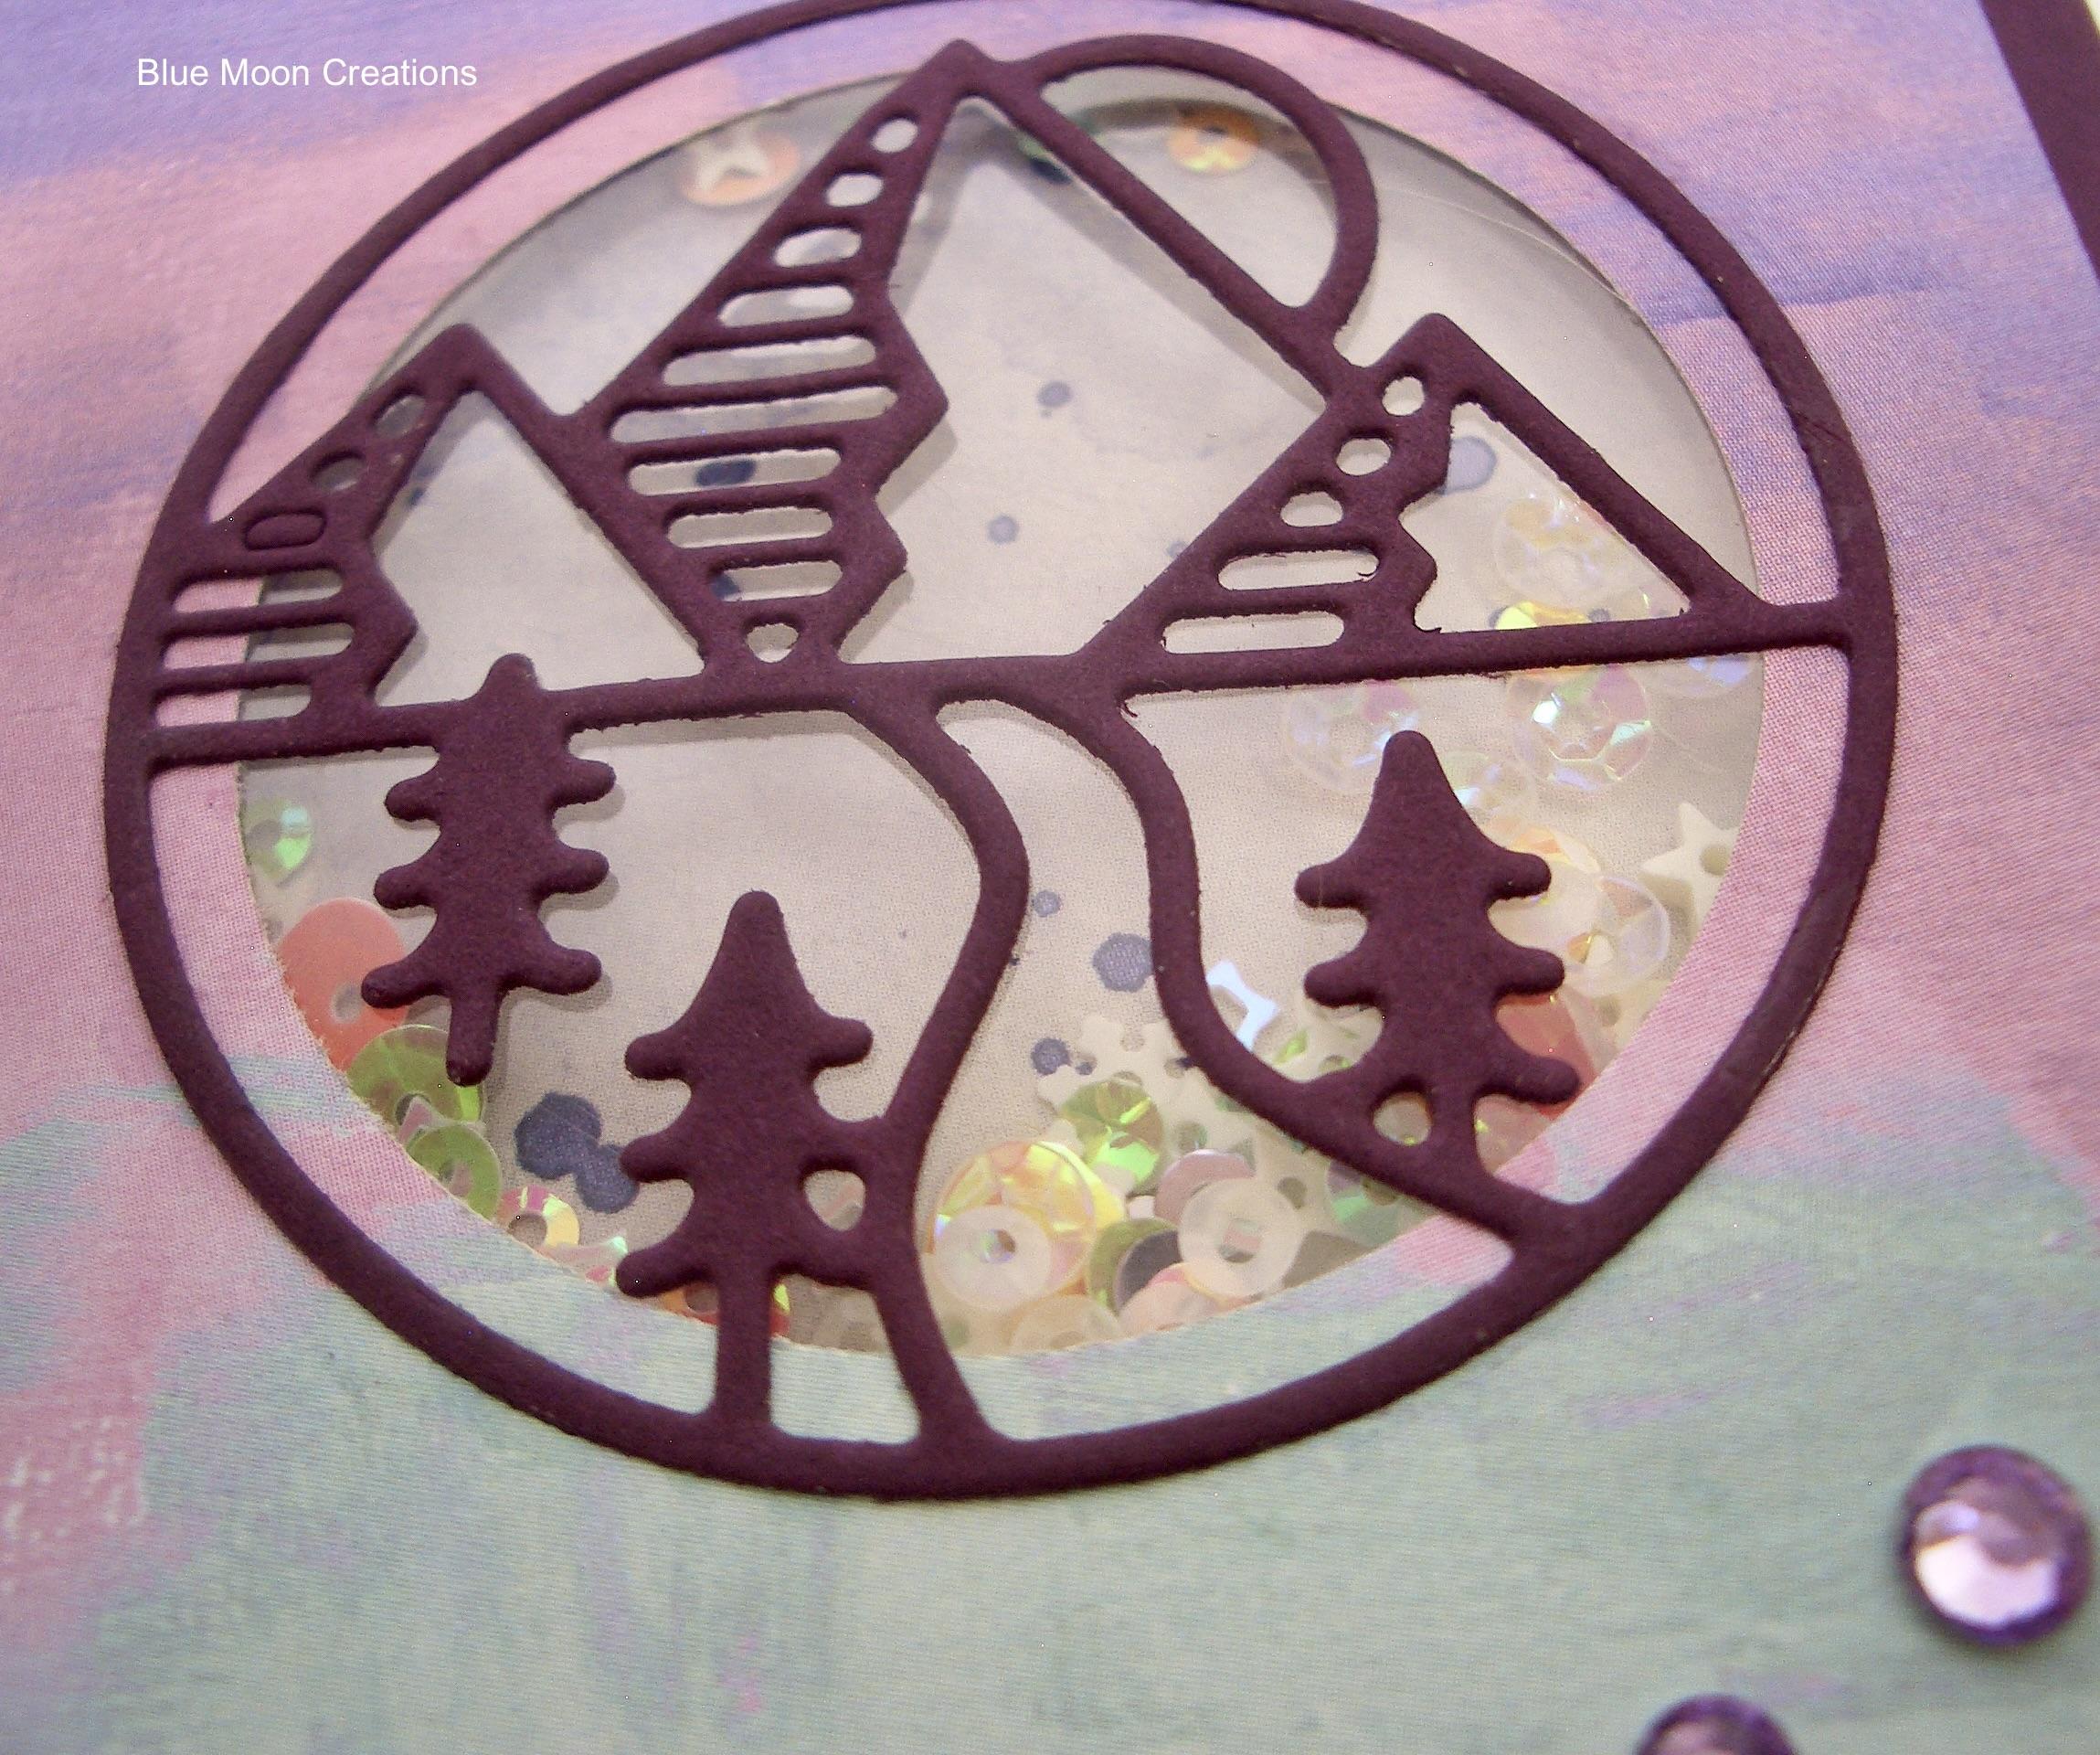
1. Using a punch or
die, cut a 1 3/4” circle out of the Hues of Happiness card front.
2. Die-cut landscape scene out of Rich Razzleberry card stock using die-cut machine and Rugged Icon Dies.
3. Attach to card front using a small amount of Fine Tip Glue.
4. Apply adhesive around the circle on the back side of the card front.
Attach window sheet.
5. Apply Adhesive Foam Strips around the edges of the circle, making sure there aren’t any gaps allowing the shaker bits to escape.
6. Attach Adhesive Foam Strips to the edges of the back side of the card front so it’ll pop up, allowing space for the shaker bits.
7. Place a small amount of shaker bits to the center of
the Dainty Flowers backing. You could use glitter, beads, confetti… I used sequins from my stash.
8. Peel off the backing on the Adhesive Foam Strips, and carefully place the card front over the backing and shaker bits.
9. Attach to Rich Razzleberry mat.
10. Stamp greeting from Perfect Pansy on Basic
White card base using Rich Razzleberry ink. Attach matted card front to card base.
11. Color rhinestone jewels using Dark Highland Heather Stampin’ Blend. Attach to card front to complete.
Supplies Used:
Stamp Set: Perfect Pansy
Ink: Rich Razzleberry
Highland Heather Stampin' Blend
Paper: Basic White, Rich Razzleberry, Hues of Happiness and Dainty Flowers (Sale-A-Bration) Designer Series Papers
Accessories: Stampin' Cut & Emboss Machine, Rugged Icon Dies, 1 3/4" circle punch,window sheet, Adhesive Foam
Strips, Fine Tip Glue, rhinestone jewels, sequins