INSTRUCTIONS:
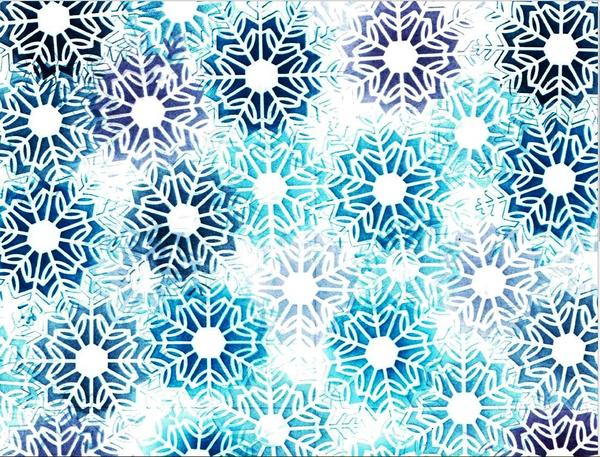
Create One Sheet Wonder background: With
blending brushes, stencil color to Wonderful Snowflake on a sheet of Basic White card stock using Pacific Point, Balmy Blue,
Night of Navy, and Gorgeous Grape inks. Move the snowflake stencil around, layering ink colors until the Basic White card stock is filled with color.
Be sure to watch my Stenciled Snowflakes How-to Video Here
Cut the card stock into 4 card fronts measuring 4" x 5 1/4" or 3 3/4" x 5" if you want to add
matting.
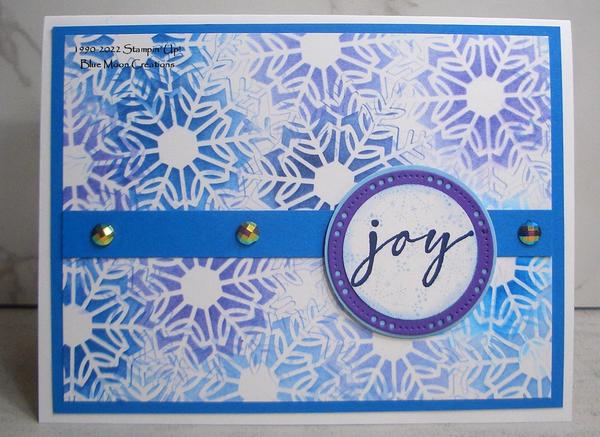
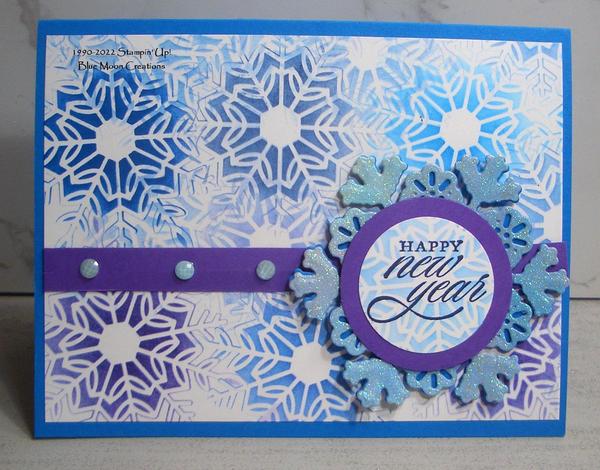
Card #1:
-Stamp snowflakes from Christmas Lights and Brightest Glow stamp sets on Basic White card stock using Balmy Blue and Night of Navy inks.
-Punch using 1 3/8" circle punch. Die-cut circle Labels Aglow Die out of Gorgeous
Grape card stock. Punch 1 3/4" circle out of Balmy Blue card stock.
-Layer circles.
-Attach card front to Pacific Point mat. Attach to Basic White card base.
-Attach a 1/2" wide strip of Pacific Point card stock to card front.
Attach circles using Mini Dimensionals to pop them up.
-Attach Blue Adhesive-Backed Gems (Clearance Rack) to complete.
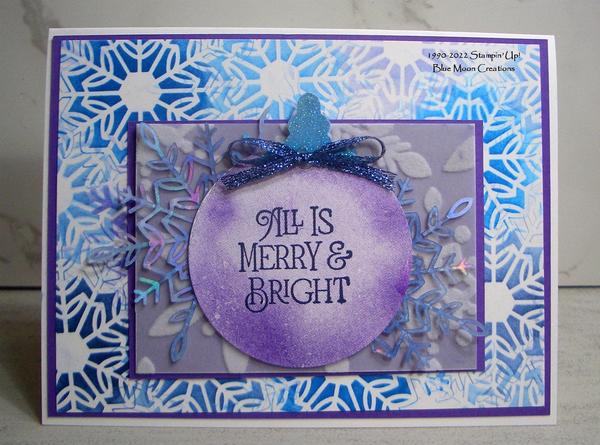
Card #2:
-Stamp circle from Watercolor Shapes on Basic White card stock using Gorgeous Grape ink. Punch using 2 1/4" circle
punch.
-Stamp greeting from Brightest Glow stamp set using Night of Navy ink.
-Using a Blending Brush, add Pacific Point ink to a small piece of Glimmer paper. Punch ornament topper using Gleaming Ornaments Punch.
-Attach a piece of Snowflake
Specialty Vellum to Gorgeous Grape mat. Use a small amount of Liquid Glue in areas that will be covered by the snowflake or ornament so it doesn't show through the vellum.
-Cut a Wonderful Snowflake in half and attach to Vellum. Again, use a small amount of Liquid Glue.
-Attach card front to Gorgeous Grape mat.
Attach to Basic White card base.
-Attach Vellum to card front. Attach punched circle using Mini Dimensionals to pop it up. Attach ornament topper using a Mini Dimensional
to pop it up. Tie a bow out of ribbon and attach using a Glue Dot.
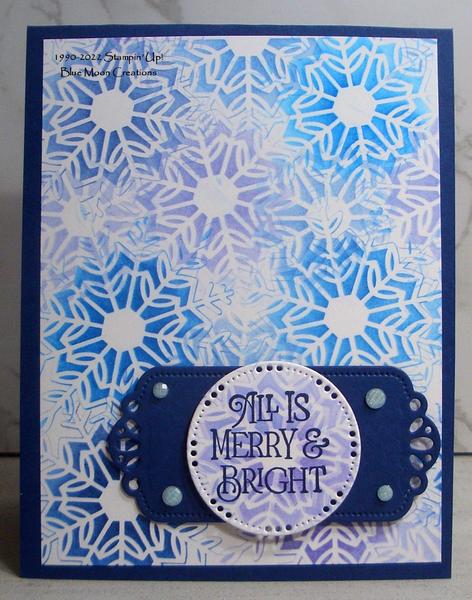
Card #3:
-Die-cut Basic White circle using Labels Aglow Die. Lay a Wonderful Snowflake over the circle and add color using a Blending Brush. Stamp greeting from Brightest Glow stamp set using Night of Navy ink.
-Die-cut label out of Night of Navy card stock.
-Attach card front to Night of Navy card base.
-Attach label using Mini Dimensionals to pop it up. Attach circle using Mini Dimensionals to pop it up.
-Add resin dots to complete.
Card #4:
-Die-cut snowflakes using Twinkling Lights Dies. Cut one snowflake out of Pacific Point card stock and another out of Glimmer Paper.
-With a Blending Brush, add Pacific Point ink to the Glimmer snowflake. Layer snowflakes using a small amount of Liquid Glue.
-Die-cut or punch a 1 3/8" circle out of Basic White card stock. Lay a Wonderful Snowflake over the circle and add color using a Blending Brush. Stamp greeting from Brightest Glow stamp set using Night of Navy ink.
-Die-cut or punch a 1 3/4" circle out of Gorgeous Grape card stock. Layer circle greeting.
-Attach card front to Pacifc Point card base.
-Attach a 1/2" wide strip of Gorgeous Grape card stock to the card front.
-Attach snowflakes to card front using Mini Dimensionals to pop them up. Add circle greeting.
-Add resin dots to complete.
SUPPLIES:
Stamp Sets: Brightest Glow, Twinkling Lights, Watercolor Shapes
Ink: Pacific Point, Balmy Blue, Gorgeous Grape, Night
of Navy
Paper: Basic White, Pacific Point, Gorgeous Grape, Night of Navy, Vellum card stock, Snowflake Specialty Vellum, Glimmer
Accessories: Stampin' Cut & Emboss Machine, Twinkling Lights and Labels Aglow Dies, 1 3/8",
1 5/8", 1
1/2", 1 3/4", and 2 1/4" circle punches, Gleaming Ornaments Punch Pack (Clearance Rack), Wonderful Snowflakes, Blending Brushes, Blue Adhesive-Backed Gems (Clearance Rack), ribbon and resin dots from my stash, Mini Dimensionals, Glue Dots