|
|
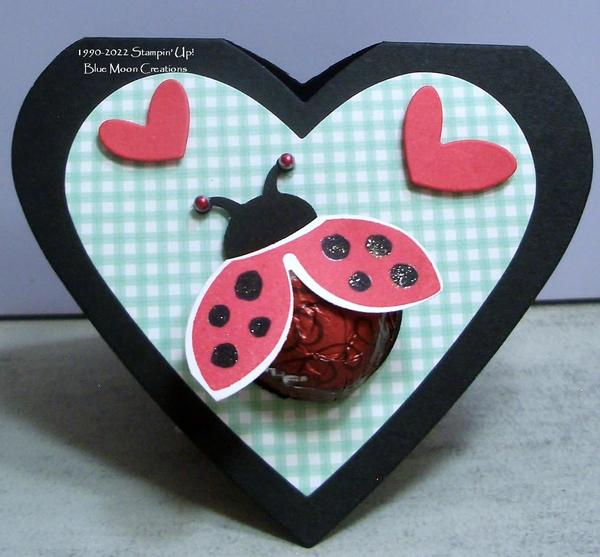
Hello Ladybug Valentine I know Valentine's Day is still over a month away, but I thought I'd chase away those winter blues by making a happy ladybug Valentine's card using a heart-shaped chocolate candy for her body. And yes, the stores already have their Valentine's products on the shelves! This is an easy project to create and suitable for assembly line crafting. Perfect for creating Valentines for a child's class, coworkers, or gifts for a luncheon. Be sure to continue to read below to see the January Hostess Code and the dates and Hostess schedule for our upcoming classes. If you'd like to make this project yourself but need some catalog product to do so, please don't
hesitate to contact me: Hello Ladybug card inside: 1. Die-cut heart out of Basic Black card stock using Hearts Dies. Place the top of the heart above the fold so the card will open.
2. Die-cut a smaller heart out of Country Gingham Designer Paper and attach to the card base.
3. Stamp ladybug wings from Hello Ladybug on a scrap piece of Basic White card stock using Sweet Sorbet ink. Punch out using coordinating Ladybug Punch. Color in spots using a black marker.
4. Punch the ladybug body out of Basic Black card stock using Ladybug Punch and attach to card front.
5. Attach a heart-shaped Dove candy or similar to the ladybug body. I used Tear and Tape for extra hold.
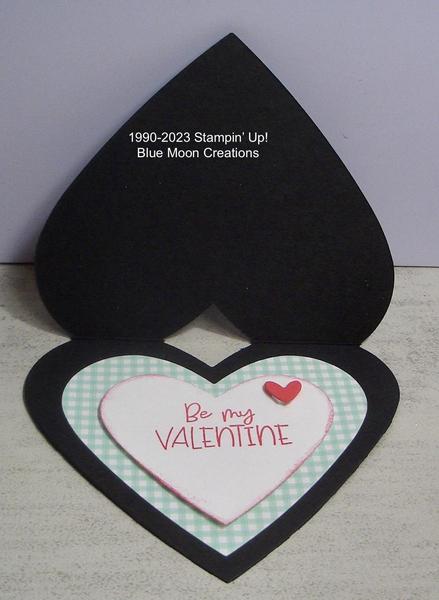
6. Attach the wings using Tear and Tape adhesive. 7. For the inside, die-cut heart out of Country Gingham Designer paper. Die-cut a smaller heart out of Basic White card stock.
Stamp greeting (Share a Milkshake) using Sweet Sorbet ink. Sponge edges with Sweet Sorbet ink. Attach to the Country Gingham heart, then attach to the inside of card. 8. Die-cut hearts out of Sweet Sorbet card stock using Share a Milkshake Dies. Attach to the front and inside of the card using Mini Dimensionals to pop them up. 9. Color Rhinestone Jewels using Sweet Sorbet Stampin' Blend and attach to the antenna. Color spots using Wink of Stella for a touch of shimmer to complete. Supplies: Stamp Set: Hello Ladybug, Share a Milkshake (Jan-June Mini Catalog, available January 5) Ink: Sweet Sorbet Black Stampin' Write Marker, Sweet Sorbet Stampin' Blend Paper: Basic Black, Basic White, Sweet Sorbet, Country Gingham 6" x 6" Designer Series Paper (Jan-June Mini Catalog) Accessories: Stampin' Cut & Emboss Machine, Hearts and Share a Milkshake Dies (Jan-June Mini Catalog), Ladybug Punch, Tear and Tape, Mini Dimensionals, Rhinestone Jewels, sponge,Dove Dark Chocolate
Hearts January Hostess Code: 7XKYQ6XC My January Newsletter will go out on the 10th with links for the new Spring Mini and Sale-A-Bration Catalogs which go live on January 5. In the meantime, I wanted to give you some reminders. 2023 Hostess and Class Schedule: January-Betty (January 24) February-Lynn (February 28) March-Pam (March 28) April-Cathy (April 25) May-Renee' (May 23) June-Sandy (June 27) We have 6 Club members. In order to make a $150 workshop and receive Hostess Rewards, each member is committing to purchasing a minimum of $25.00/month before tax and shipping. Purchases should be made regardless if you are able to attend the monthly classes or
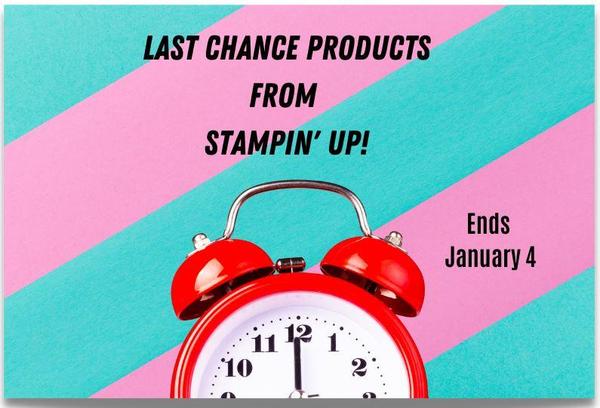
not. Let me know if you have any questions. See you in a few weeks! July-Dec Mini Catalog-Last Chance Items Going, Going, Gone on January 4 Shop Online 24/7 You are receiving this email from Anne Hayward because you have subscribed to my mailing list. Thank you! I am a Stampin' Up! Demonstrator, and most, if not all of the product I use is Stampin' Up! Usually, substitutions can easily be made with other products. If this is not for you, that is ok. To unsubscribe, please see the instructions at the bottom of this email. But, please DO NOT file a complaint or tag my
emails as SPAM. To ensure that you continue to receive emails from me, please add the following to to your address book: [email protected] |
|
|
|
|