Instructions:
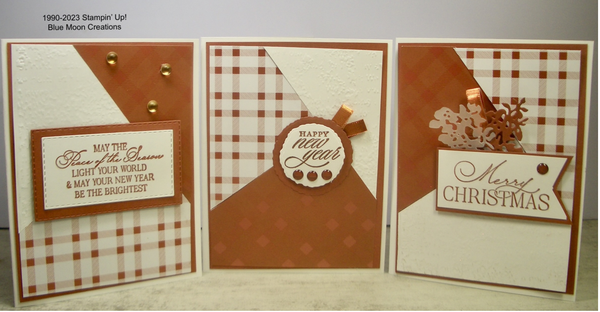
Paper Measurements:
A mix of 3
colors/patterns of Designer Series Paper (Tartan Foil) and/or card stock (Basic White) cut to measure 6" x 6"
3 coordinating card bases 5 1/2" x 4 1/4" (Basic White)
3 coordinating mat pieces 3 7/8" x 5 1/8" (Copper Clay)
TIP: To
get the same sized shapes for the 3 panels, stack the designer paper or card stock and cut together.
1.Emboss Basic White 6" x 6" piece of card stock using a die-cut machine and Timeworn Type Embossing Folder.
2.Cut the 3 panels:
-stack the 2
designs of Tartan Foil DSP and embossed Basic White card stock together
-insert into paper trimmer and cut at 3 3/4" (option: save the cut off pieces and attach to the envelope flap)
-rotate and cut at 5" (option: save the cut off pieces and attach to the inside of the card)
-keep the pieces stacked and cut at an angle
-rotate again and cut at an angle
-The measurements of the angle don't matter as long as the 3 pieces are cut together. They will be the same and will fit together like a
puzzle when shuffled.
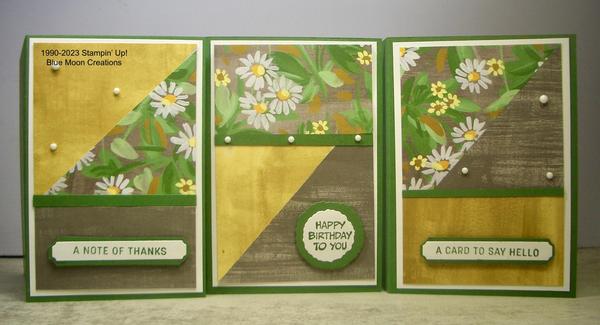
3. Shuffle the cut pieces and attach one each of the cut pieces (3 to a card) to Copper Clay mat. Attach to Basic White card base. The placement of the shapes will be the same for each card, but the paper designs will be shuffled.
4. Stamp greetings, attach to mats, and attach to
card fronts.
5. Add embellishments as desired to complete.
Supplies Used:
Stamp Set: Brightest Glow
Ink:
Copper Clay
Paper: Basic White, copper Clay, Tartan Foil Designer Series Paper, Vellum card stock
Accessories: paper trimmer, Stampin' Cut & Emboss Machine, Time Worn Type Embossing folder, Deckled Circles, Stitched Rectangle and Aspen Tree Dies, Copper Ribbon, Mini Dimensionals, Glue Dots, Brushed Metallic, and 2023-2025 In
Color Dots