Instructions:
Paper Measurements:
Card Base 11" x 4 1/4", scored at 4 1/4" and 5 1/2"
Front Panel (DSP) 4" x 4"
Side Panel 1" x 4".
Inside Panel 4"x 4"
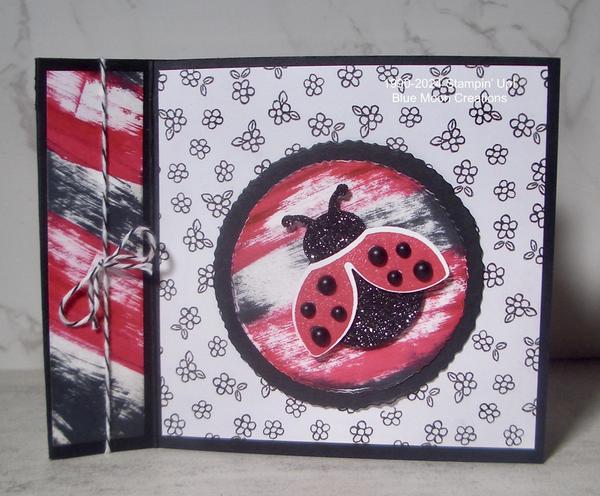
1.Cut Score and fold card base using the measurements above. Apply a strip of adhesive on the inside 1" piece to form the book binding fold.
2.Background: Swipe Real Red and Basic Black Stampin' Spots on 1" x 4" Basic
White card stock for the side panel. Swipe Real Red and Basic Black Stampin' Spots on 2 3/4" x 2 3/4" scrap piece of Basic White card stock, then die-cut using Deckled Circle Die. Die-cut Basic Black Deckled Circle mat and layer.
3. Punch ladybug body out of Black Glimmer (from my stash) or Basic Black card stock using the Ladybug punch. Stamp wings on scrap Basic White
card stock using Real Red ink and punch using Ladybug punch. Attach wings to body using Mini Dimensionals to pop them up.
4. Attach 4" x 4" piece of Zoo Crew Designer Series Paper to card front. Attach 1" swiped background to side panel. Attach Deckled Circles to card front using Mini Dimensionals. Add ladybug using Mini Dimensionals. Add Black Matte Dots to
ladybug's spots.
5.Wrap a piece of black Baker's Twine around the side panel and tie a bow.
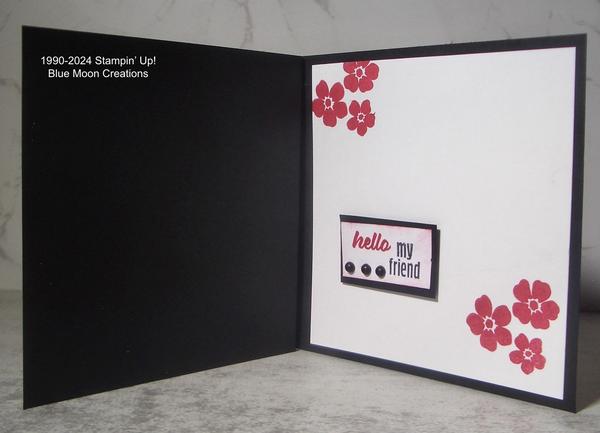
6. Inside: Stamp flowers from Hello Ladybug on Basic White 4"x 4" card stock using Real Red ink. Stamp greeting on scrap piece of Basic White card stock using Real Red and Memento
Black inks. Sponge Real Red ink along the edges. Attach to Basic Black mat, then add to card inside. Add Black Matte Dots to complete.
Supplies Used:
Stamp Set: Hello Ladybug (retiring)
Ink: Real Red, Memento Black
Real
Red and Basic Black Stampin' Spots
Paper: Basic Black, Basic White, Black Glimmer, Zoo Crew Designer Series Paper (retiring)
Accessories: Stampin' Cut & Emboss Machine, Deckled Circle Dies, Ladybug Punch (retiring), Black Matte Dots
(retiring), Black Baker's Twine, Mini Dimensionals
The possibilities are endless!