|
|
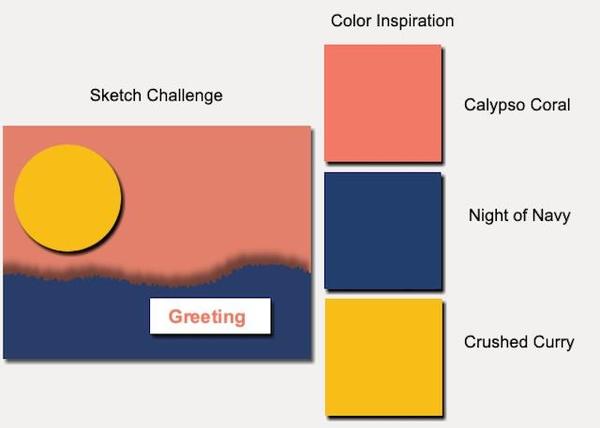
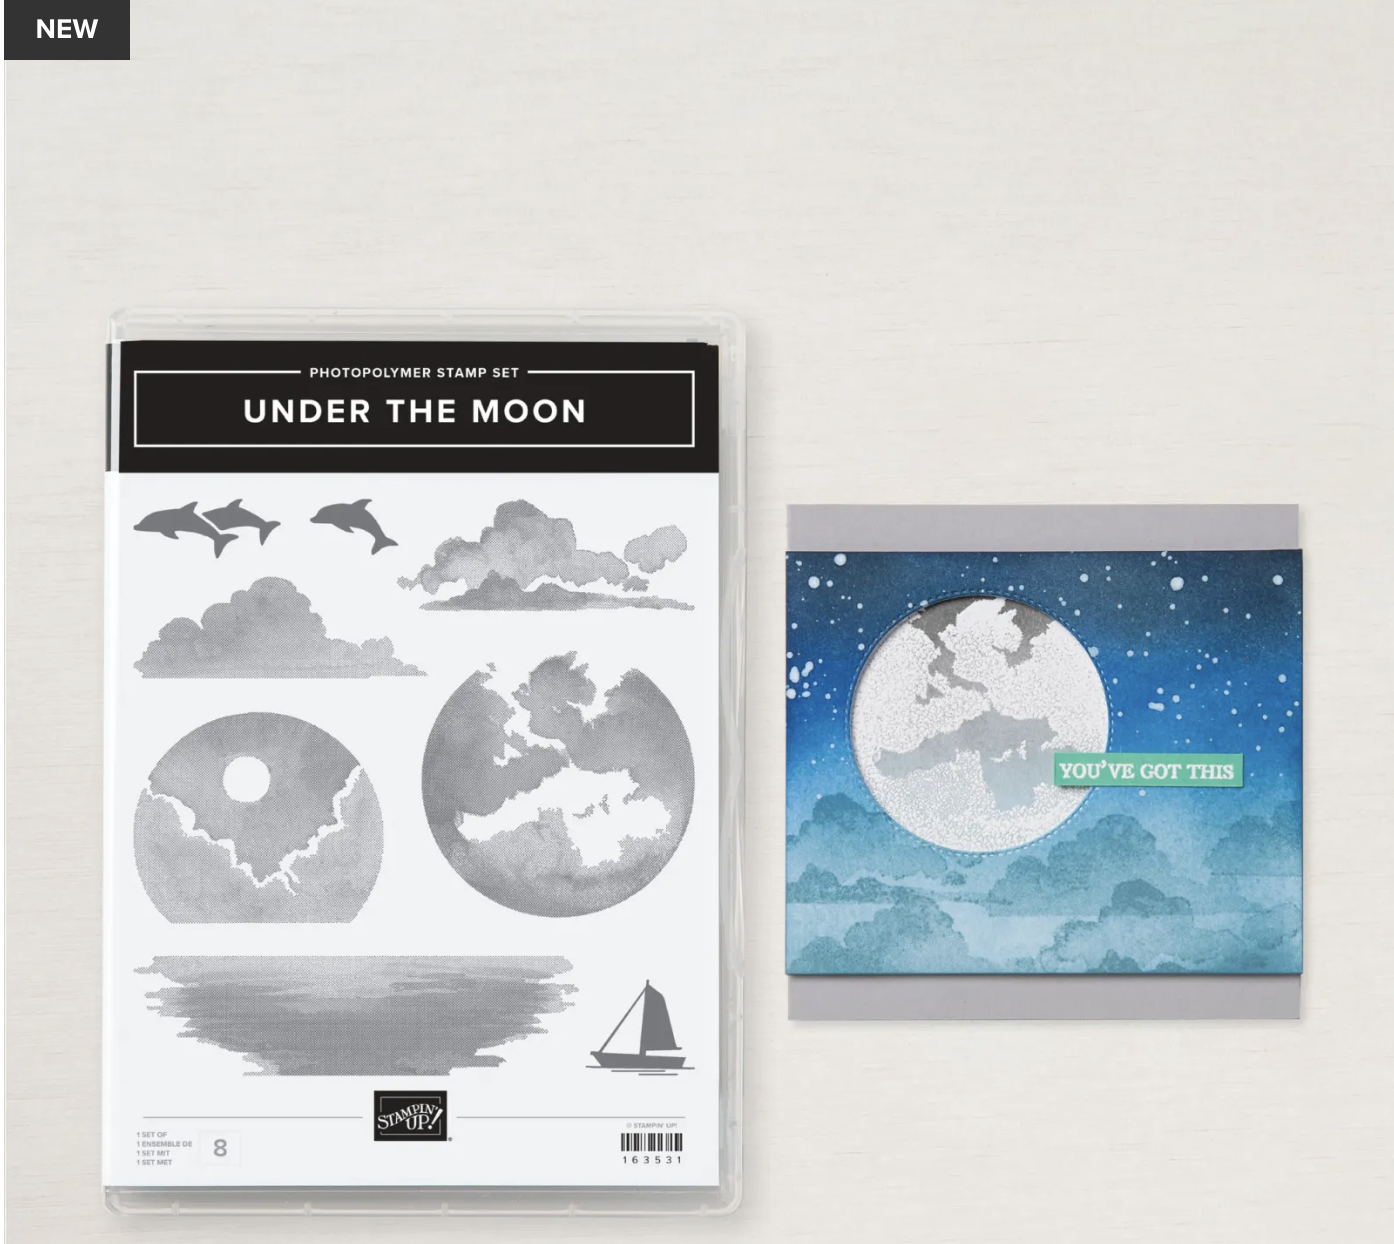
In this issue: May Sketch Challenge and Color Inspiration May Promotions:2024-2025 Annual Catalog May Hostess Code, Class Schedule, Birthdays, supply list for Multi-candle birthday card May Featured Product: Under the
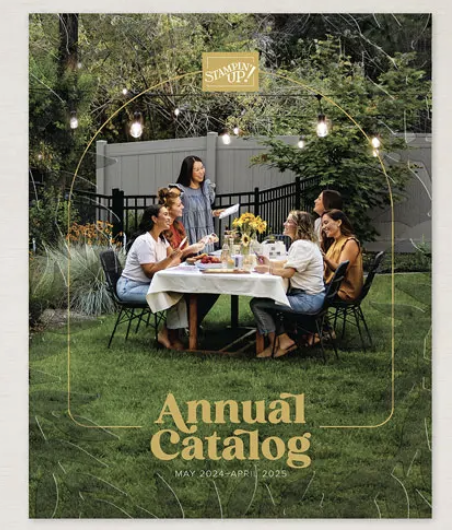
Moon May Featured Projects: Under the Moon May Sketch Challenge and Color Inspiration View 2024-2025 Annual Catalog as a pdf HERE Shop 2024-2025 Annual Catalog The look and layout are a little different from previous catalogs. So whether you’re
looking for a Step-by-Step project, something Quick & Easy, or you just want to express Creativity Your Way, there’s something for everyone! Take a look and let me know what you think! Let me know if you have any questions. Join Stampin' Up! in May and you will receive FOUR 2024–2026 In Color products in your Starter Kit
for FREE: - 2024–2026 In Color Classic Stampin’ Pad Bundle
- 2024–2026 In Color 8-1/2" x 11" (21.6 x 27.9 cm) Cardstock
- 2024–2026 In Color 6" x 6" (15.2 x 15.2 cm) Designer Series Paper
- 2024–2026 In Color Stampin’ Write Markers
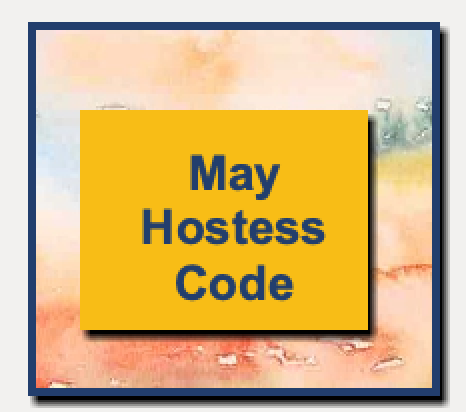
In addition to the In Color products, new demonstrators will pick $125USD worth of products of their choice. They will also receive free business supplies with their order and free shipping. Not to mention all the fun that comes with being a part of our wonderful crafting community. Please feel free to contact me with any questions. [email protected] Hostess Code: GV3T6URM 2024 Class and Hostess Schedule (4th
Tuesday of the month) May 28-Vivienne June 25-Renee' August
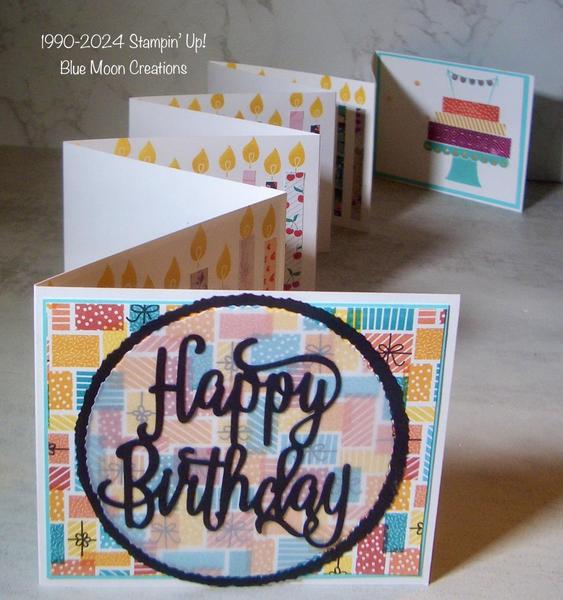
27-Betty September 24-Lynn October 22-Sandy November 26-Vivienne Birthdays: Renee'-January 25 Anne-February 20 Vivienne-February 26 Betty-March 10 Sandy-June 12 Lynn-August 28 May's project will be the multi-candle fold out birthday card! What you'll need to bring: -1/8"- 1/2" wide paper scraps. We'll cut them to various lengths 2 3/4"-3 1/4" -scissors -glue (It is best to use the Liquid or Fine Tip Glue.) -If you have a special Designer Paper you'd like for the front of the card, bring it. Otherwise, you can go through my crate of retired DSP. -retired Bird Builder punch (we'll use the "wing") or a stamp set with a candle flame like Build a Birthday. I have one set, and I believe Sandy has another.
I will provide: -retired Build a Birthday stamp set and ink to match your DSP. -retired Happy Birthday Die and coordinating card stock -card stock for card base. Please let me know how many candles you'd like to do. That'll determine the number of pieces of card stock I will have cut and scored for you. -Deckled
circle Dies, vellum card stock and coordinating card stock for the ring around the circle -Tear and Tape Adhesive -various dots, pearls etc. I created the card for my Dad's 90th birthday. It'll already be mailed to him as his birthday is before we meet on the 28th. It was a fun card to make, taking about 2 hours with a couple of short breaks. That was for 90
candles, plus designing the front and back pieces. It helps if you already have your paper strips cut. This will be fun!! Under the Moon Create a moonlit scene with the Under the Moon Stamp Set, dusky colors, and your creativity! Or switch up the colors to create a placid daytime scene. Combine images of clouds, the moon, water, dolphins, and a sailboat for an ocean view. This image-only set will pair
beautifully with sentiments from other sets so you can create cards perfect for any occasion. You’ll be over the moon with the possibilities of this stamp set! Under the Moon Blends
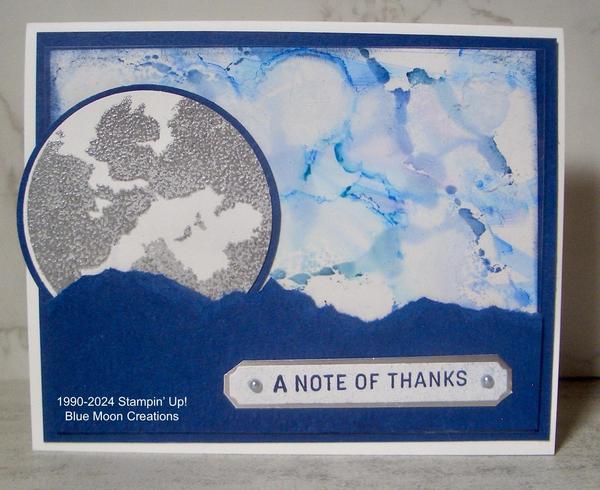
Background-Sketch Challenge Instructions: 1.Blends
Background: scribble Stampin' Blends on a piece of Window Sheet. I used Night of Navy, Pool Party, Coastal Cabana, and Highland Heather Stampin' Blends. Dip a water painter or paint brush into 90% or higher isopropyl alcohol. Add drops of isopropyl alcohol onto the scribbled spots of Blends. Or, you can spritz the alcohol using a spritzer bottle. The ink will pool and run. Lay a piece of Basic White card stock onto the colors, tapping it with your fingertips to
transfer the ink. 2.Attach to Night of Navy mat. Optional: trim and attach the Window Sheet with ink over the Basic White card front, adding another layer of intense colors and design. 3. Stamp moon from Under the Moon on Basic White card stock using Versamark ink.
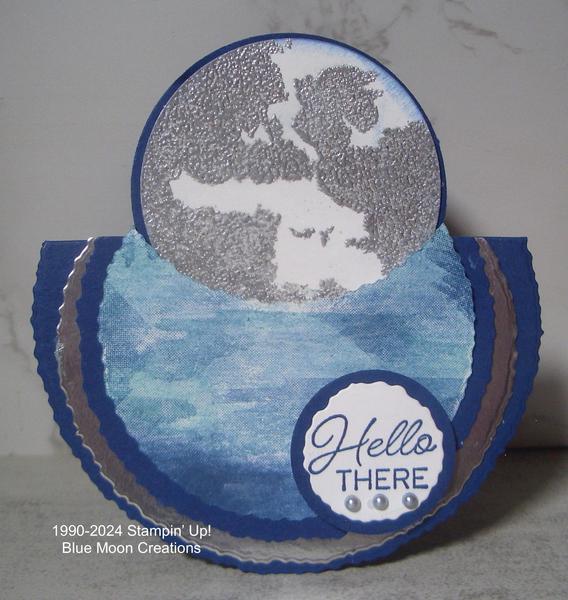
Heat emboss using a heat tool and silver embossing powder. Punch out using 2 1/4" circle punch or die. Attach to 2 3/8" punched Night of Navy circle. 3.Tear a strip of Night of Navy card stock to form the landscape. Attach to card front. Don't apply adhesive to the top of the piece so you can slip the moon behind. 4.Attach the card front to a Basic White card base. Slip moon behind the landscape. Stamp greeting on Basic White card stock using Night of Navy ink. Attach to Silver Foil mat and attach to card front using Mini Dimensionals to pop it up. Add silver dots to complete. Supplies Used: Stamp Set: Under the Moon, Sending Wishes (retired) Ink: Night of Navy, Versamark Night of Navy, Pool Party, Coastal Cabana, and Highland Heather Stampin' Blends Paper: Basic White, Night of Navy, Silver Foil Accessories: Window Sheet, Water Painter, 91% Isopropyl Alcohol, heat tool, Silver Embossing Powder, 2 1/4" and 2 3/8" circle punches, Stampin' Cut and Emboss Machine, Sending Die (retired), Mini Dimensionals, silver dots Under the Moon Rocker Card Instructions: 1.Die-cut circle
out of Basic White card stock using Deckled Circle Die. Place the top of the die above the card stock to cut half a circle. Stamp the water image from Under the Moon onto the circle using Pool Party Ink. Stamp the edges of the image along the edges of the circle using Boho Blue ink. 2.Die-cut another 1/2 circle out Night of Navy card stock using the next largest
Deckled Circle Die. Die-cut another 1/2 circle out of Silver Foil using the next largest Deckled Circle Die. 3. Die-cut card base out of Night of Navy card stock using the next largest Deckled Circle Die. Fold the card base in half and place the top of the die above the score line and cut. Attach layers of Silver Foil, Night of Navy and stamped image to card base. Do
not apply adhesive to the very top of the stamped background as you will slip the moon in between. 4. Stamp moon image on Basic White card stock using Versamark ink. Heat emboss using heat tool and silver embossing powder. Punch moon using 2 1/4" circle punch. Punch mat out of Night of Navy card stock using 2 3/8" circle punch. Layer moon and mat. Slip moon in
between the card base and stamped background. 5.Stamp greeting from Blueberry Bunches on Basic White card stock using Night of Navy ink. Die-cut using smallest Deckled Circle Die. Attach to Night of Navy mat punched using 1 1/4" circle punch. Attach to card front using Mini Dimensionals to pop it bup. 6. Attach silver embellishments to complete. Supplies Used: Stamp Sets: Under the Moon, Blueberry Bunches Ink: Pool Party, Boho Blue, Night of Navy, Versamark Paper: Night of Navy, Silver Foil, Basic White Accessories: Stampin' Cut & Emboss Machine, Deckled Circles Dies, 2 1/4", 2 3/8", and 2 1/4" circle punches, heat
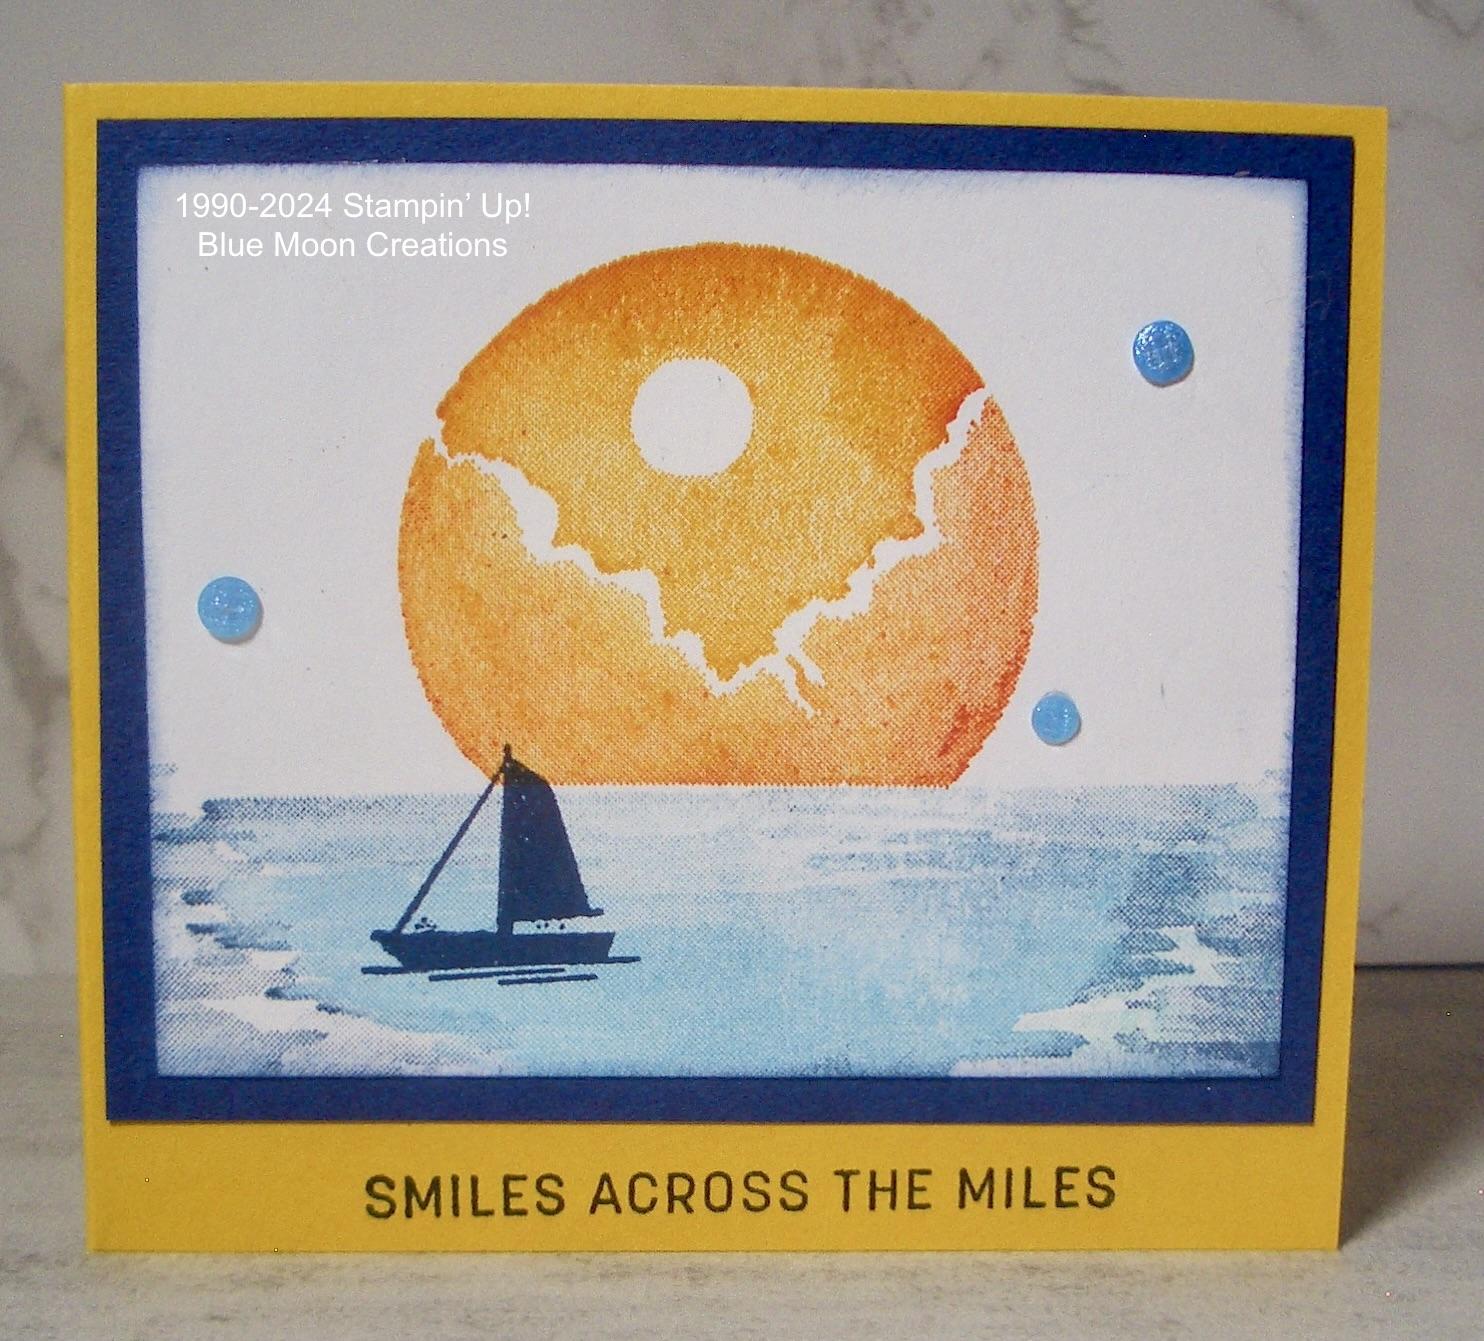
tool, silver embossing powder, Mini Dimensionals, silver embellishments Instructions: 1.Stamp sun on Basic White card front using Crushed Curry and Calypso Coral inks. Stamp water below the sun using Night of Navy, Pool Party, and Misty Moonlight inks. Stamp sailboat
using Night of Navy ink. TIP: use a stamp positioning tool to layer on the colors of ink. 2.Attach to Night of Navy mat. Attach to Crushed Curry card base. Stamp greeting using Night of Navy
ink. 3.Add resin dots to complete. Supplies Used: Stamp Set: Under the Moon Ink: Crushed Curry Calypso Coral, Night of Navy, Pool Party, Misty Moonlight Paper: Crushed Curry, Night of Navy, Basic White Accessories: Stamparatus, resin dots
You are receiving this email from Anne Hayward because you have subscribed to my mailing list. Thank you! I am a Stampin' Up! Demonstrator, and most, if not all, of the product I use is Stampin' Up! Usually, substitutions can easily be
made with other products. If this is not for you, that is ok. To unsubscribe, please see the instructions at the bottom of this email. But please do not file a complaint or tag my emails as SPAM. To ensure that you continue to receive emails from me, please add the following to your address book: |
|
|
|
|