Happy April!
Happy Easter!
Storage just got better!
Whether you have an entire room or a small corner in your home for stamping, your creative space should be tailored to you. Our new product line, Storage by Stampin’ Up!, provides you with modular storage solutions that let you organize—and customize—your space your way!
Available beginning April 1, 2019.
These products will be included in the 2019-2020 Annual Catalog.
Let me know if you have any questions.
| |
UV2TZGBG
Orders using this hostess code will be combined.
As always, if we have enough in sales to make the order a workshop ($150), we will have a Mystery Hostess.
Please place your order online by April 25.
I will notify our hostess by email on April 26.
The workshop will need to close on April 28.
Happy Shopping!
|
|
Shop Online 24/7 |
Products Spotlight-Celebrate Spring!
|
Spring has arrived!
Let's celebrate with flowering trees, butterflies, flowers, and the Easter Bunny!
Sheltering Tree, #137163, $25.00
Graceful Glass 6"x6" Vellum DSP, #146344, $11.00
Petal Promenade DSP, #146913, $11.00
Assorted Stampin' Blends
Swirls & Curls Embossing Folder, #147923, $7.50
|
|
Shop Online 24/7 |
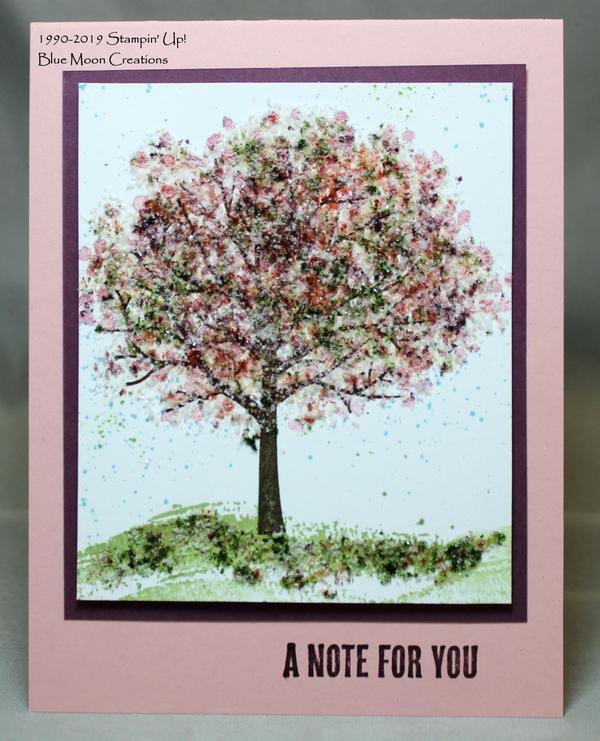
Faux Flocking Sheltering Tree
|
Use Styrofoam balls to create faux flocking. Mix with reinkers for endless color possibilities.
You can also make the flocking by distressing card stock with a distressing tool. But, this method can be time-consuming as it can take a while to get a good pile of paper bits. So give Styrofoam a try!
1. To create the flocking, rub two Styrofoam balls together. The Styrofoam will flake off into little pieces. Be sure to do this step in something that will capture the bits, like an embossing tray.
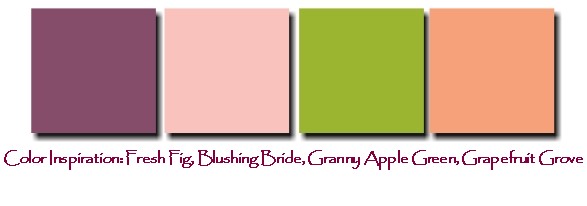
2. Add a few drops of reinker onto the pile and mix using a pair of tweezers or a toothpick. For this project, I created 4 piles of bits and colored them with Fresh Fig, Blushing Bride, Grapefruit Grove, and Granny Apple Green. I also had a 5th pile of just plain white Styrofoam.
3. Stamp leaves from Sheltering Tree on a piece of Whisper White card stock using Blushing Bride ink.
4. Place Whisper White card front in the Stamparatus, securing with a magnet. Place the tree from Sheltering Tree photopolymer side down on the card front. Close the hinged plate, picking up the stamp on the plate. Ink with Early Espresso ink and stamp. Repeat as needed to get a good inked image.
5. Apply Tombow Multi-purpose glue over the stamped leaves. I brushed it on with a small paintbrush. Carefully add the faux flocking, taking from each pile, and moving it around as needed with a pair of tweezers.
6. Stamp the ground from Sheltering Tree using Granny Apple Green. Apply Tombow-Multi purpose glue, and carefully add Granny Apple Green faux flocking. Set aside to allow the glue to dry completely.
7. Optional: I added some Balmy Blue and Granny Apple Green flecks by placing drops of reinker in a tray, picking up the color with a toothbrush, and then running my finger through the brush over the card front.
8. Stamp greeting from Wood Words on Blushing Bride card base in Early Espresso ink using the Stamparatus to get a good inked image.
9. Attach to Fresh Fig mat. Attach to Blushing Bride card base to complete.
Card measures 4 1/4" x 5 1/2"
Supplies Used:
Stamp Sets: Sheltering Tree, Wood Words
Ink: Early Espresso, Blushing Bride, and Granny Apple Green
Fresh Fig, Blushing Bride, Grapefruit Grove, Granny Apply Green, and Balmy Blue reinkers
Paper: Blushing Bride, Fresh Fig, Whisper White
Accessories: 2 Styrofoam balls, embossing tray, Stamparatus, Tombow Multi-purpose glue, paintbrush, tweezers, toothbrush
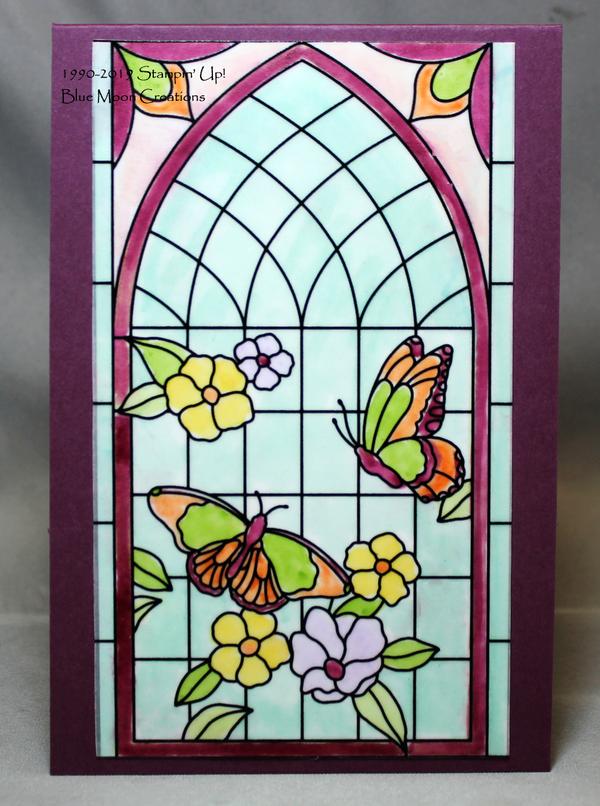
Butterfly and Flowers Stained Glass
|
1. Cut Graceful Glass Vellum Designer Series Paper 3" x 5 1/4". Color the front of the paper using a mix of Stampin' Blends and Stampin' Write Markers.
2. Attach to a piece of 3" x 5 1/4" Whisper White card stock to give it a bright background.
3. Attach to Fresh Fig card base.
Card measures 3 3/4" x 5 1/2"
Supplies Used:
Ink: Pool Party, Granny Smith Green, Crushed Curry, Gorgeous Grape Stampin' Blends, Fresh Fig, Grapefruit Grove Stampin' Write Markers
Paper: Fresh Fig, Whisper White, Graceful Glass Vellum Designer Series Paper
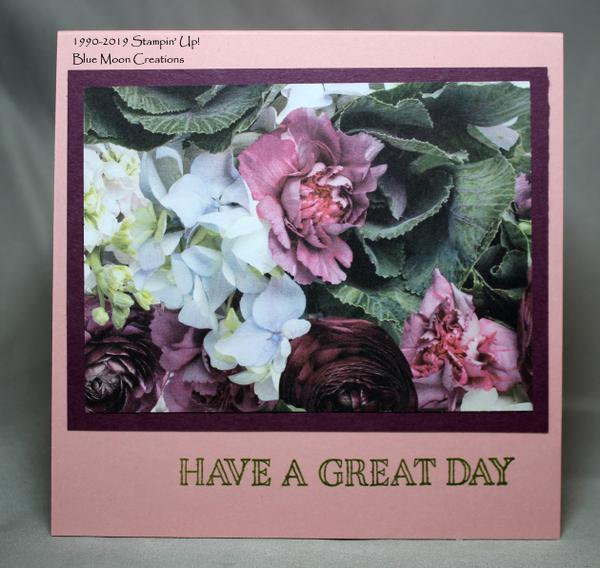
Petal Promenade Have a Great Day!
|
A quick and easy, five-minute card, letting the Designer Series Paper do most of the work!
1. Mat 3 3/4" x 2 3/4" Petal Promenade Designer Series Paper onto 4" x 3" Fresh Fig mat.
2. Stamp greeting onto Blushing Bride card base in Granny Apple Green using the Stamparatus.
3. Attach card front to card base to complete.
Card measures 4 1/4" x 4 1/4"
Supplies Used:
Stamp set: Flora and Fauna
Ink: Granny Apple Green
Paper: Blushing Bride, Fresh Fig, Petal Promenade Designer Series Paper
Accessories: Stamparatus
Embossed Happy Easter Bunny
|
1. Print rabbit template found in the link above on a piece of computer paper. Cut out using a pair of scissors. Lay template on an 11" x 4 1/4" piece of Crumb Cake card stock, scored at folded at 5 1/2". Position the template, so the rabbit's tail is on the scoreline. Trace around the template using a pencil. The card will open along this scoreline. Cut along the traced pencil lines.
2. Emboss the front of the rabbit using the Big Shot and Swirls & Curls Embossing Folder. Lightly sponge Soft Suede over the embossing and along the edges of the rabbit.
3.Stamp greeting on a scrap piece of Blushing Bride card stock using Granny Apple Green. I used the retired stamp set Teeny Tiny Wishes, but any small greeting stamp will work. Banner cut one edge. Layer onto a Fresh Fig mat that has also been banner cut. Banner cut a scrap piece of Grapefruit Grove card stock.
4. Tie a piece of Petal Pink/Whisper White 5/8" Variegated Ribbon around the rabbit's neck, tying a bow in the front. Slip the banner pieces under the ribbon, securing with SNAIL Adhesive. Add a glimmer dot to the center of the bow.
5. Add a tail to cover the scoreline. I used a piece of retired Vanilla Flower Trim from my stock that I colored using a mix of water and Blushing Bride ink refill. I added a few drops of refill and water into a plastic bag, added the trim, moving it around in the mix until I got the color I liked. I removed the trim from the bag and set it aside to dry completely. I attached it to the card using Tombow Multi-purpose glue. Other options for the tail include
small circle, scallop circle, or flowers cut out of card stock using punches or dies. Roll up the edges using a bone folder, sponge ink around the edges, layer them, then add to the card front using a Dimensional to pop it up.
6. Add an enamel dot eye to complete.
Supplies Used:
Stamp Teeny Tiny Wishes (retired)
Ink: Granny Apple Green, Soft Suede
Blushing Bride ink refill
Paper: Crumb Cake, Fresh Fig, Blushing Bride, Grapefruit Grove
Accessories: rabbit template, printer, computer paper, Big Shot, Swirls & Curls Embossing Folder, sponge, Petal Pink/Whisper White 5/8" Variegated Ribbon, Vanilla Flower Trim (retired), water, plastic bag, Tombow Multi-purpose glue, glimmer, and enamel dot
|
|
|


