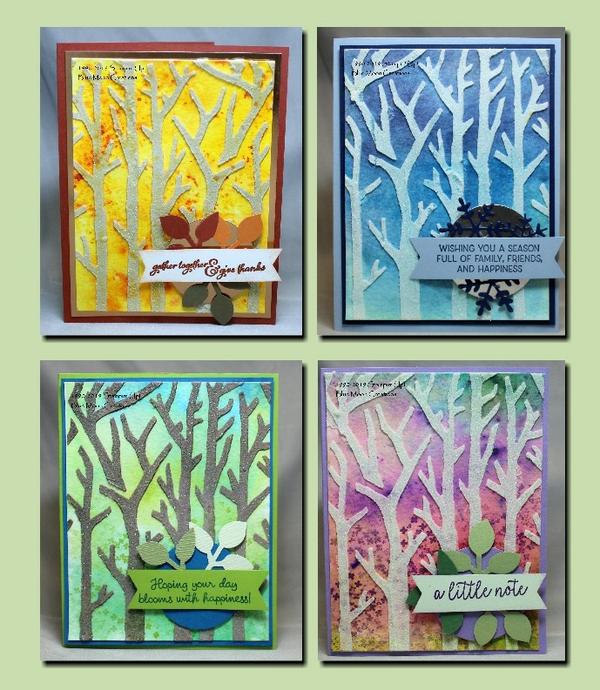
Four Seasons of Trees-Embossing Paste and Decorative Mask
Fall
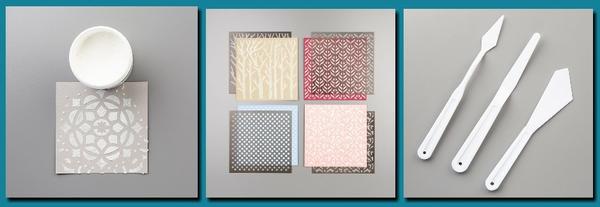
Add great texture to your projects by applying Embossing Paste over a Decorative Mask!
Embossing Paste is easy to use.
Color can easily be added to the mix for an endless supply of possibilities!
Fall, Winter, Spring, and Summer-a forest filled with changing colors!
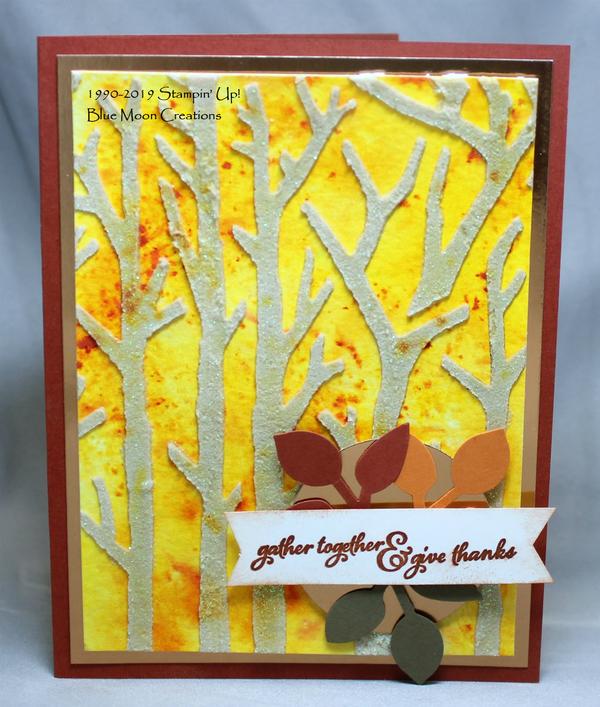
Fall Card
1. Create watercolor background using Daffodil Delight and Mango Melody Pigment Sprinkles. Secure a piece of watercolor paper on your work surface using washi or painter's tape applied along the edges to keep the paper from buckling. Sprinkle pigment colors on watercolor paper. Spritz with water to activate the Sprinkles. Let them set a minute or two, then dab off excess water using a paper towel. Set aside to dry completely.
2. Lay the trees Decorative Mask over the watercolor background. Secure mask using washi or painter's tape along the edges, so the mask does not move.
3. Remove a small amount of Shimmery White Embossing Paste from the container and place on a Silicone Craft Sheet using a palette knife. With the palette knife, spread and smooth the Embossing Paste over the mask, kind of like you were frosting a cake.
4. Carefully remove the tape and mask, and set the piece aside to dry completely.
5. Punch leaves out of Cajun Craze, Pumpkin Pie, and Mossy Meadow card stock using the Leaf Punch. Option: emboss leaves using die-cut machine and Subtle Embossing Folder. Punch 1 3/4" circle out of Copper Foil paper. Stamp greeting from Painted Harvest onto a scrap piece of Very Vanilla card stock using Cajun Craze ink. Banner cut each end. Lightly sponge Cajun Craze ink along the edges. Curl the edges of the banner using a pair of scissors.
6. Add watercolor card front to Copper Foil mat. Attach to Cajun Craze card base.
7. Attach copper circle to front of card using a Mini Dimensional to pop it up. Attach the leaves to the circle. Attach the greeting banner over the leaves, using Mini Dimensionals to pop it up to complete.
Supplies Used:
Stamp Set: Painted Harvest
Ink: Cajun Craze
Paper: Cajun Craze, Copper Foil, watercolor, Mossy Meadow, Pumpkin Pie, Very Vanilla
Accessories: Daffodil Delight and Mango Melody Pigment Sprinkles, spritzer bottle with water, Shimmery White Embossing Paste, Basics Decorative Masks, Silicone Craft Sheet, palette knife, Leaf and 1 3/4" Circle punches, Big Shot, Subtle Embossing Folder, sponge, Mini Dimensionals, washi tape
Winter
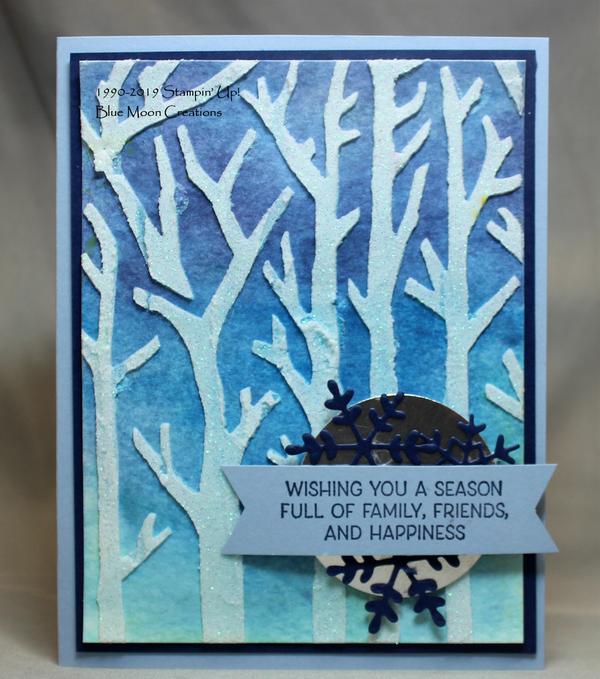
Winter Card
1. Create watercolor background by adding Pacific Point, Balmy Blue, and Seaside Spray ink to watercolor paper card front. Create an ink palette in the inside of the ink pad lid by closing the lid and squeezing the top, transferring ink from the pad onto the lid. Spritz watercolor paper with water, then paint color on using an Aqua Painter. Set aside to dry completely.
2. Lay the trees Decorative Mask over the watercolor background. Secure mask using washi or painter's tape along the edges, so the mask does not move.
3. Remove a small amount of Shimmery White Embossing Paste from the container and place on a Silicone Craft Sheet using a palette knife. With the palette knife, spread and smooth the Embossing Paste over the mask, kind of like you were frosting a cake.
4. Carefully remove the tape and mask, and set the piece aside to dry completely.
5. Die-cut snowflakes out of Night of Navy card stock using a die-cut machine and Frosted Frames die. Punch 1 3/4" circle out of Silver Foil Paper. Stamp greeting from Frosted Foliage on a scrap piece of Seaside Spray card stock using Night of Navy ink. Banner cut each end. Curl the edges of the banner using a pair of scissors.
6. Add watercolor card front to Night of Navy mat. Attach to Seaside Spray card base.
7. Attach silver circle to front of card using a Mini Dimensional to pop it up. Attach the snowflakes to the circle. Attach the greeting banner over the snowflakes, using Mini Dimensionals to pop it up to complete.
Supplies Used:
Stamp Set: Frosted Foliage
Ink: Night of Navy, Pacific Point, Balmy Blue, Seaside Spray
Paper: Seaside Spray, Night of Navy, watercolor, Silver Foil
Accessories: Aqua Painter, spritzer bottle with water, Shimmery White Embossing Paste, Basics Decorative Masks, Silicone Craft Sheet, palette knife, Big Shot, Frosted Frames Die, 1 3/4" Circle punch, Dimensionals, washi tape
Spring
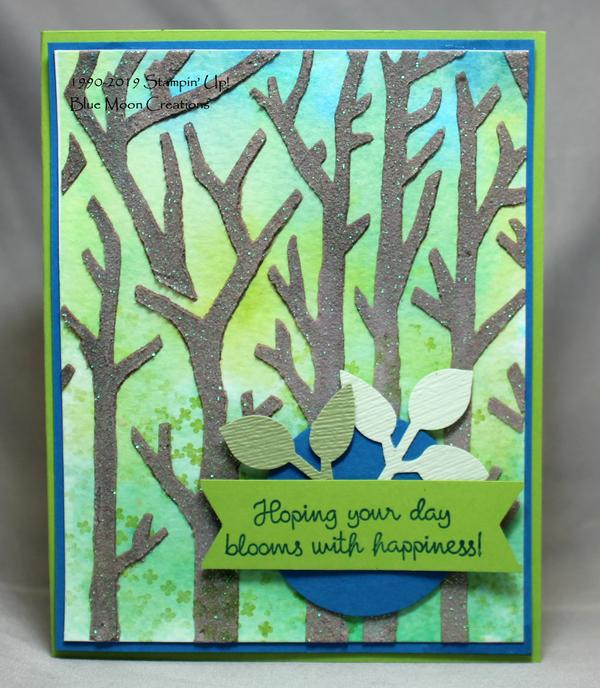
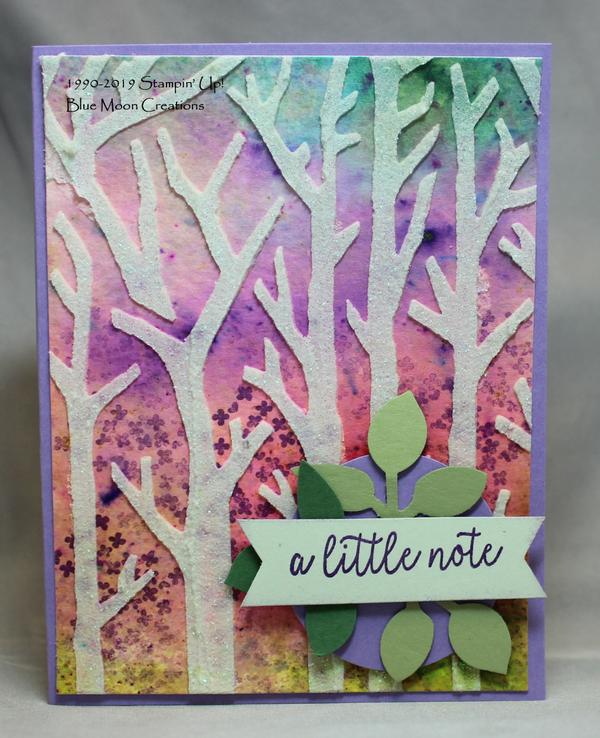
Spring Card
1. Create watercolor background by adding Pacific Point, Granny Apple Green, and Garden Green ink to watercolor paper card front. Create an ink palette in the inside of the ink pad lid by closing the lid and squeezing the top, transferring ink from the pad onto the lid. Spritz watercolor paper with water, then paint color on using an Aqua Painter. Set aside to dry completely. Once dry, stamp the small flowers from Varied Vases along the bottom half of the card front using
Pear Pizzazz ink.
2. Lay the trees Decorative Mask over the watercolor background. Secure mask using washi or painter's tape along the edges, so the mask does not move.
3. Remove a small amount of Shimmery White Embossing Paste from the container and place on a Silicone Craft Sheet using a palette knife. With the palette knife, spread and smooth the Embossing Paste over the mask, kind of like you were frosting a cake.
4. Carefully remove the tape and mask, and set the piece aside to dry completely.
5. Punch leaves out of Pear Pizzazz and Soft Sea Foam card stock using the Leaf Punch. Option: emboss leaves using die-cut machine and Subtle Embossing Folder. Punch 1 3/4" circle out of Pacific Point card stock. Stamp greeting from Varied Vases onto a scrap piece of Granny Apple Green using Pacific Point ink. Banner cut each end. Curl the edges of the banner using a pair of scissors.
6. Add watercolor card front to Pacific Point mat. Attach to Granny Apple Green card base.
7. Attach Pacific Point circle to front of card using a Mini Dimensional to pop it up. Attach the leaves to the circle. Attach the greeting banner over the leaves, using Mini Dimensionals to pop it up to complete.
Supplies Used:
Stamp Set: Varied Vases
Ink: Pacific Point, Granny Apple Green, Garden Green, Pear Pizzazz
Paper: Granny Apple Green, Pacific Point, watercolor, Pear Pizzazz, Soft Sea Foam
Accessories: Aqua Painter, spritzer bottle with water, Shimmery White Embossing Paste, Basics Decorative Masks, Silicone Craft Sheet, palette knife, Big Shot, Subtle Embossing Folder, 1 3/4" Circle punch, Dimensionals, washi tape
Summer
Summer Card
1. Create watercolor background using Bermuda Bay, Gorgeous Grape, and Granny Apple Green Pigment Sprinkles. Secure a piece of watercolor paper on your work surface using washi or painter's tape applied along the edges to keep the paper from buckling. Sprinkle pigment colors on watercolor paper. Spritz with water to activate the Sprinkles. Let them set a minute or two, then dab off excess water using a paper towel. Set aside to dry completely. Once dry, stamp the
small flowers from Varied Vases along the bottom half of the card front using Gorgeous Grape ink.
2. Lay the trees Decorative Mask over the watercolor background. Secure mask using washi or painter's tape along the edges, so the mask does not move.
3. Remove a small amount of Shimmery White Embossing Paste from the container and place on a Silicone Craft Sheet using a palette knife. With the palette knife, spread and smooth the Embossing Paste over the mask, kind of like you were frosting a cake.
4. Carefully remove the tape and mask, and set the piece aside to dry completely.
5. Punch leaves out of Pear Pizzazz and Garden Green card stock using the Leaf Punch. Option: emboss leaves using die-cut machine and Subtle Embossing Folder. Punch 1 3/4" circle out of Highland Heather card stock. Stamp greeting from Butterfly Gala onto a scrap piece of Soft Sea Foam card stock using Gorgeous Grape ink. Banner cut each end. Curl the edges of the banner using a pair of scissors.
6. Add watercolor card front to Highland Heather card base.
7. Attach Highland Heather circle to front of card using a Mini Dimensional to pop it up. Attach the leaves to the circle. Attach the greeting banner over the leaves, using Mini Dimensionals to pop it up to complete.
Supplies Used:
Stamp Set: Varied Vases, Butterfly Gala
Ink: Gorgeous Grape
Paper: Highland Heather, watercolor, Pear Pizzazz, Garden Green, Soft Sea Foam
Accessories: Bermuda Bay, Gorgeous Grape, Granny Apple Green Pigment Sprinkles, spritzer bottle with water, Shimmery White Embossing Paste, Basics Decorative Masks, Silicone Craft Sheet, palette knife, Leaf and 1 3/4" Circle punches, Big Shot, Subtle Embossing Folder, Mini Dimensionals, washi tape
-Adding color to the Embossing Paste is easy. Scoop out a small amount using a palette knife and place on a Silicone Craft Sheet. Add a drop or two of reinker and mix with the knife.
-Apply the Embossing Paste using a palette knife. It's kind of like spreading frosting on a cake.
-The thicker you apply, the longer it will take to dry. But even so, it doesn't take long.
-Be sure to wash off the embossing paste with warm water from your mask, palette knife, and work surface as soon as you are finished with it. It dries quick.
-Also, be sure to put the lid back on the jar of embossing paste and seal tightly, so it doesn't dry out in the jar. I have also added a piece of cling wrap to the top of the jar, sealing it with the lid.
You are receiving this e mail from Anne Hayward because you have subscribed to my mailing list.. I am a Stampin' Up! Demonstrator, and the products I feature are sold by Stampin' Up! I send out two newsletters per month filled with
paper-crafting ideas. Usually, products sold by other companies can be substituted. If this is not for you, that is ok. To unsubscribe, please follow the instructions at the bottom of this e mail, but please do not tag my e mails as SPAM. To ensure that you continue to receive e mails from me, please add the following to your address book: