|
|
This is always a bittersweet time for me. Stampin' Up! has released the list of retiring stamp sets and accessories. I'm always a little sad to see stamp sets go. But, I know this leads up to the release of the new Annual Catalog in June, which is always an exciting time.
Here are some things to remember when looking at the list of retiring product.
-All retiring products will be available until June 2, 2020, or while supplies last. And they often go fast. So, if there is something on the retiring list you would like, I'd order it right away. Stampin' Up! has guaranteed that retiring stamp sets will be available until May 22. After that, when the supply has run out, they will no longer be
available.
-You can view the list of retiring products in a pdf format HERE (the font is really small, so please click on the automatic zoom or "+" sign to enlarge." Items on this list
may have sold out, so to see what is still available, please shop the Last Chance Page online HERE.
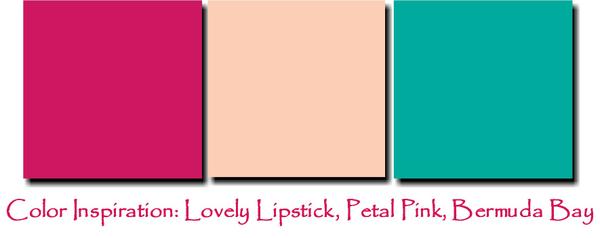
-The 2018-2020 In Colors will be retiring. That includes paper, inks, paper, refills, markers, and accessories.
-Bundles with a 10% discount will retire. Even if the items in the bundle carry over to the new catalog, the discounts will not.
-Stampin' Blends are not retiring. The option to purchase the light and dark Blends separately is going away. In the upcoming catalog, you will still be able to purchase the Blends, but in the combo packs only.
If you need any stamping or paper crafting ideas during Coronavirus stay at home or safer at home orders, please reach out.
Please stay healthy.
Anne
Please be sure to let me know if you have any questions:
Quick Links:
Sample Recipe Lists:
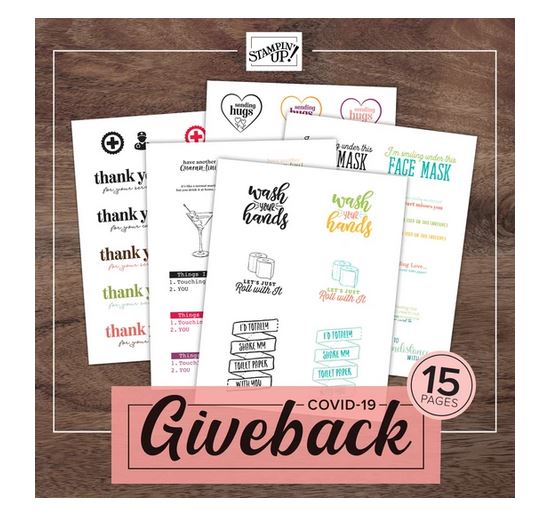
Stampin' Up! Making A Difference-Covid-19 Giveback Download
Stampin’ Up! is committed to making a difference in our global communities and caring about people first. As part of our Making a Difference program we’re offering a product giveback opportunity to support organizations that are helping COVID-19 frontline responders and communities vulnerable to the pandemic.
The Share Sunshine pdf Download can be purchased, and we will donate 100% of the proceeds to COVID-19 efforts.
The Share Sunshine PDF Download is a digital stamp set that’s packed with both lighthearted and heartfelt sentiments and imagery relevant to the unique COVID-19 and social distancing situation we’re currently experiencing. You can use the download in your card making and papercrafting projects. Simply print the imagery on card stock and cut it out using our Paper Trimmer, punches,
or dies. Since we are physically distanced from each other, now is a perfect time to share sunshine with our friends and family by sending cards!
As part of Stampin’ Up!’s Making a Difference program, 100% of the Share Sunshine PDF Download proceeds will go to COVID-19 efforts through these organizations:
The World Health Organization’s COVID-Solidarity Response Fund
United Way Worldwide’s COVID-19 Community Response and Recovery Fund
|
|
|
|
EQR9XKCP
Orders using this hostess code will be combined.
As always, if we have enough in sales to make the order a workshop ($150), we will have a Mystery Hostess.
Please place your order online by May 25.
I will notify our hostess by email on May 26.
The workshop will need to close on May 28.
Happy Shopping!
|
|
|
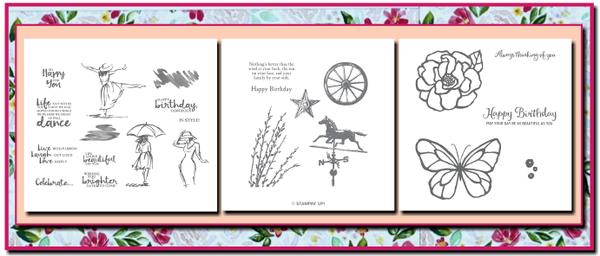
Product Spotlight-A Few of My Favorite Retiring Stamp Sets
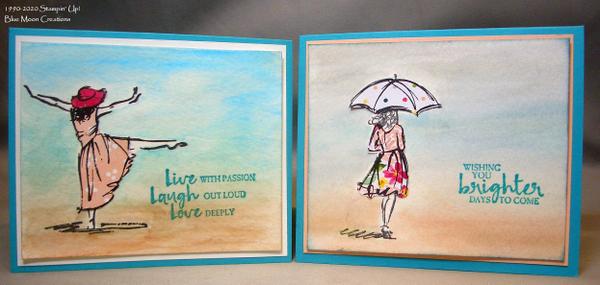
Paper Pieced Beautiful You
The Paper Piecing Technique in card making is adding colorful and patterned paper to a stamped image.
When it is paired with the images found in Beautiful You, it's kind of like playing paper dolls when you were a child but with a grown-up appeal.
1. Create a mask for the girls. Stamp image on a post-it-note using Memento Black ink. Fussy cut the image using a pair of scissors. Make sure part of the cut image includes the sticky part on the back of the post-it-note.
2. Stamp girl from Beautiful You on a piece of watercolor paper using Black Stazon ink.
3. Cover stamped girl with cut-out image on the post-it-note.
4. Apply watercolor background by swiping colors using an Aqua Painter. Remove the mask and set piece aside to dry completely.
5. Stamp image on a piece of Best Dressed Designer Series Paper using Black Stazon or Memento Black ink. Fussy cut the dress, hat, and umbrella parts of the image using a pair of scissors.
6. Attach cut-outs to image using SNAIL Adhesive. You can also pop the pieces up using Mini Dimensionals to add more dimension.
7. Stamp greeting from Beautiful You using Bermuda Bay ink.
8. Attach to Whisper White or Petal Pink mat. Attach to Bermuda Bay card base to complete.
Supplies Used:
Stamp Set: Beautiful You
Ink: Black Stazon, Memento Black
Watercolor inks, Dancing Girl: Crumb Cake, Soft Suede, Smokey Slate, Pool Party, Bermuda Bay
Girl with Umbrella: Crumb Cake, Soft Suede, Seaside Spray, Sahara Sand
Paper: Bermuda Bay, Whisper White, Petal Pink, watercolor, Best Dressed 6"x6" Designer Series Paper
Accessories: post-it-note, scissors, Aqua Painter
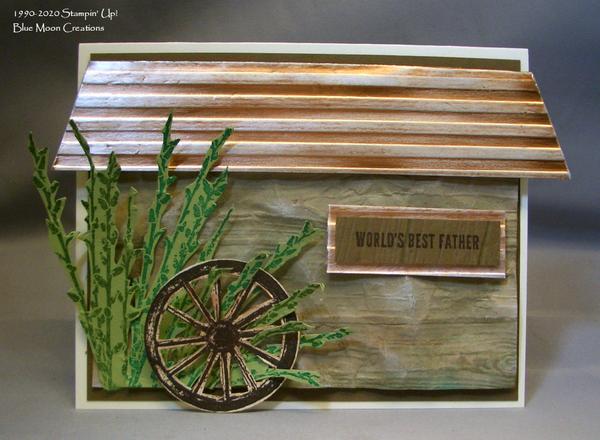
Country Road Father's Day
Country Road is a great stamp set to use for masculine-themed cards. I created this weathered barn by aging the card stock and the copper foil roof. Old buildings and barns, this is a scene we often see here in the mountains of southern Colorado!
1. Swipe Soft Suede and Bermuda Bay inks on the inside of the Pinewood Planks Embossing Folder. Insert a piece of Crumb Cake card stock and emboss using a die-cut machine.
2. To age the piece more, lightly spritz with water and crumble the piece into a ball. Open and lightly smooth out. Swipe Whisper White craft ink over the creases. Set aside to dry completely.
3. To create the roof, I made a quick template out of computer paper. I cut out the template, placed it on a piece of Copper Foil, and traced around the template with a pencil. I then cut it out using a pair of scissors. Emboss using a die-cut machine and Corrugated Embossing Folder. Once embossed, I scored 1 1/2" from the top and folded it along the score line. I will attach this scored side to the card front, giving the piece a little dimension. To age the
roof piece, I ran a sanding block over it.
4. Stamp grass/weeds on Pear Pizzazz card stock using Call Me Clover ink. Stamp another image using Mossy Meadow ink. Fussy cut images using a pair of scissors.
5. Stamp wheel on Very Vanilla card stock using Early Espresso ink. Punch wheel out using 1 3/4" punch or die. Cut card stock in between the spokes using a pair of scissors. I punched a hole in between each of the spokes using a small hole punch. This hole will make it easier to start the cutting.
6. Stamp greeting from Itty Bitty Greetings on a small piece of Soft Suede card stock using Early Espresso ink. Emboss piece using Hardwood Planks Embossing Folder and die-cut machine. Attach to copper foil mat that has been embossed using Corrugated Embossing Folder and aged using a sanding block. Attach greeting to mat.
7. Attach card front to Soft Suede mat. Attach to Very Vanilla card base.
8. Attach roof using Dimensionals along the score line and along the bottom of the roof to pop it up. Attach grass/weeds. Attach wheel using a Mini Dimensional in the center. Attach greeting using Mini Dimensionals to pop it up.
Supplies Used:
Stamp Sets: Country Road, Itty Bitty Greetings
Ink: Soft Suede, Bermuda Bay, Early Espresso, Call Me Clover, Mossy Meadow, Whisper White Craft
Paper: Very Vanilla, Soft Suede, Crumb Cake, Pear Pizzazz, Copper Foil
Accessories: Big Shot, Pinewood Planks, and Corrugated Embossing Folders, 1 3/4" circle and 1/8" hole punch, scissors, spritzer bottle with water, computer paper, pencil, sanding block, Mini Dimensionals
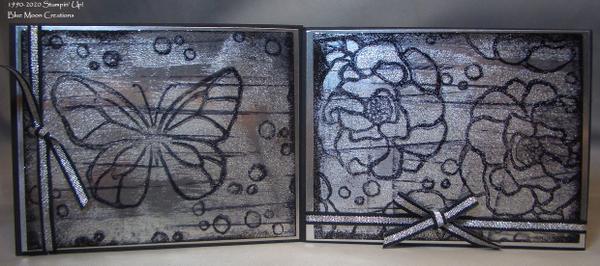
Beautiful Day Black Ice Technique
Layer inks on foil paper using the Direct to Paper Technique for a stunning effect. The Black Ice Technique is great for masculine-themed cards.
1. Using the Direct to Paper Technique, swipe streaks of Black Stazon along the Silver Foil paper. Add Stazon to the edges of the Silver Foil paper as well.
2. Stamp image from Beautiful Day using Black Stazon ink. Apply heat to dry the ink using the low setting on a heat tool.
3. Lightly swipe Versamark on the card front. You want streaks of Versamark, so use a soft touch.
4. Apply clear embossing powder over the card front, and heat emboss using a heat tool.
5. Attach card front to Silver Foil mat. Wrap ribbon around, securing it to the back. Tie another piece of ribbon around the front, creating a knot. Or, tie a bow out of another piece of ribbon and attach to the front using a Glue Dot.
6. Attach to Basic Black card base. Attach a piece of Whisper White or Very Vanilla card stock to the inside of the card. Stamp greetings from Beautiful You on the inside using Black Stazon or Memento Black ink to complete.
Supplies Used:
Stamp Set: Beautiful You
Ink: Black Stazon, Versamark
Paper: Basic Black, Silver Foil
Accessories: heat tool, clear embossing powder, ribbon out of my stash, Glue Dot
|
|
|
|
|