|
|
In this issue:
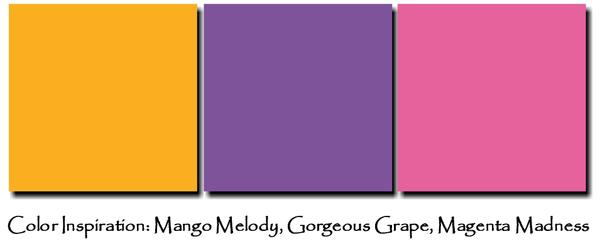
August Color Inspiration
August Stampin' Up! News: Holiday Catalog, Bonus Days Redemption, Changes to Online Store
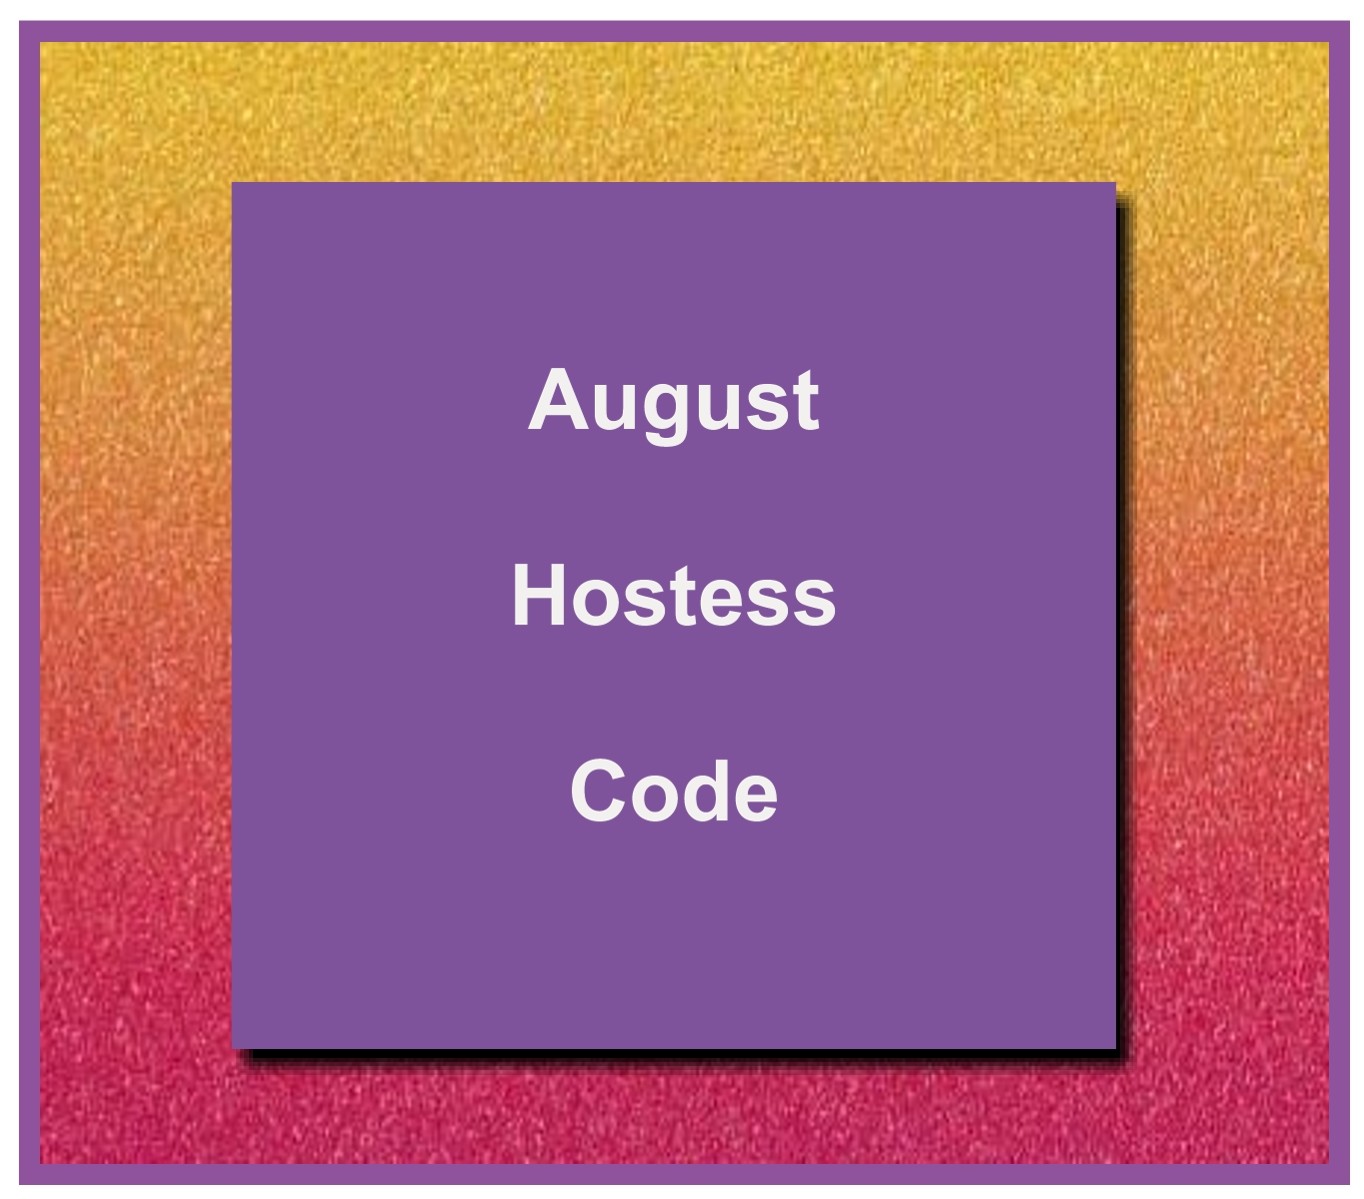
August Hostess Code
Featured Product: Blossoms in Bloom Bundle
Featured Projects: Blossoms in Bloom Puzzle Cards
Happy August!
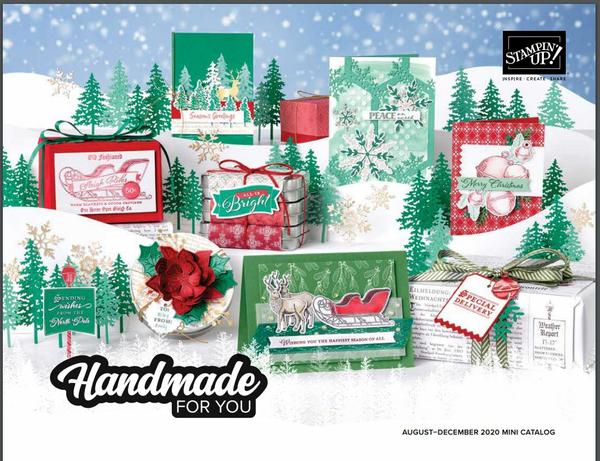
The August-December 2020 Mini Catalog is Here!
Fresh ideas for Halloween, fall, Christmas, and the winter season.
It's not too early to get a start on those holiday cards and projects!
*****
Did you earn Bonus Day coupons in July?
If so, August is time to redeem them!
You should have received an email from Stampin' Up! with your Bonus Day Coupon codes.
Just log into your Stampin' Up! account and add items to your basket.
When you are ready to check out, enter your coupon codes into the Manage Coupon Codes Box.
Be sure to redeem them by August 31.
Be sure to let me know if you have any questions:
Changes to the Stampin' Up! Online Store
Stampin' Up! has made changes to its online store, which took effect on August 4, 2020.
I think you will like the new look and functionality. It'll be super easy to redeem Stampin' Rewards, add a Hostess Code, or redeem Bonus Days coupon(s). There is also a Wish List function! You'll be able to add items to your Wish List, then copy/paste the URL to share with loved ones who might be looking for gift ideas.
There will also be a "Feedback" button on each of the products. If you have issues with the site or any of the products, you can communicate directly with Stampin' Up! through this feature.
While shopping with me, make sure you see my name and the photo of Mama Bear and me at the top of the page, so you'll confirm you are in my online store.
Also, during the checkout process, you'll have to fill out 4 sections: name/address, shipping method, and payment info. The last section is the Demonstrator info. You'll have to click on the Demonstrator button to verify you want to shop with me and continue on.
One more thing. While all your account information will migrate over, the link to the online store will be new. If you have your user name and password stored or bookmarked on your browser, you'll have to update this info as it will no longer be stored with your browser. If you forget your password, it's not a big deal. Just click on the link "Forgot Password," and you'll get an email from
Stampin Up! with instructions on how to create a new password. The email will come from [email protected]. If you don't see the email, check your SPAM or Junk folder.
If you have any questions or problems with the site, please be sure to let me know.
|
|
|
|
XKBWB4DR
Orders using this hostess code will be combined.
As always, if we have enough in sales to make the order a workshop ($150), we will have a Mystery Hostess.
Please place your order online by August 25.
I will notify our hostess by email on August 26.
The workshop will need to close on August 28.
Happy Shopping!
|
|
|
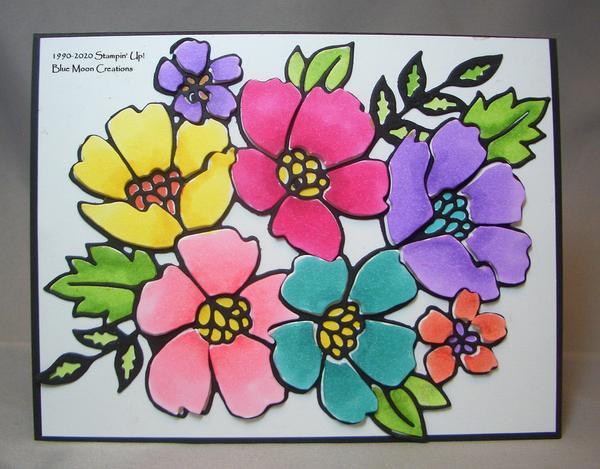
Product Spotlight-Blossoms in Bloom Bundle
|
|
Blossoms in Bloom Bundle
Create depth with watercolor-look images you stamp with the Blossoms in Bloom Set, then cut them out using the Many Layered Blossoms Dies.
|
|
|
Blossoms in Bloom Puzzle Card
Puzzle Cards can be a little time-consuming to create but are so worth the effort!
Cut out 2 images using a die-cut machine and die. One will be used for the inner pieces and bits, the other will be used as the border. Remove the inner pieces, being careful to save all of pieces and bits.
Keep them in order to help with the placement when inserting them back into the border piece.
Or, a simpler way is to place a piece of Press 'n Seal (found in any grocery store in the alum foil, parchment paper aisle) over the backside of the die before any pieces are removed from the die.
The Press 'n seal has a sticky backing on it that allows the pieces and bits to stick to it.
Once the Press 'n Seal is applied, gently pop out the pieces from the die using a paper piercing tool.
Remove each piece from the Press 'n seal and insert it back into the border using Multi-purpose Glue or Dimensionals to pop it up.
This card will make you smile as the pieces come together.
It has a slight shimmery effect thanks to the Shimmery White card stock!
Supplies Used:
Ink: Assorted Stampin' Blends
Paper: Shimmery White, Basic Black
Accessories: die-cut machine, Many Layered Blossoms Die, Press 'n Seal, paper piercing tool, Silicone Craft Sheet, Multi-purpose Glue, sponge, Dimensionals
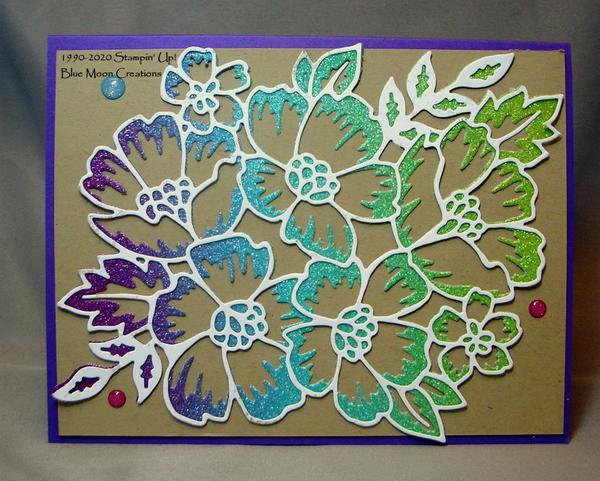
Glimmer Paper Blossoms in Bloom
Remember the Shimmery White border you saved from the puzzle card above?
Well, now it is time to use it for a second card.
You'll also be using the outline image die found in Many Layered Blossoms.
This card also features the Rainbow Glimmer Paper, which is so pretty and adds so much sparkle!
1. Cut one image out of Rainbow Glimmer Paper using a die-cut machine and the outline Many Layered Blossoms Die. Remove from the die with the help of a paper piercing tool.
2. Add a small pool of Multi-purpose Glue on a Silicone Craft Sheet. With a sponge, pick up some glue and lightly dab on the back of the Shimmery White border. Apply to the Rainbow Glimmer cut-out, carefully lining up the images.
3. Lightly sponge glue on the back of the piece and attach to Crumb Cake card front.
4. Attach to Gorgeous Grape card base.
5. Add a greeting if desired. Add enamel dots to complete.
Supplies Used:
Paper: Gorgeous Grape, Crumb Cake, Shimmery White, Rainbow Glimmer
Accessories: die-cut machine, Many Layered Blossoms Die, paper piercing tool, Silicone Craft Sheet, Multi-purpose Glue, sponge, enamel dots from my stash
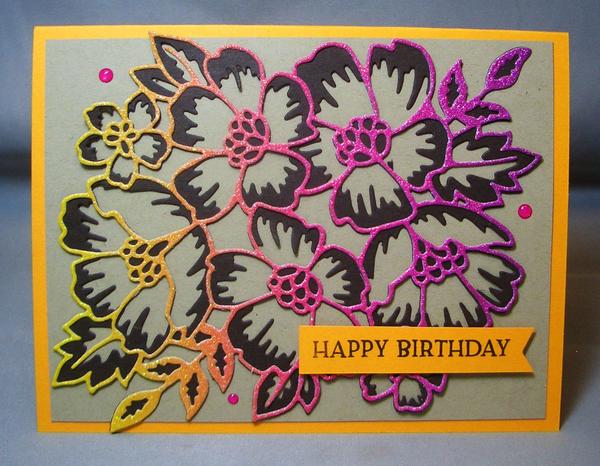
Glimmer Paper Puzzle Card
For this card, my puzzle pieces are cut from the Rainbow Glimmer Paper.
This one really sparkles in person!
1. Using the technique for the Blossoms and Bloom Puzzle card above, cut two images using the solid image die. One is cut out of Early Espresso card stock, the second out of Rainbow Glimmer Paper. Carefully place the die with the Rainbow Glimmer paper on a piece of Press 'n Seal, pressing it onto the die. Remove the bits and pieces using a paper piercing tool, securing them to the Press 'n
Seal. For the Early Espresso piece, do not use the paper piercing tool to remove the center of the flowers. If possible, try to keep them intact. If a stray piece or two falls out, that's ok. You can insert them back into the image with a little glue using a pair of tweezers or the Take Your Pick Tool.
2. Place a small pool of Multi-purpose Glue on a Silicone Craft Mat. With a sponge, pick some glue and lightly dab on the back of the Early Espresso border. Attach to Whisper White card base.
3. Add the flower petals one by one back into the border using Multi-purpose Glue to adhere. On this card, the pieces are not popped up.
4. Stamp greeting on a scrap piece of Whisper White card stock using Magenta Madness ink. Lightly sponge Mango Melody ink over greeting. Mat to a piece of Early Espresso card stock. Attach to the card using Dimensionals to pop it up.
5. Add enamel dots to complete.
Supplies Used:
Stamp Set: Blossom in Bloom
Ink: Magenta Madness, Mango Melody
Paper: Whisper White, Early Espresso, Rainbow Glimmer
Accessories: die-cut machine, Many Layered Blossoms Die, Press 'n Seal, paper piercing tool, Silicone Craft Sheet, Multi-purpose Glue, Take Your Pick Tool, sponge, Dimensionals, enamel dots
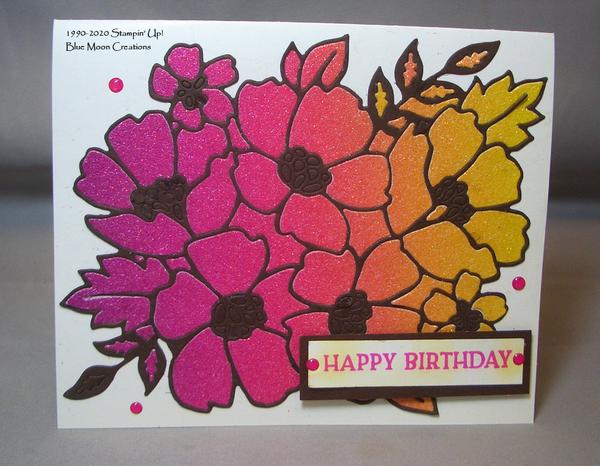
Blossoms in Bloom Glimmer
Now to use the Rainbow Glimmer border piece from the card above.
1. Cut one image out of Early Espresso card stock Paper using a die-cut machine and the outline Many Layered Blossoms Die. Remove from the die with the help of a paper piercing tool.
2. Add a small pool of Multi-purpose Glue on a Silicone Craft Sheet. With a sponge, pick up some glue and lightly dab on the back of the Glimmer Paper border. Apply to the Early Espresso cut-out, carefully lining up the images.
3. Lightly sponge glue on the back of the piece and attach to Crumb Cake card front.
4. Attach to Mango Melody card base.
5. Stamp greeting on a scrap piece of Mango Melody card stock using Early Espresso ink. Banner cut one edge. Add to the card using Dimensionals to pop it up.
6. Add enamel dots to complete.
Supplies Used:
Stamp Set: Blossoms in Bloom
Paper: Mango Melody, Crumb Cake, Early Espresso, Rainbow Glimmer
Accessories: die-cut machine, Many Layered Blossoms Die, paper piercing tool, Silicone Craft Sheet, Multi-purpose Glue, sponge, enamel dots from my stash
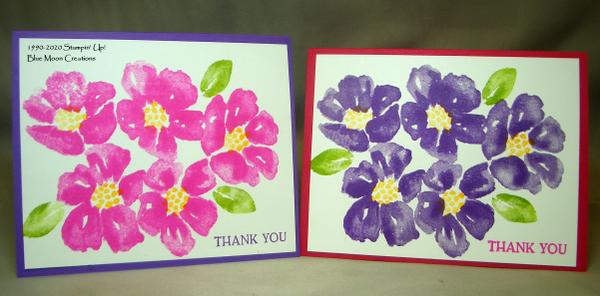
Blossoms in Bloom Easy Thank You Cards
Create quick and easy cards using the Blossoms in Bloom stamp set and the Stamparatus. Place the large flower stamp and greeting onto Stamparatus plates. Ink and stamp. Clean using the Simply Shammy and ink them up again in another color.
Free-hand stamp the flower centers and leaves.
Supplies Used:
Stamp Set: Blossoms in Bloom
Ink: Gorgeous Grape, Magenta Madness, Mango Melody, Granny Apple Green
Paper: Whisper White, Gorgeous Grape, Magenta Madness
Accessories: Stamparatus, Simply Shammy
|
|
|
|
|