|
|
In this issue:
April Sketch Challenge and Color Inspiration
April Promotions
April Hostess Code
April Product: Sweet Ice Cream Bundle
Featured Projects: Sweet Ice Cream
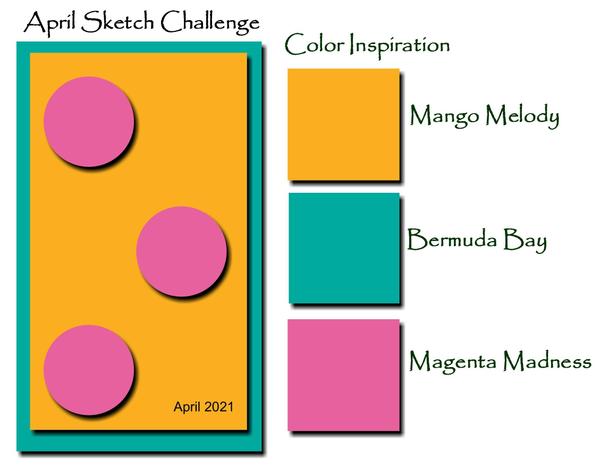
April Sketch Challenge and Color Inspiration
Going, Going, Gone
Retiring stamp sets and accessories
Happy April!
This is always a bittersweet time for me.
Stampin' Up! has released the list of retiring stamp sets and accessories.
I'm always a little sad to see stamp sets go.
But, I know this leads up to the release of the new Annual Catalog on May 4tth, which is always an exciting time.
You can view and print the Last Chance List Here:
Here are some things to remember when looking at the list of retiring product.
-All retiring products will be available until May 3, 2021, or while supplies last.
And they often go fast. So, if there is something on the retiring list you would like, I'd order it right away.
-The 2019-2021 In Colors will be retiring. That includes paper, inks, paper, refills, markers, and accessories.
-Bundles with a 10% discount will retire. Even if the items in the bundle carry over to the new catalog, the discounts will not.
I will continue sending out my Spring Inspiration e mails on March 13th and 27th.
These will be in addition to my first of the month and my mid-month Fresh Ideas newsletters.
Please be sure to let me know if you have any questions.
|
|
|
|
RMAAN3DW
Orders using this hostess code will be combined.
As always, if we have enough in sales to make the order a workshop ($150), those placing an order using the hostess code will share the hostess rewards.
Hostess rewards will be based on a percentage of each order placed.
Please place your order online by April 25.
I will notify our hostess by email on April 26.
The workshop will need to close on April 28.
Happy Shopping!
|
|
|
Product Spotlight-Sets for the Kid in All of Us!
Stampin' Up! has some fun stamp sets and coordinating dies for kids of all ages.
In this month's newsletter, I am featuring 3 stamp sets/dies that I purchased to create cards for our 2 young grandkids:
Woodland Wonder
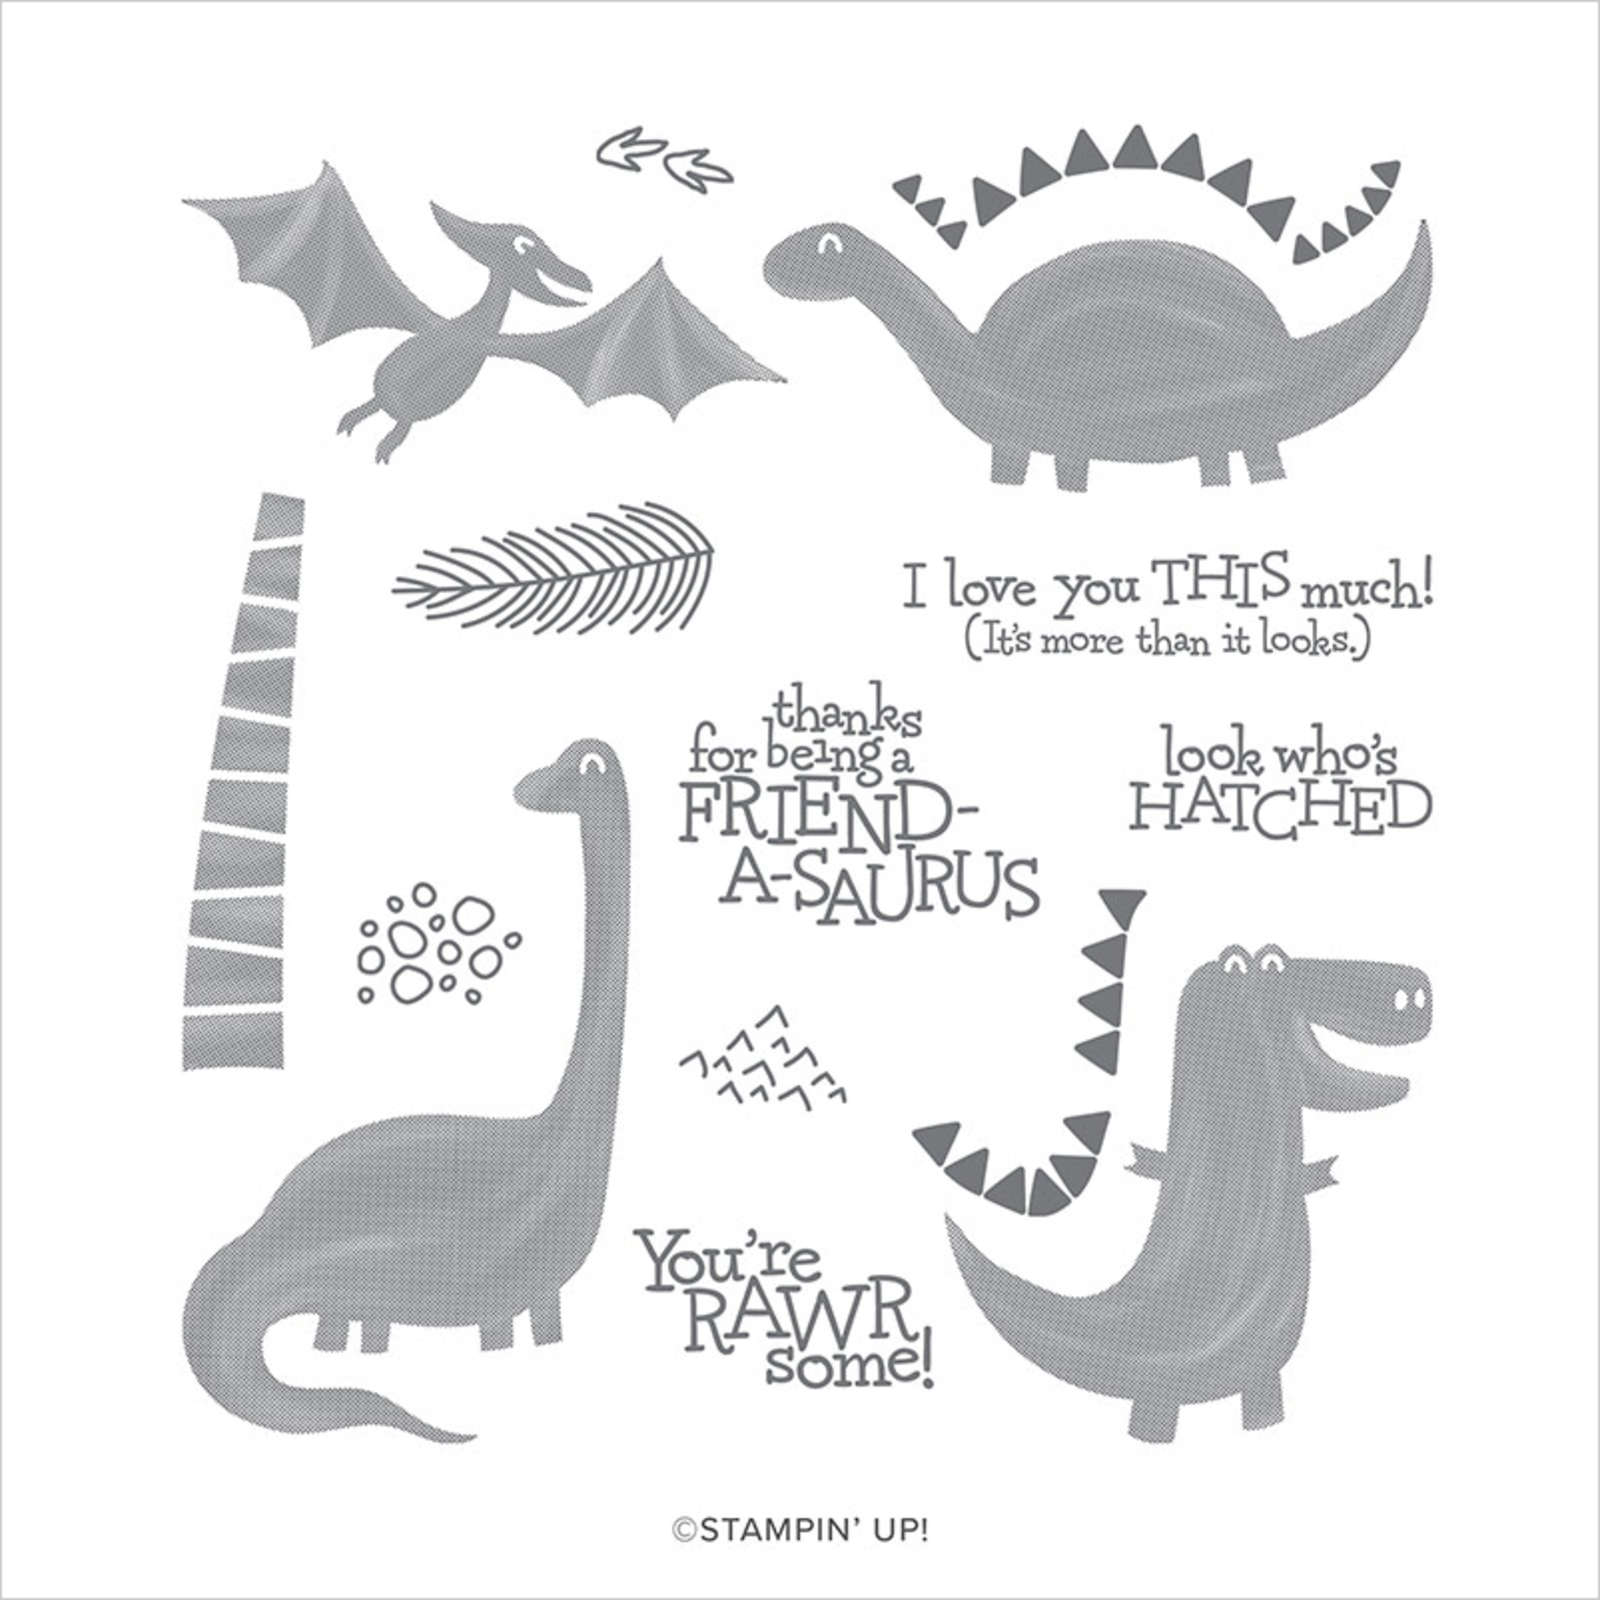
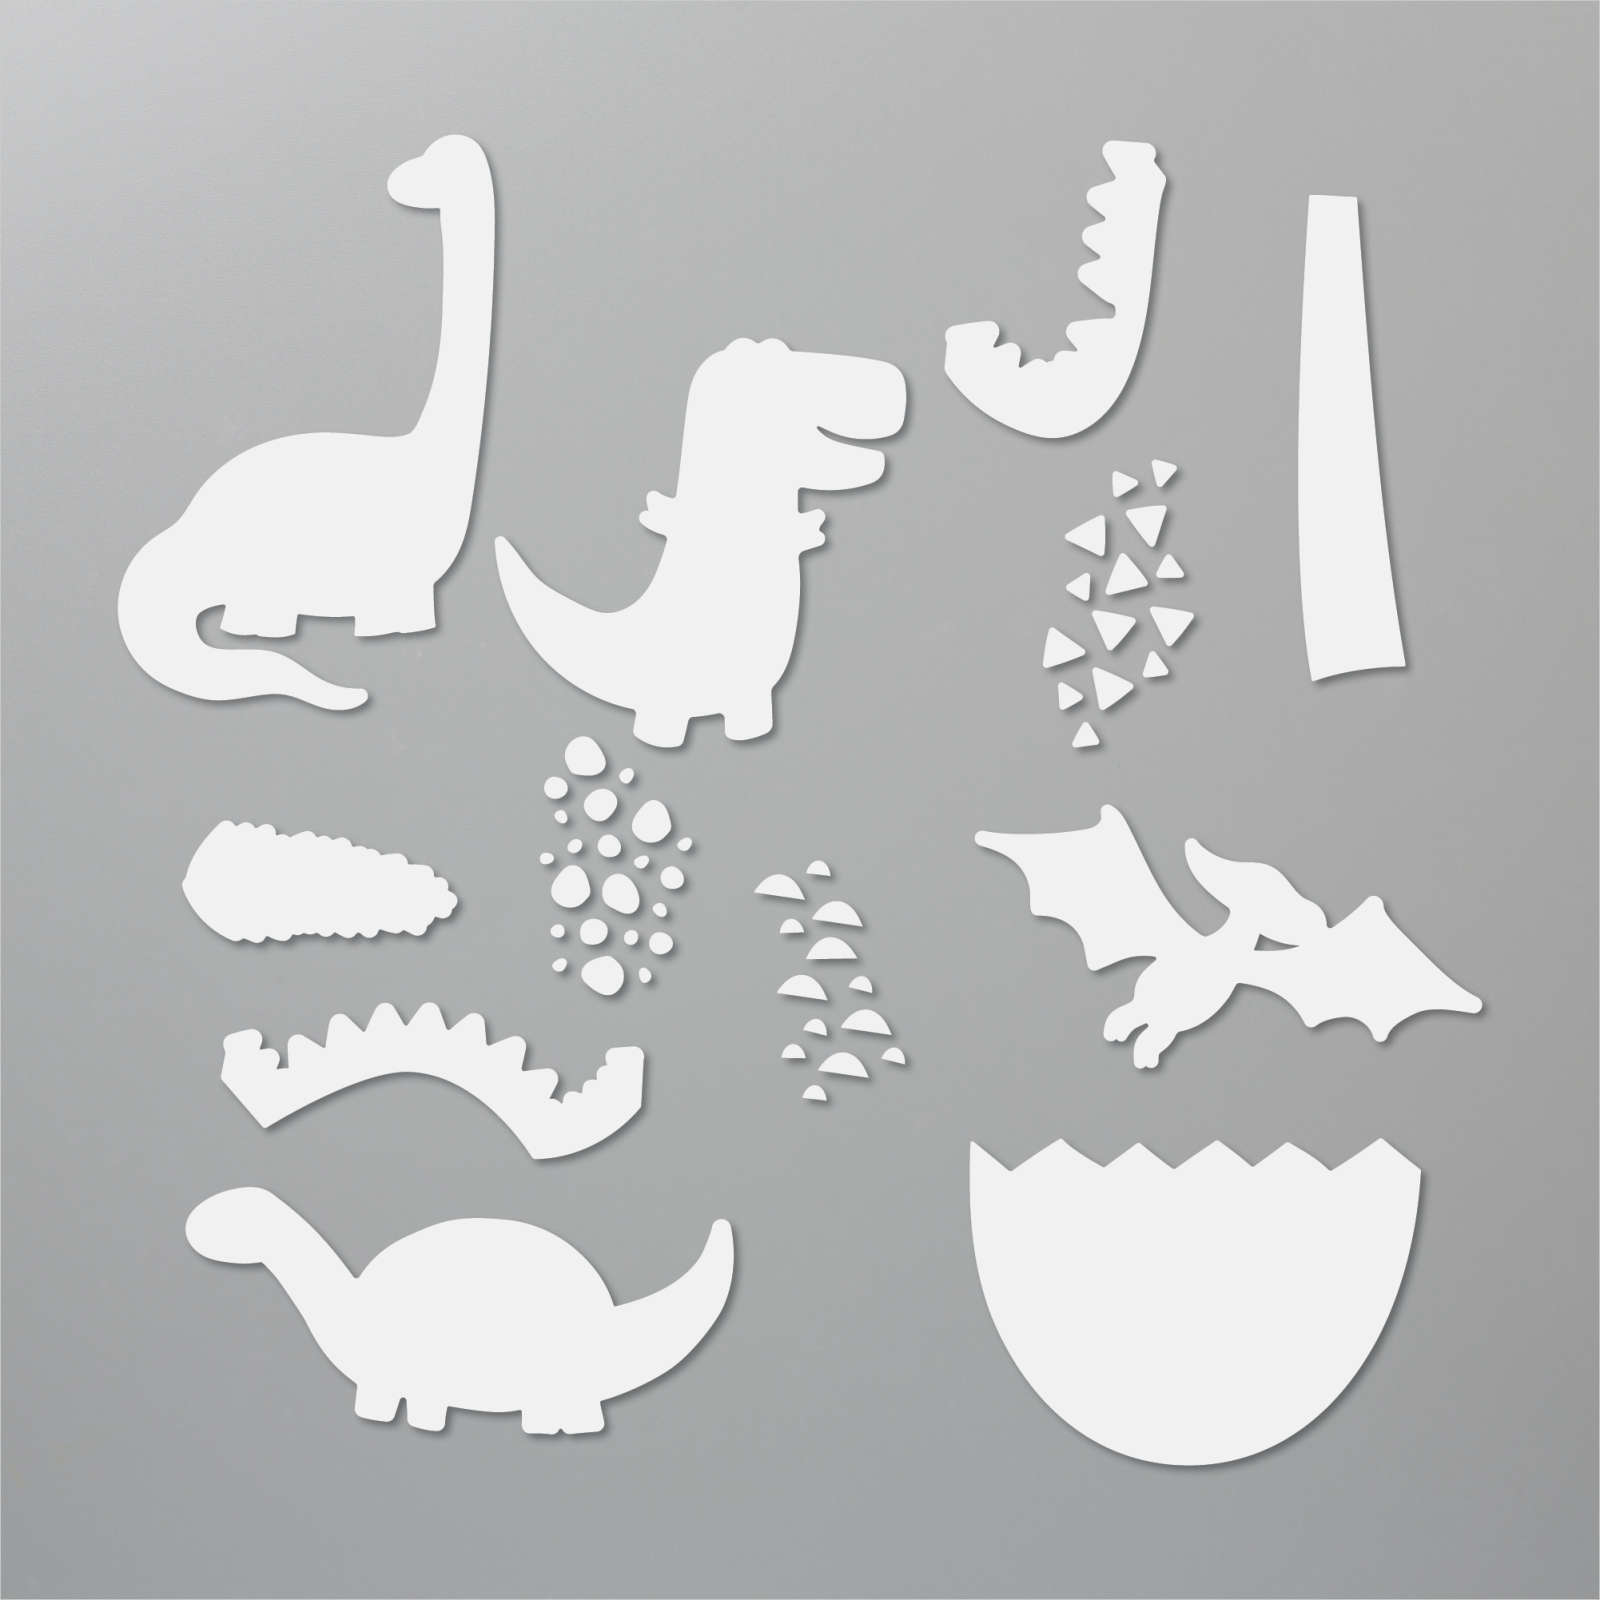
Dino Days & Dino Dies-Retiring
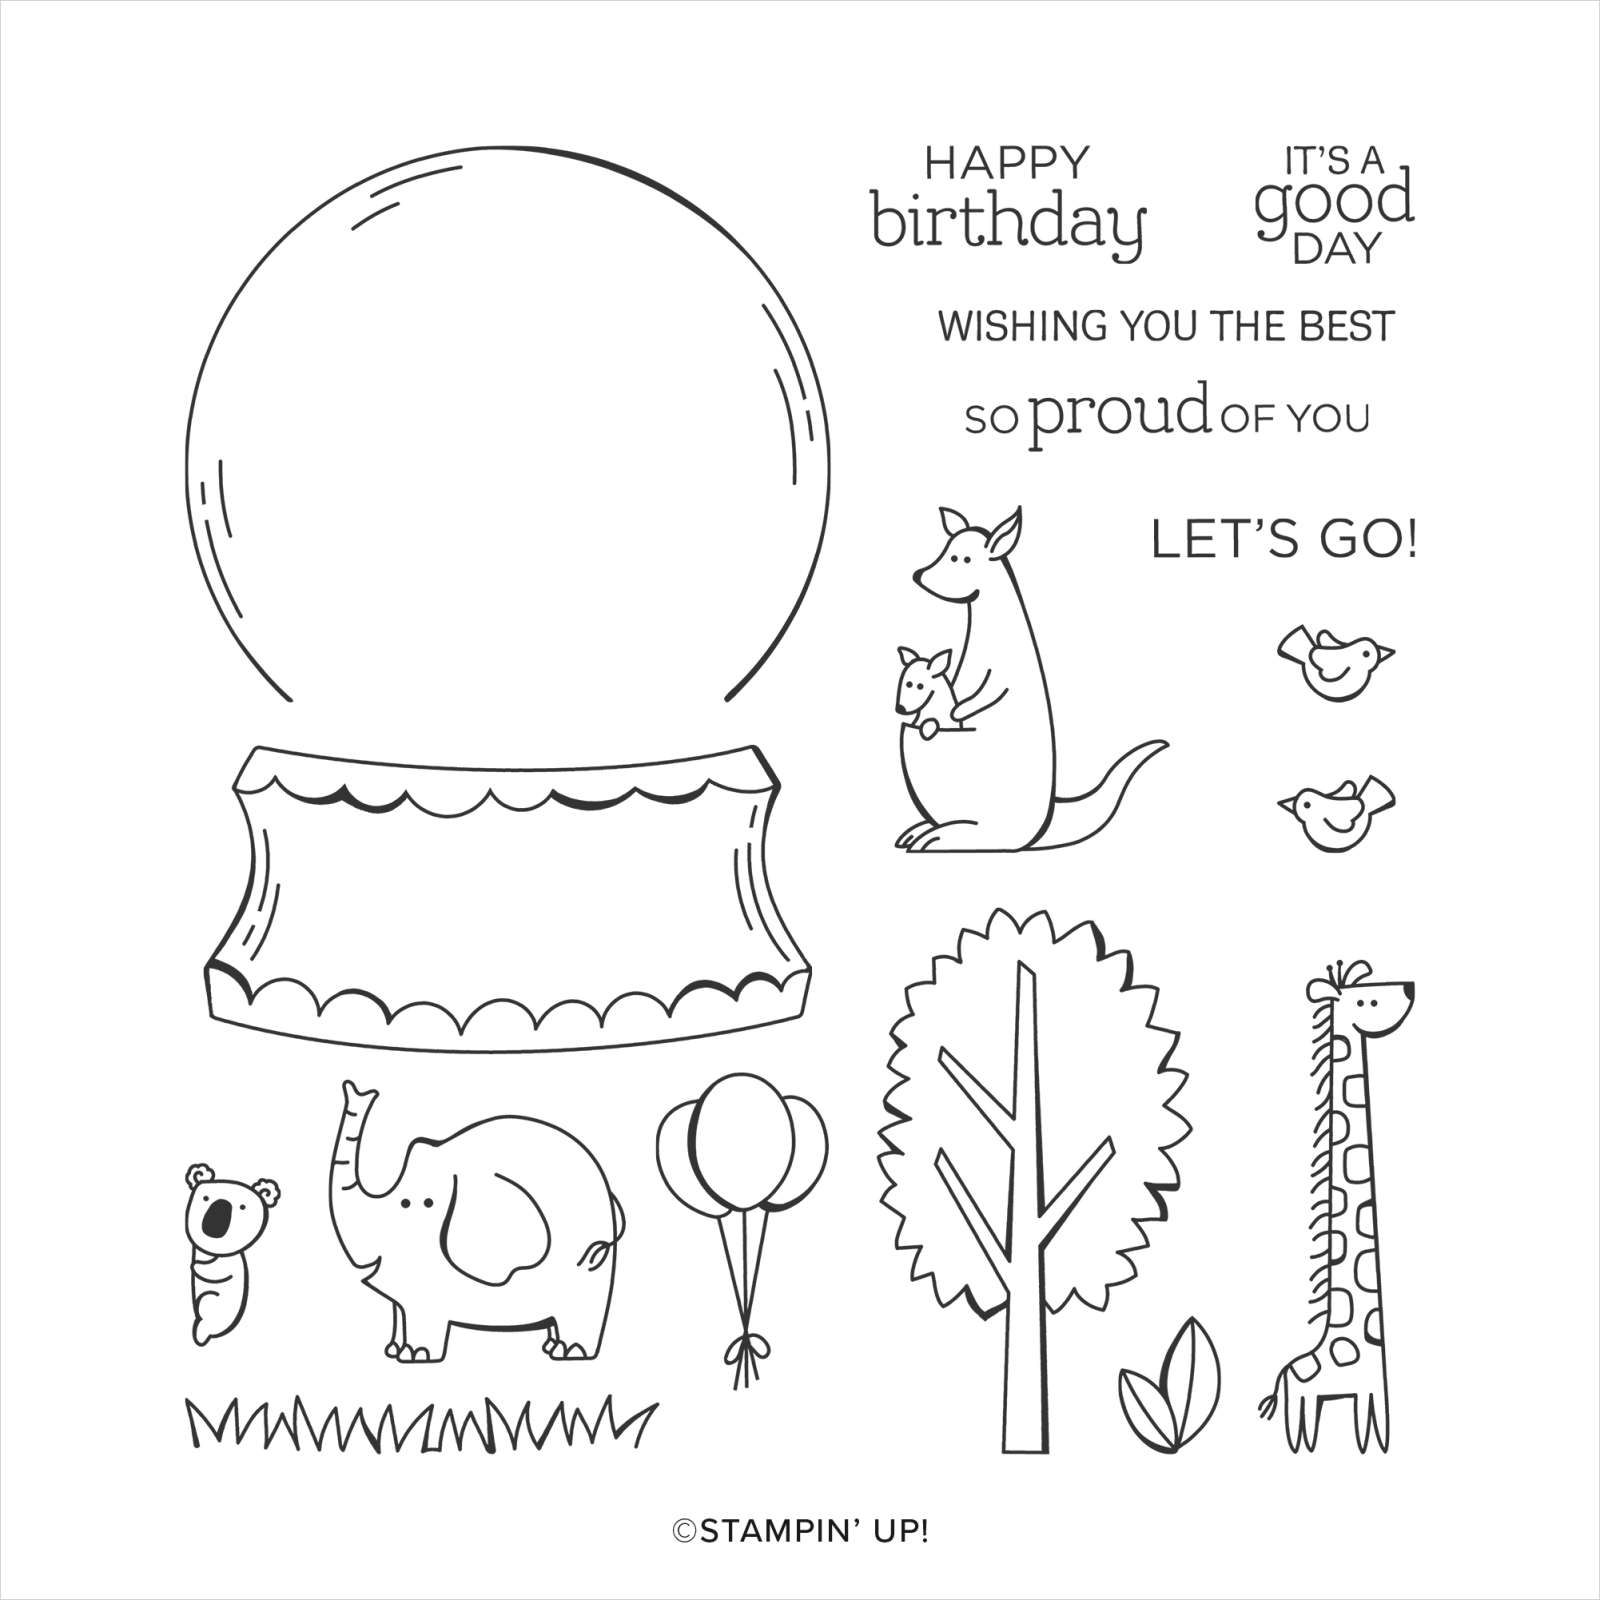
Zoo Globe, Snow Globe Scenes Dies and Snow Globe Shaker Domes-Retiring
But, these stamp sets can be used for kids of all ages, young and old alike!
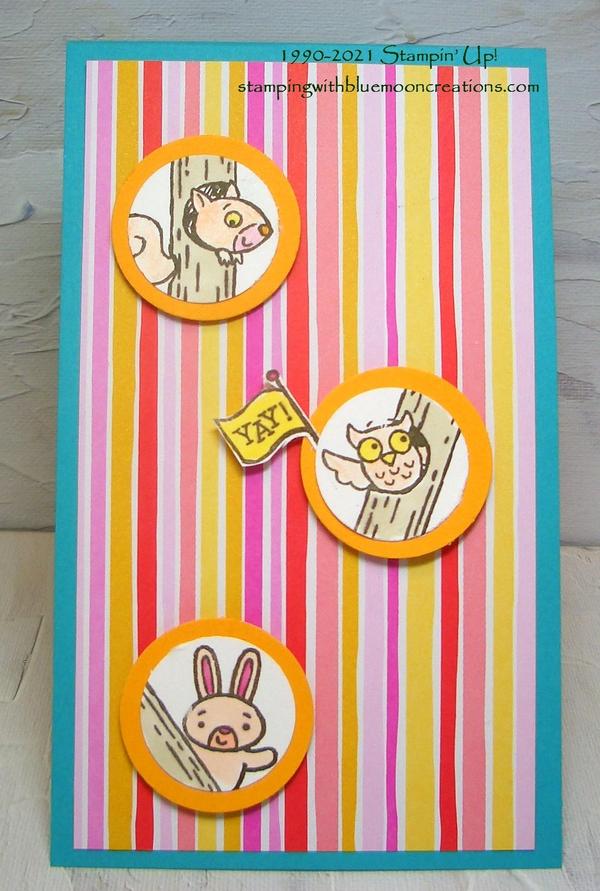
"W" Fold Technique-Woodland Wonder
(Sketch Challenge)
Woodland Wonder "W" Fold Closed
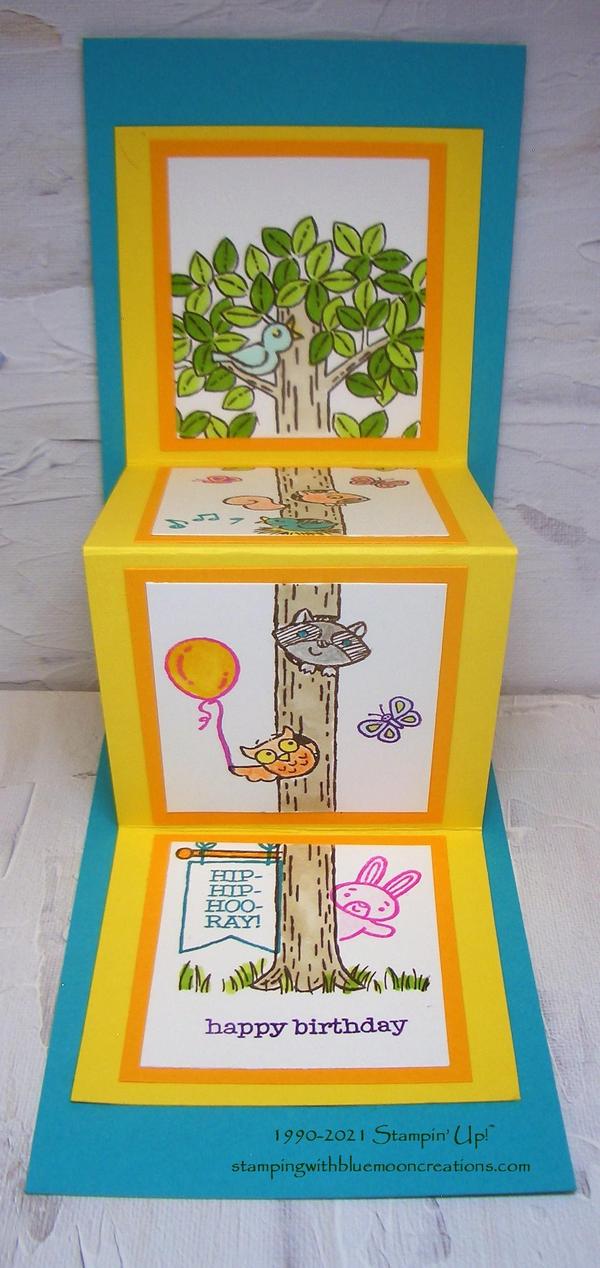
Woodland Wonder "W" Fold Opened
Create a fun fold card using the easy "W" Fold Technique.
Paper Measurements:
Card base: Bermuda Bay measuring 3 ¼” x 11”, scored in half at 5 ½”
Card front: Flowers for Every Season 6” x 6” Designer Series Paper measuring 3” x 5 ¼”
Inside “W” Fold: Daffodil Delight measuring 2 ¾” x 11”, scored and folded 2 ¾” and 8 ¼” (valley folds), and 5 ½” (mountain fold)
Inside panels: 4-Whisper/Basic White measuring 2” x 2 ¼”, plus scraps for front
Inside panels matting:4- Mango Melody measuring 2 ¼” x 2 ½”, plus scraps for front
1. Cut and score card base, card front, inside “W”, inside panels and matting per instructions above.
2. Place 4 Whisper/Basic White panels on grid sheet paper, using the grid lines for placement. If it helps, apply a small amount of adhesive to each panel's back so they don’t shift.
3. Stamp the images using Early Espresso ink.
TIP: Woodland Wonder is a photopolymer stamp set, so lining up the images is relatively easy. But, use the Stamparatus to line up the images if needed.
4. Color images using a variety of Stampin’ Blends, Stampin’ Write Markers, ink pads, and watercolor pencils.
5. Stamp additional images (butterflies, music notes, balloon, banner, rabbit, greeting.)
See photos in pdf tutorial:
6. Fold card base and inside “W” pieces, using a bone folder to get good score lines.
7. Add Tear & Tape Adhesive to the backside of both end panels of the “W” piece.
8. Measure in 1” from the right side of the card base and mark line with a pencil. Remove adhesive on the Tear & Tape and attach to right side of card base, lining up the edge with the 1” pencil mark.
9. Attach stamped pieces to Mango Melody mat.
10. Attach panels to inside “W.”
11. For front of card: Stamp center tree image on scrap piece of Whisper/Basic White card stock using Early Espresso ink. Punch individual critters using 1” circle punch. Color images. Punch Mango Melody mats using 1 ¼” circle punch. Attach critters to mats.
Stamp “YAY!” using Early Espresso ink. Fussy cut using a pair of scissors.
Attach Flowers for Every Season DSP to front of card base. Attach critters using Dimensionals to pop them up. Slip “YAY” underneath owl to complete
Supplies Used:
Supplies Used:
Stamp Set: Woodland Wonder
Ink: Early Espresso, Bermuda Bay, Magenta Madness, Gorgeous Grape
Various Stampin’ Blends, Stampin’ Write Markers, and watercolor pencils
Paper: Bermuda Bay, Daffodil Delight, Whisper/Basic White, Mango Melody, Flowers for Every Season 6"x6" Designer Series Paper
Accessories: Simply Scored Scoring Tool, bone folder, Tear & Tape Adhesive, 1” and 1 ¼” circle punches, grid paper, Mini Dimensionals
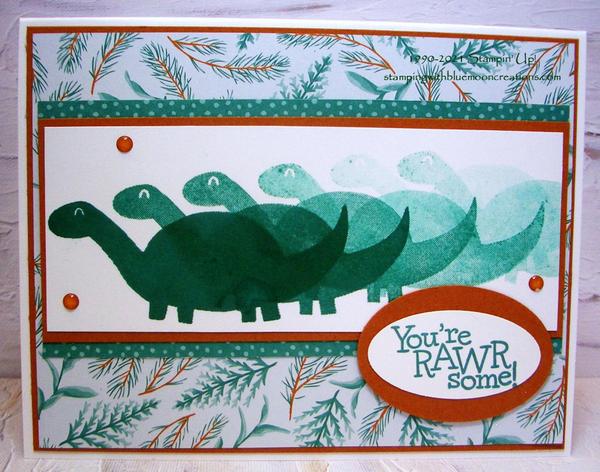
Dino Days Motion Stamping Technique
Create movement in your card creations using the Motion Stamping Technique.
Stamp full strength, then stamp off slightly next to it, repeating across the card front.
1. Stamp dinosaur from Dino Days full strength on Whisper/Basic White card front using Just Jade ink.
TIP: Because I wanted the first image to be dark, I used the Stamparatus. I inked and stamped four times. I used an acrylic block for the rest of the stamping. The stamp was not reinked in between images.
Without reinking, stamp the image again. Repeat across the card front.
2. Attach to Cinnamon Cider mat. Attach strips of Flowers for Every Season 6"x6" Designer Series paper to the matted piece's top and bottom.
3. Attach Flowers for Every Season DSP card front to Cinnamon Cider mat. Attach to Whisper/Basic White card base. Attach stamped piece.
4. Stamp greeting on scrap Whisper/Basic White card stock using Just Jade ink. Punch using an oval punch or die. Attach to Cinnamon Cider oval. Attach to card front.
5. Attach Glimmer Dots to complete.
Supplies Used:
Stamp set: Dino Days (retiring)
Ink: Just Jade
Paper: Whisper/Basic White, Cinnamon Cider, Flowers for Every Season 6"x6" Designer Series Paper
Accessories: Stamparatus, oval punches, In Color Enamel Dots
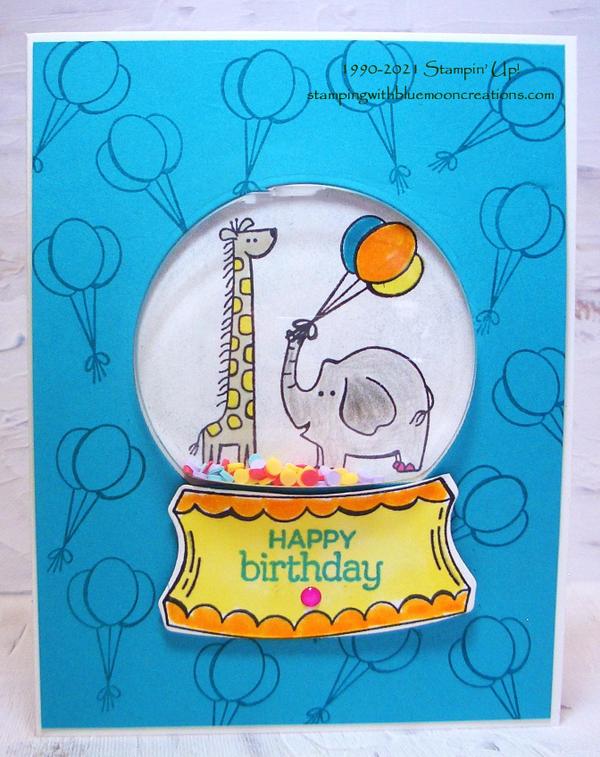
Create a fun, interactive Shaker Card using Zoo Globe stamp set
and coordinating Snow Globe Scenes Dies
1. Stamp balloon image on Bermuda Bay card front using Bermuda Bay ink.
2. Cut snow globe out using die-cut machine and Snow Globe Scenes die.
3. Stamp images from Zoo Globe on 3 1/4" x 3 1/4" piece of Whisper/Basic White card stock using Memento Black ink.
TIP: To help you with the placement of the stamped images, first place the Bermuda Bay cut-out over the piece and lightly trace the globe's outline using a pencil.
4. Lightly sponge Balmy Blue ink over the piece. Color images using a variety of Stampin' Blends and Stampin' Write Markers.
5. Place shaker pieces in the center of the stamped image. I used Ice Cream Corner Sprinkles, but any glitter, beads, or sequins would work.
6. Peel the backing off the Snow Globe Dome and place over the stamped image.
7. Apply adhesive on the front of the stamped piece, around the dome. Insert the dome into the card front's opening, rubbing your fingers around the front, securing the dome.
8. Attach to Whisper/Basic White card base.
9. Stamp snow globe base on Whisper/Basic White card stock using Memento Black ink. Stamp greeting in the center using Bermuda Bay ink. Color image using a variety of Stampin' Blends and Stampin' Write Markers. Cut out using die-cut machine and
coordinating Snow Globe die. Attach below the snow globe using Dimensionals to pop it up.
10. Attach glimmer dot to complete.
Supplies Used:
Stamp Set: Zoo Globe (retiring)
Ink: Memento Black, Bermuda Bay, Balmy Blue
various Stampin' Blends and Stampin' Write Markers
Paper: Whisper/Basic White, Bermuda Bay
Accessories: Stampin' Cut & Emboss Machine, Snow Globe Scenes Dies (retiring), Snow Globe Shaker Dome (retiring), Ice Cream Corner Sprinkles, Mini Dimensionals, sponge
|
|
|
|
|