|
|
In this issue:
July Sketch Challenge and Color Inspiration
July Promotions
July Hostess Code
July Product: Give It a Whirl Dies
Featured Projects: Give It a Whirl Dies
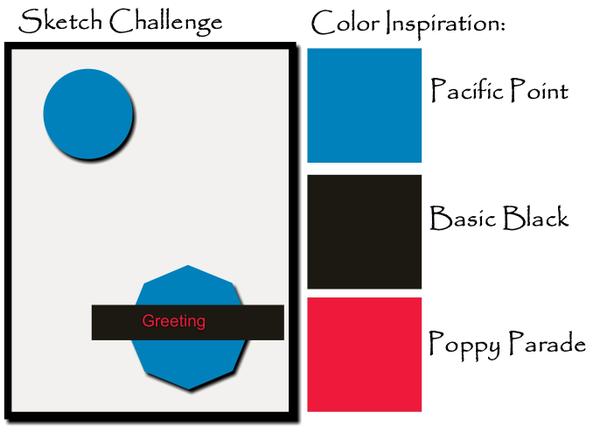
July Sketch Challenge and Color Inspiration
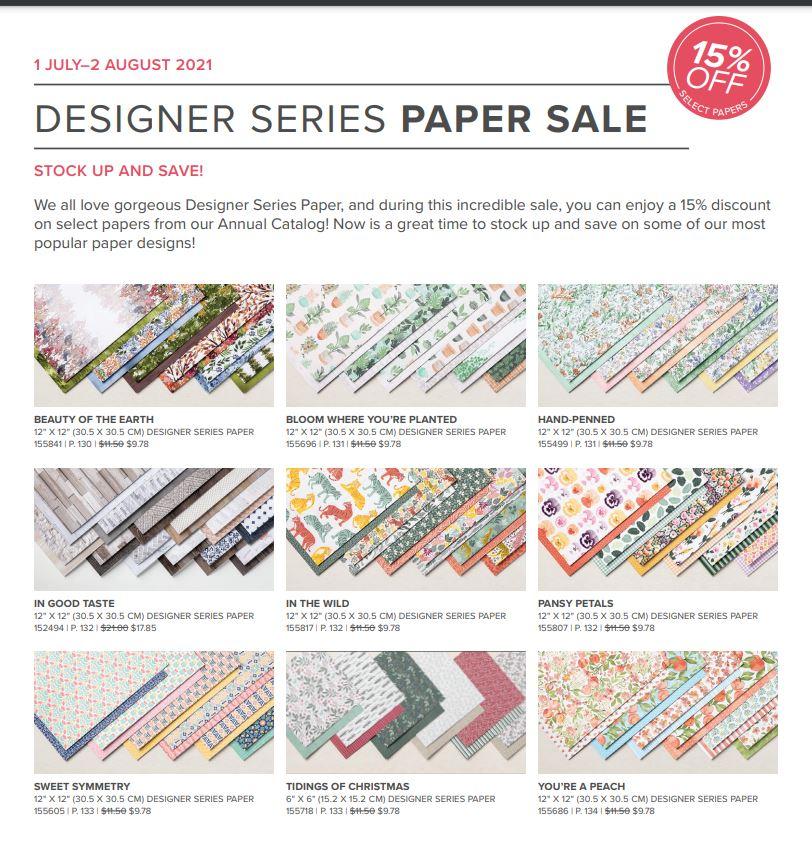
15% off Select Designer Series Paper
15% off Designer Series Paper!
We all love gorgeous Designer Series Paper, and during this incredible sale, you can enjoy a 15% discount on select papers from the 2021–2022 Annual Catalog! Now is a great time to stock up and save on some of our most popular
paper designs!
July 1through August 2, 2021.
Let me know if you’d like take advantage of the Designer Series Paper Sale. I’d be happy to place an order for you.
Shop Designer Series Paper Sale Here
I will continue sending out my Summer Inspiration e mails on July 13th and 27th
These will be in addition to my first of the month and my mid-month Fresh Ideas newsletters.
Please be sure to let me know if you have any questions.
|
|
|
|
Hostess Schedule May-August
3K3HZPPV
July-Lynn
August-Audrie
Please place your order online using the Hostess Code above anytime through July 25.
We'll see you on the 23rd, 10:00 am!
|
|
|
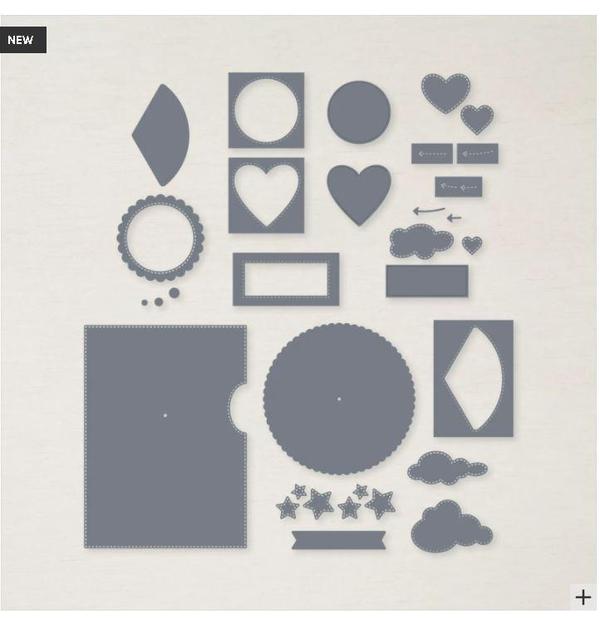
Product Spotlight-Give It a Whirl Dies
NEW!
People of all ages love interactive cards like the ones you create with the Give It a Whirl Dies. These dies include all the images you need to create the card, rotating wheel, and images to go on the wheel. You can also use the dies individually to build scenes on handmade cards and scrapbook pages.
* 21 dies
* Largest die: 5-1/4" x 3-13/16" (13.3 x 8 cm)
* Use with the Stampin’ Cut & Emboss Machine
Dies create unique die-cut shapes and paper cutouts with just a quick run through your Stampin’ Cut & Emboss Machine.
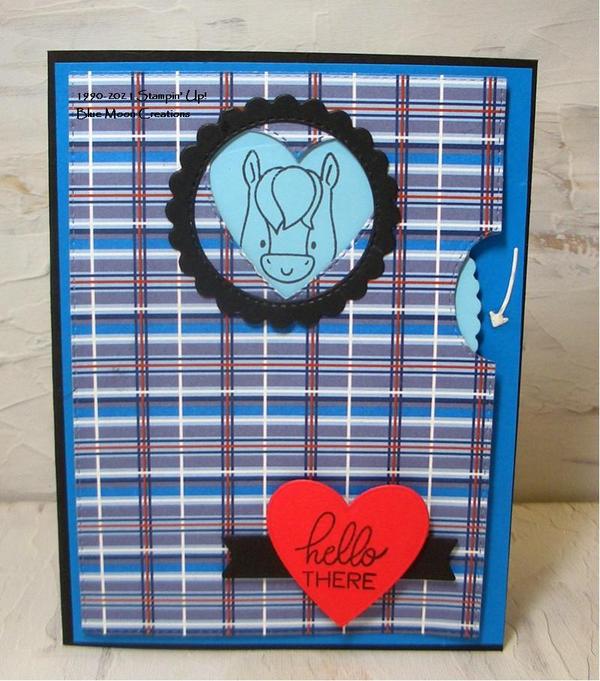
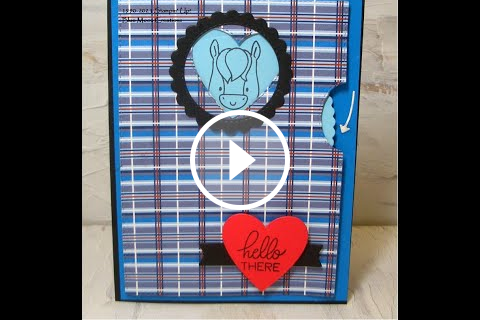
Peekaboo Farm Give It a Whirl Card
(Sketch Challenge)
Create fun, interactive cards using the Give It A Whirl Dies.
The possibilities are endless!
Be sure to watch my exclusive how-to video (link is below).
1. Cut and assemble card and whirling mechanism pieces.
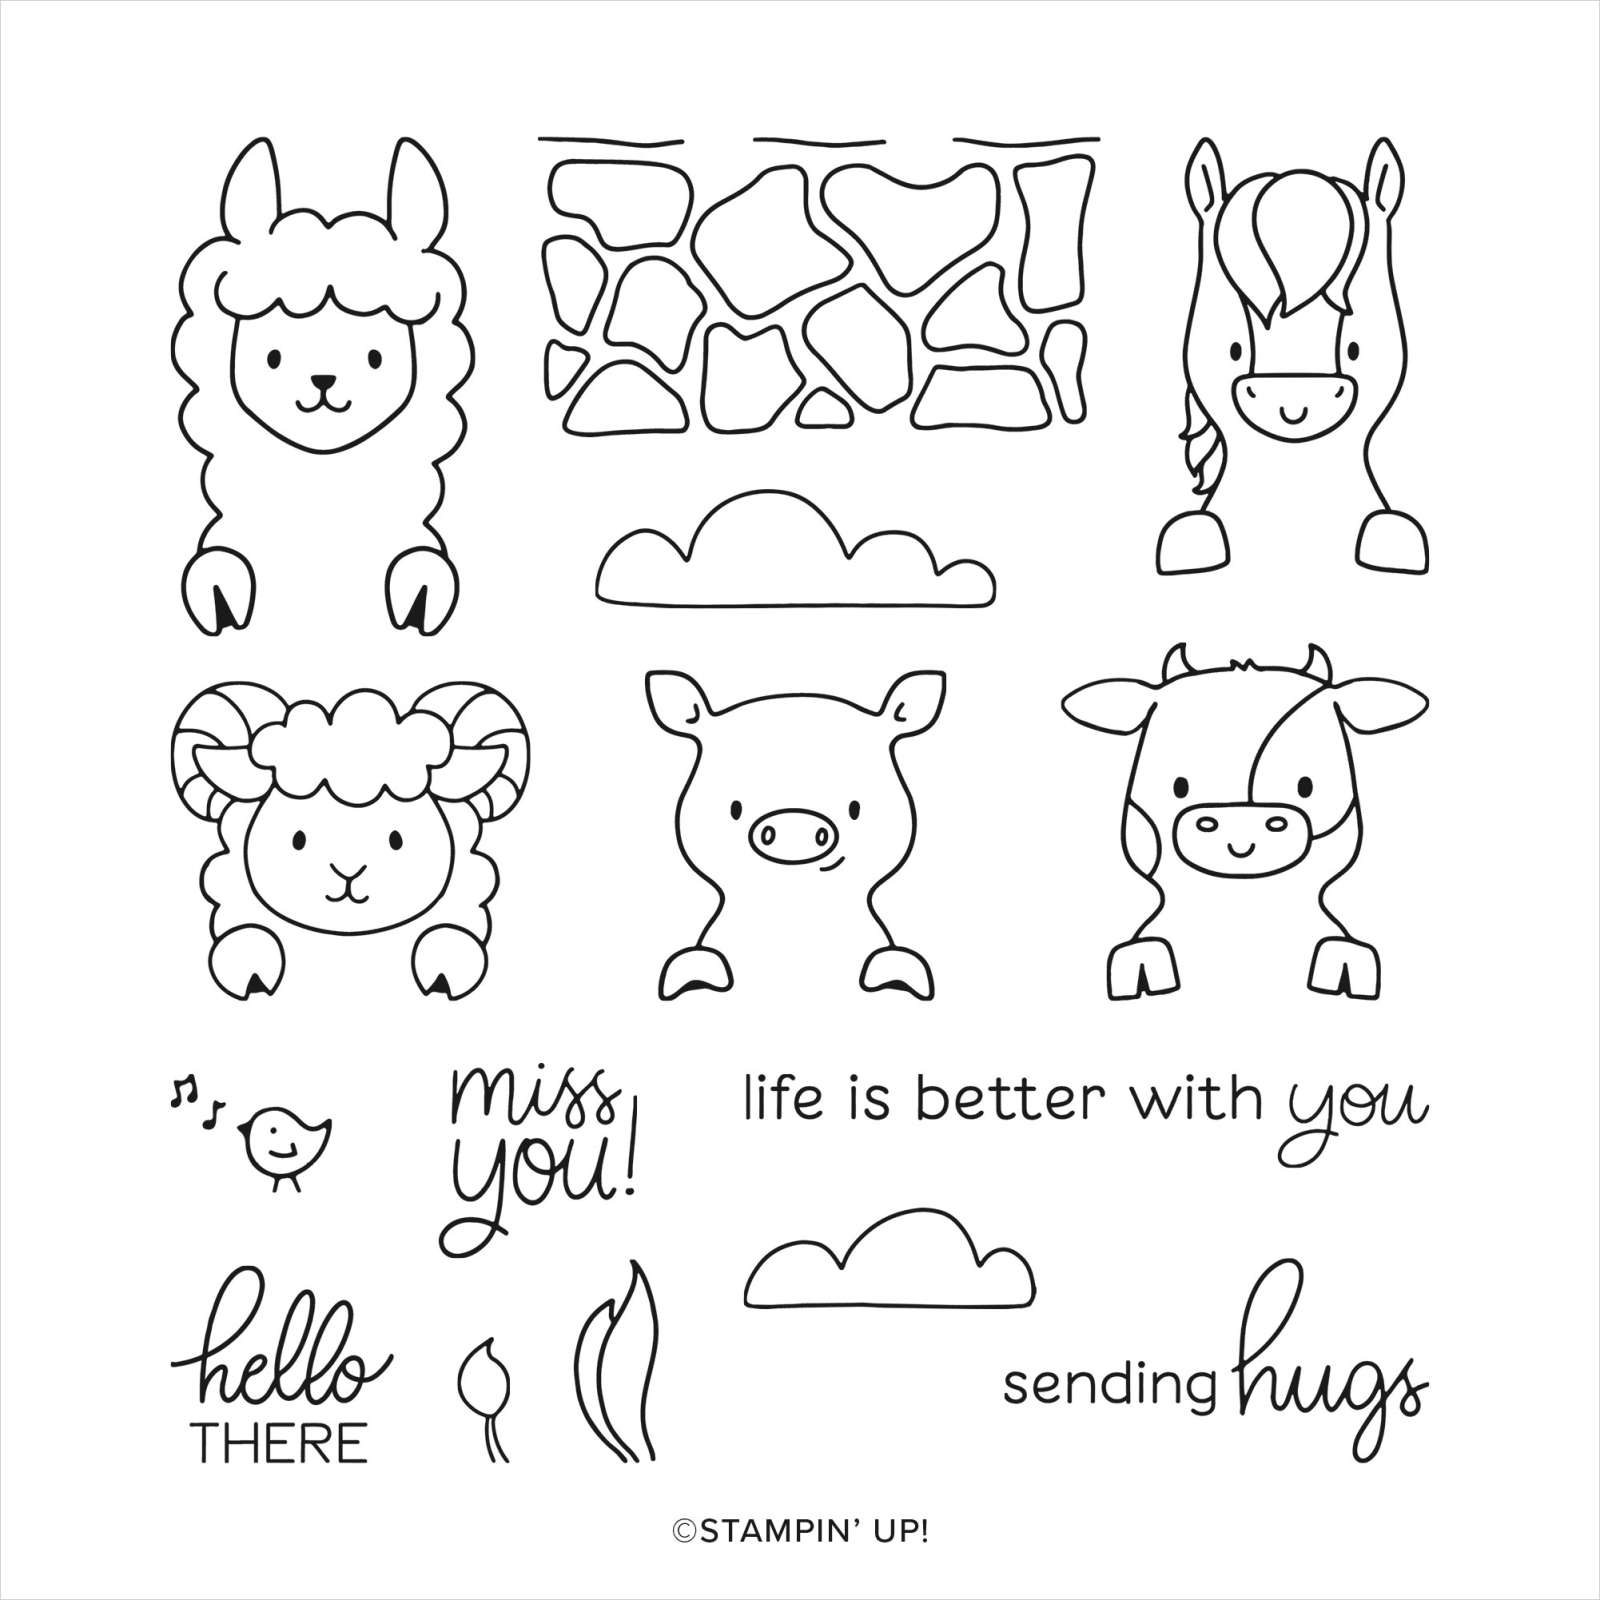
2. Stamp images from Peekaboo Farm on Balmy Blue circle piece using Black Memento ink.
3. Assemble card pieces (watch the video for more details)
4. Cut the heart out of Poppy Parade card stock using the Give It A Whirl die. Cut banner out of Basic Black card stock using the Give It A Whirl Die. Stamp greeting using Black Memento ink on the heart. Attach banner and heart to card front using Mini Dimensionals to pop them up.
5. Add directional arrow using Tombow Glue to complete.
Supplies Used:
Stamp Set: Peekaboo Farm
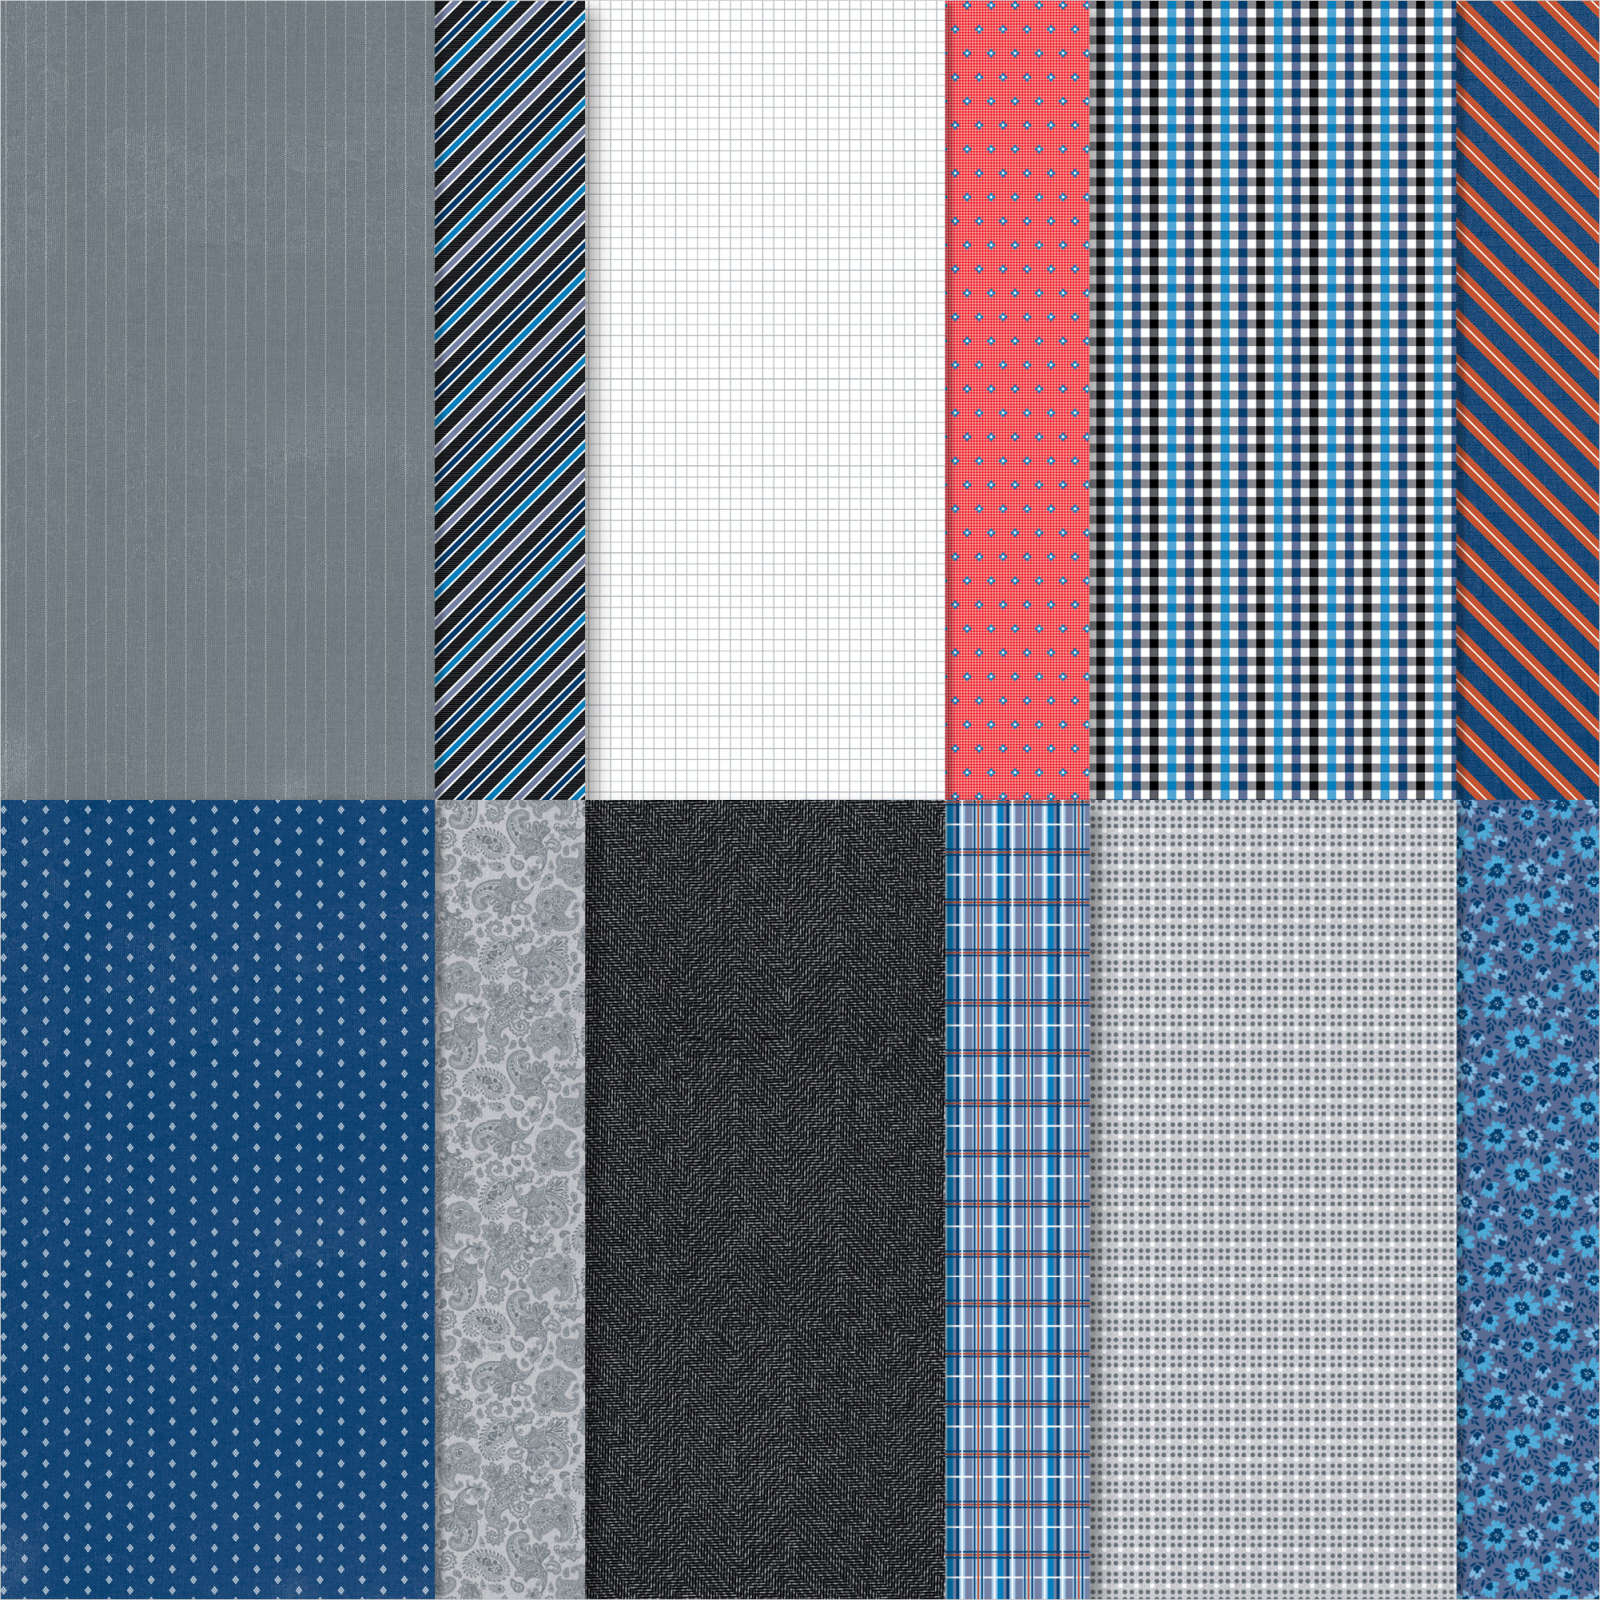
Paper: Basic Black, Pacific Point, Balmy Blue, Poppy Parade, Whisper White, Well Suited Designer Series Paper
Accessories: Stampin' Cut & Emboss Machine, Give It A Whirl Dies, brad, Mini Dimensionals, Tombow Glue
Give it a Whirl Exclusive How-To Video Tutorial
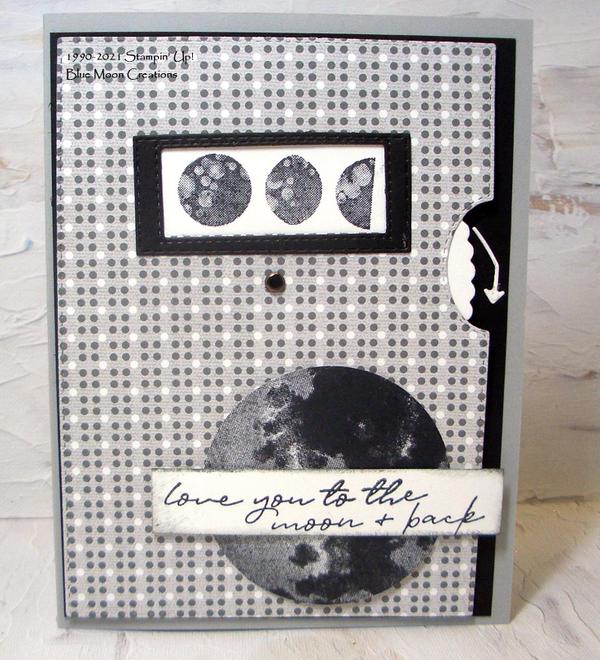
To the Moon Give It A Whirl Card
1. Cut and assemble card and whirling mechanism pieces.
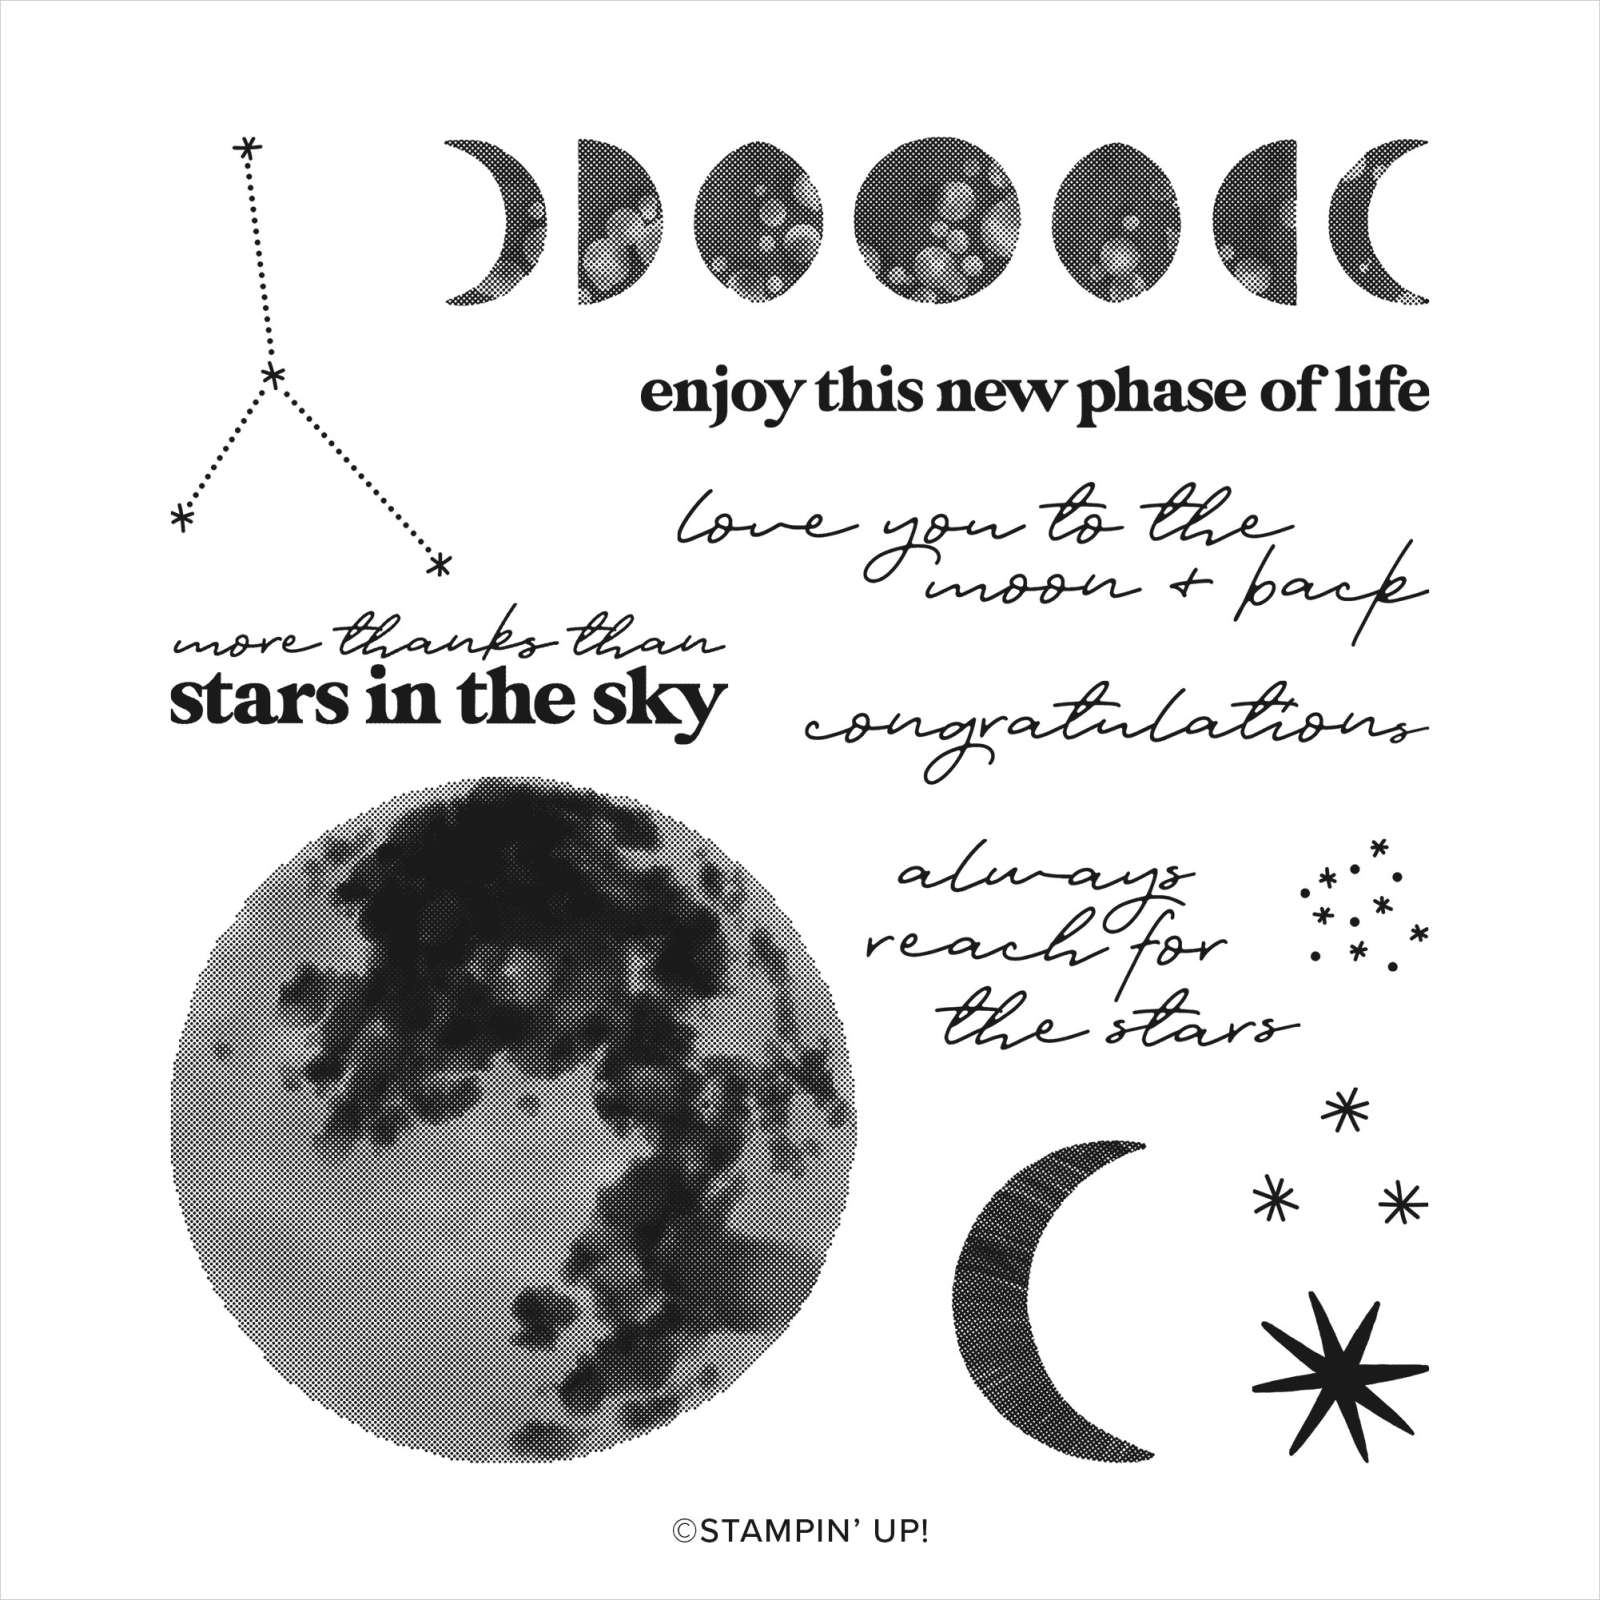
2. Stamp images from To the Moon on Whisper White circle piece using Black Memento ink.
3. Assemble card pieces (watch the video for more details)
4. Stamp moon on Whisper White card stock using Black Memento ink. I used the Stamparatus to get a good inked image. Punch out using 2 1/2" circle punch or die-cut machine and die.
5. Stamp greeting on a scrap piece of Whisper Card stock using To the Moon stamp. Trim to a rectangle size. Sponge Black Memento ink along the edges.
6. Attach moon to the card front using Mini Dimensionals. Attach greeting using Mini Dimensionals.
7. Add directional arrow using Tombow Glue to complete.
Supplies Used:
Stamp Set: To the Moon
Ink: Black Memento
Paper: Smoky Slate, Basic Black, Whisper White, Well Suited Designer Series Paper
Accessories: Stampin' Cut & Emboss Machine, Give It A Whirl Dies, brad, Stamparatus, 2 1/2" circle punch, sponge, Mini Dimensionals, Tombow Glue
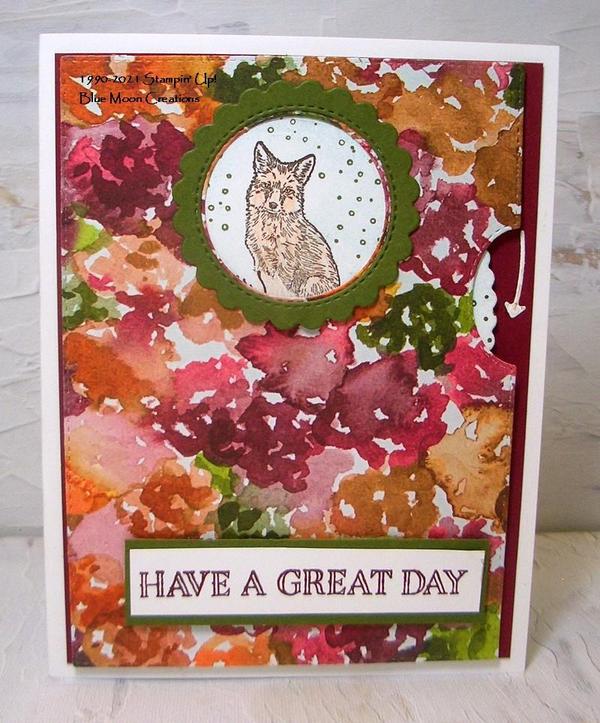
Nature's Beauty Give it a Whirl Card
1. Cut and assemble card and whirling mechanism pieces.
2. Stamp images from Nature's Beauty Early on Whisper White circle piece using Early Espresso ink. Color images using watercolor pencils, Stampin' Write Markers, or Stampin' Blends.
3. Assemble card pieces (watch the video for more details)
4. Stamp greeting on Whisper White card stock using Merry Merlot ink. Trim and attach to Mossy Meadow mat. Attach to card front using Mini Dimensionals to pop it up.
5. Add directional arrow using Tombow Glue to complete.
Supplies Used:
Stamp Set: Nature's Beauty, Flora and Fauna (Paper Pumpkin kit)
Ink: Early Espresso, Mossy Meadow, Merry Merlot, watercolor pencils
Paper: Whisper White, Merry Merlot, Mossy Meadow, Beauty of the Earth Designer Series Paper
Accessories: Stampin' Cut & Emboss Machine, Give It A Whirl dies, brad, Mini Dimensionals, Tombow Glue
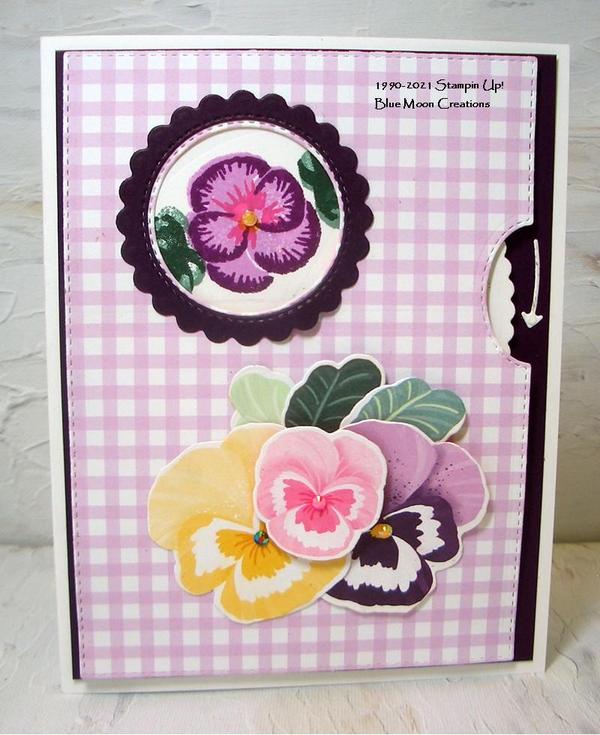
Pansy Patch Give it a Whirl
1. Cut and assemble card and whirling mechanism pieces.
2. Stamp images from Pansy Patch on Whisper White circle piece using Blackberry Bliss, Fresh Freesia, Polished Pink, Bumblebee, Evening Evergreen, and Soft Succulent inks.
3. Assemble card pieces (watch the video for more details)
4. Cut pansy and leaf images from Pansy Petals Designer Series Paper using the Stampin' Cut & Emboss Machine and coordinating Pansy Dies. Attach to card front using Mini Dimensionals to pop them up.
5. Add directional arrow using Tombow Glue. Add Jewels to centers of the pansies to complete.
Supplies Used:
Stamp Set: Pansy Patch
Ink: Blackberry Bliss, Fresh Freesia, Polished Pink, Bumblebee, Evening Evergreen, and Soft Succulent
Paper: Whisper White, Blackberry Bliss, Pansy Petals Designer Series Paper
Accessories: Stampin' Cut & Emboss Machine, Give It A Whirl, and Pansy dies, brad, 2021-2021 In Color Jewels, Mini Dimensionals, Tombow Glue
|
|
|
|
|