|
|
I'm here to help with inspiration for summer-themed (and jump-start on Christmas) crafting!
If you have any questions, please send an e mail:
SUPPLIES
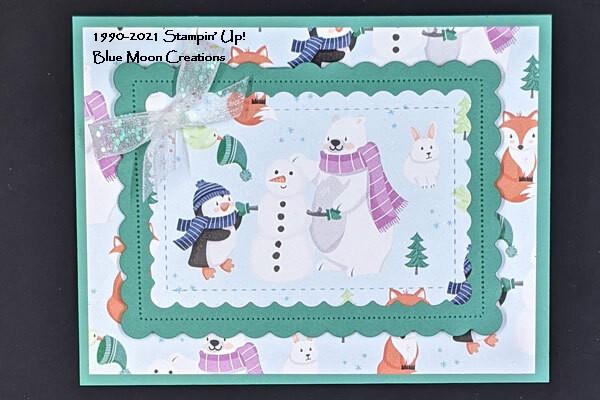
Stamps: Penguin Place (photopolymer 156410)
Ink: Memento (132708)
Paper (including Cutting Dimensions):
Basic White Cardstock [CS] (159276) 4” x 5-1/4” [Card Insert]
Just Jade Cardstock [CS] (153079) 5-1/2” x 8-1/2”, scored and folded at 4-1/4” [Card Base], 4” x 5”
Penguin Playmates Designer Series [DSP] (158420) * 4” x 5-1/4”
Accessories:
3/8" Glittered Organdy Ribbon - White (156408) 8",Scalloped Contours Dies (155560) second largest, next smaller, Take Your Pick (144107),Medium Envelopes - Basic White (159236),
Washi Tape, Stampin’ Pierce Mat (126199), Bone Folder (102300), Stampin’ Dimensionals (104430), Mini Glue Dots (103683), Grid Paper (130148) or Small Grid Paper (149621),Stampin’ Cut & Emboss Machine (149653) or Mini Stampin’ Cut & Emboss Machine (150673)
INSTRUCTIONS
1. Fold Card Base; burnish crease with Bone Folder. Set aside.
2. Cut backing layer from Jade CS using larger Contour Die.
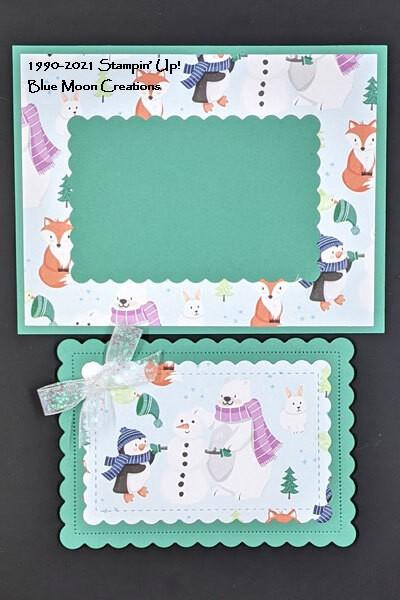
3. Center smaller Contour Die over ‘scene’ then secure with Washi Tape. Cut out then attach to Jade layer with Seal. NOTE: Save the piece you cut the scene from as you’ll use this on your Card (see Photo 1).
4. Assemble Card as follows:
- Attach DSP to Base with Seal;
- Add Jade/DSP layer with Dimensionals; and,
- Tie small bow and attach with Glue Dots.
5. Decorate inside of Card with stamps/printed paper as desired; decorate Envelope if you choose.
Q: I notice that you always include Grid Paper or Small Grid Paper in the Supply List for your projects. I make a lot of cards - which one should I buy?
A: I suggest you buy both and here’s why. I use the Small Paper (149621) - about 7-1/2” square - when I’m working in a small space where the full-sized won’t fit. At 11” x 17”, the full-sized Grid Paper (130148) gives me plenty of room to spread out my supplies and
protect my table – Win-Win!
|
|
|
|
|