Supplies:
Stamp Sets: Magical Meadow (162134)
Inks: Real Red (147084), Old Olive (147090)
Paper: Basic White (159276), Real Red (102482), Old Olive (100702), Shaded Spruce (146981), Joy of Christmas Designer Series Paper (161958)
Other: Stampin’ Cut & Emboss Machine (149653), Magical Meadow Dies (162143), Paper Trimmer (152392), Take Your Pick Tool (144107), Adhesive Backed Glitter Sequins (162029), Real Red & Burlap Combo Ribbon Pack (160386), Paper Snips Scissors (103579), Stampin’ Dimensionals (104430), Mini Glue Dots (103683), Multipurpose Liquid Glue (110755), Bone Folder (102300), Sponge Daubers (133773) Exposed Brick 3D Embossing Folder
(161600)
Other: Scotch tape
Measurements:
- Real Red Card Stock (card base): 5 ½” x 7 ¼”; scored and folded at 4 1/4”
- Real Red Card Stock:
4 ¼” x 4 ¼”, scored and folded at 1”
- Real Red Card Stock: 2 ½” x 3 ½”
- Real Red Card Stock: scrap to die cut berries
- Basic White Card Stock: 4” x 5 ¼”
- Basic White Card Stock: 2 ¼” x 3 ¼”
- Old Olive Card Stock: scrap to diet out 5 holly leaves
- Shaded Spruce Card Stock: scrap to die cut pine sprigs
- Designer Series Paper: 2 ¾” x 5 ¼”
- Designer Series Paper: 3” x 4”
- Red Ribbon: 5”
Instructions
- Fold the Real Red Card Stock along the score line to form the card base. Use the Bone Folder to get a good
crease.
- Using the embossing folder run both pieces of Designer Series Papers through your Cut & Emboss Machine.
- Attach the Designer Series Paper that measures 2 ¾” x 5 ¼” to the front flap of the card base using
Multipurpose liquid glue.
- Take the 4” x 5 ¼” Basic White Card Stock and place it in the embossing folder about ½” in so the bricks will run the correct way. Since the card stock will be protruding out the side you need to turn your Embossing Folder sideways and run through your Cut & Emboss Machine.
- Add liquid glue to the inside of the 1” flap of the Real Red Card Stock that measures 4 ¼” x 4 ¼” and centre it to the Basic White piece from No. 3 above along the right side.
- Attach the 4” x 5 ¼” Basic White
piece to the inside of the card with liquid adhesive. Your small flap on the right side goes over the left front flap when your card is closed.
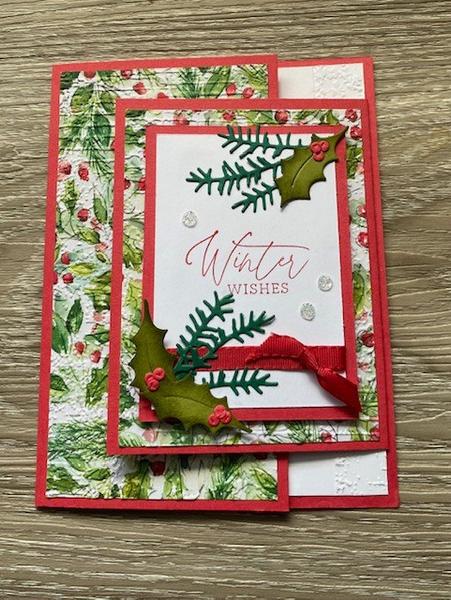
- Attach the Designer Series Paper that measures 3” x 4” to the small flap (refer to picture above).
- Stamp the Basic White piece that measures 2 ¼” x 3 ¼” with the Winter Wishes stamp in Real Red Ink.
- Using the Real Red narrow ribbon from the combo set, wrap around the 2 ¼” x 3 ¼” piece approximately ¾” from the bottom and adhere on the back with Scotch
tape. Then make a faux Real Red bow trimming the ends on an angle using your paper snips and attach the bow to the ribbon using a mini glue dot.
- Using the Old Olive and Shaded Spruce scrap cardstock pieces, die cut the foliage from the Magical Meadow die set. The five holly leaves were die cut out of Old Olive and then using dauber go around the edges using Old Olive Ink.
- Three of the leaves will
be for the outside of the card and two for the inside of the card. Use the scrap of Real Red to die cut the berries.
- Adhere the die cut pieces referring to the picture above using liquid glue, dotting the glue lightly.
- Attach the 2 ¼” x 3 ¼” Basic White piece to the Real Red piece that measures 2 ½” x 3 ½” using liquid glue.
- Attach the Real Red 2 ½” x 3 ½” piece, with Dimensionals, to the front right flap (refer to picture above).
- Using your Take Your Pick Tool add three small clear glittered sequin gems to the front of the card.
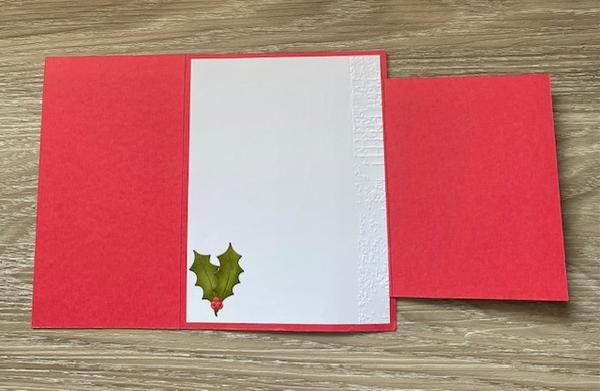
- On the inside of the card, adhere two of the holly leaves and three berries to the lower left side of the Basic
White Card Stock piece that measures 4” x 5 ¼”.