Supplies
Stamp Sets: Gift of Giving (162075) Inks: Early Espresso Classic Ink (147114) Paper: Basic White (159276), Joy of Christmas Designer Series Paper (161958) Other: Stampin’ Cut & Emboss Machine (149653), Stylish Shapes Dies (159183), Copper & Natural Ribbon Combo Pack (162192), Paper Snips Scissors (103579), Stampin ’Dimensionals (104430), Mini Glue Dots (103683), Simply Scored Scoring Tool (122334), Crumb Cake Stampin’ Blends Combo Pack (154882), Shaded
Spruce Stampin’ Blends Combo Pack (154903), Cherry Cobbler Stampin’ Blends Combo Pack (154880)
Measurements
• Joy of Christmas 12” x 12” sheet (packet). Non-directional paper is best for this project.
• Basic White (image): 3 ¼” x 3 ¼”
• Natural Ribbon: 24”
Instructions
1. Decide which pattern of your designer paper you would like to be on the left-hand side of your packet and place
that side face up on your Simply Scored Scoring Tool. For my project, I want the green plaid on the left, so it is face up.
2. Score your paper with the LARGE end of your stylus at: a. 2”, 5 ¾”, 6 ¼” and 10”
3. Turn the paper ¼ of a turn and score at: a. 2 ½” and 8 ¼”
4. GENTLY fold on each of the score lines. I DON’T burnish them, as it may crack your paper.
5. Place your page
in front of you, with the “double center score lines” facing your stomach.
6. Now you want to fold EACH of the corners up or down,
7. so the edge of the corner meets up with the 2” and the 10” score
lines. See photo:
8. Fold the 2” and 10” sides “in”
9. Fold the left hand 2 ½” and 8 ¼” fold lines “down” and “under”. See photos:
10. Flip your packet over and tuck the corner of the top into the “flap” of the bottom. No adhesive needed!
11. You can now close your booklet. The double center score lines are the “spines” of your book. Yes, the paper does buckle slightly. It’s ok ☺
12. Use glue dots to attach treats to the inside of your packet. a. I used Tim Horton’s Hot Chocolate, purchased at Costco (I folded it in half and tucked it into the left hand pocket. b. I used glue dots to attach two “Via” Instant Coffee sachets to the center of the packet. These can often be found at Costco for much less money than grocery stores. c. I used glue
dots to attach two tea packets in the right side pocket, just to hold them in place better. Again, Costco has the best price on tea!
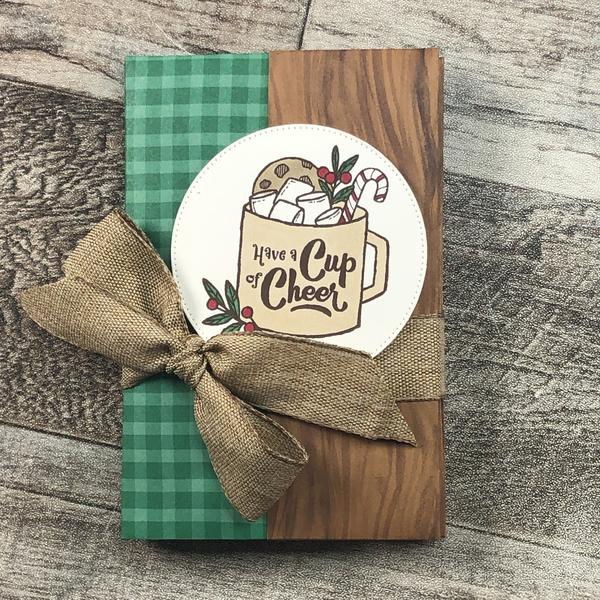
13. Use your Cut & Emboss Machine to cut out the largest circle from the Stylish Shapes dies.
14. Use Early Espresso Classic Ink to stamp your image on your die cut circle.
15. Use your Blend Markers to colour your image.
16. Use dimensionals to attach the
circle to the front of your packet. I used three – one on the top of the circle and one on each side of the circle. I want the bottom of the circle to be loose so that my ribbon can tuck under it slightly.
17. Tie your ribbon around your packet with a bow and slide it up so it fits just under your circle. Done! As always, written instructions are
harder to understand than visual instructions. Refer to the pictures and you should be able to understand what to do. Enjoy!
*** FUN FACT – this packet can also hold six Notecards and Envelopes! Tuck three in each side and you have a
no-calorie hostess gift for any occasion.
NOTE: Additional pictures of making this project are available in the PDF Tutorial - click the orange button, below!