Welcome to the second installment of Little Blooms: A Mini Snap Purse, wherein we explore stitching the flowers clustered here and there around the design.
If you are not familiar with the way a stitch-along works, you can find further information on what to expect with this project in the preview of Little Blooms here.
Last week in Part 1, we setup the project. That’s where you’ll find the pattern and the embroidery design, along with information on transferring the design.
Members of the Needle ‘n Thread community on Patreon will find the PDF for this installment already available. If you’re in the Dedicated or Avid Stitcher levels, I’ll be posting a video supplement for you a little later this week.
So that’s the backstory – now let’s jump into the flowers, shall we?
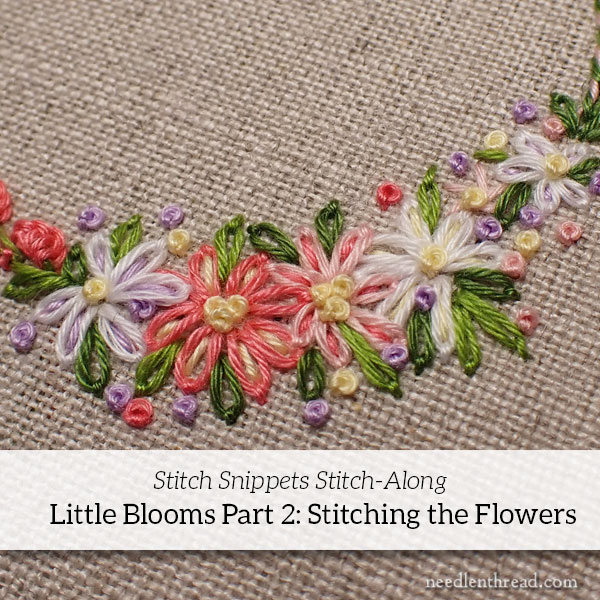
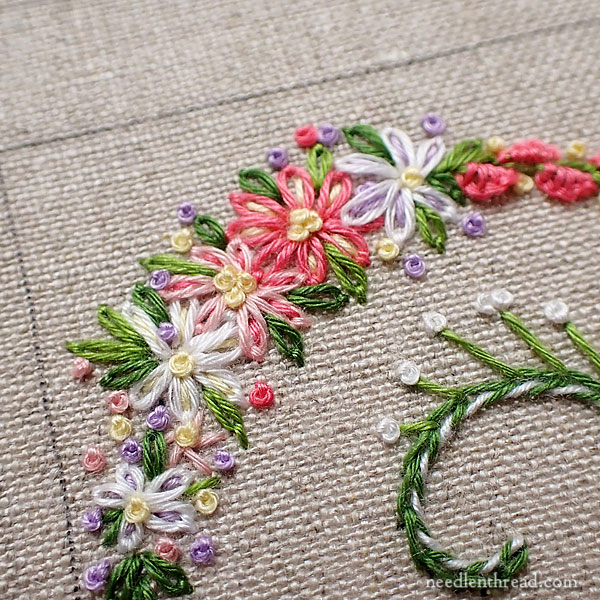
In Part 2, we’re going to explore how to stitch clusters of flower on the scroll design.
In the pictures, you’ll see that some of the vines are already embroidered. I worked the samples several ways – flowers first, vines first, and mixing flowers and vines as I went. You’re free to take whatever approach you want.
In retrospect, it makes more sense to me to do the flowers first and then to work the vines around the flowers, because it’s easier to get a good balance on the overall design, considering the flower bunches and the relative thickness of surrounding vines and so forth.
Unlike most embroidery designs, you will not be stitching over already-drawn shapes on the fabric. Instead, you’ll be working the floral clusters in a free-style approach, without a pattern.
While this may sound intimidating, you will see that it’s really a very easy way to stitch this type of floral element.
One reason it’s easy is because it’s a very forgiving approach: the flowers don’t have to be “perfect” to look great! The flower petals don’t have to be equal in size, they don’t have to be equally spaced. The greenery can be worked in any of the shades of green, in petal shapes and in straight stitches. The scattered French knots don’t need to be evenly distributed in color or size or location.
Overall, this free-style approach keeps the clusters from looking stiff.
Before stitching the clusters, you’ll need to decide where you want to place them on the design.
Deciding on Placement
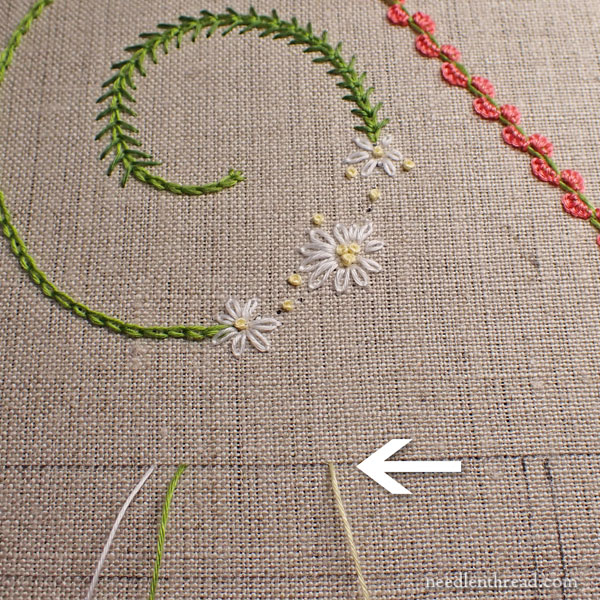
To help you decide where to place the flower bunches, here’s a diagram of where I placed them on the stitched sample:
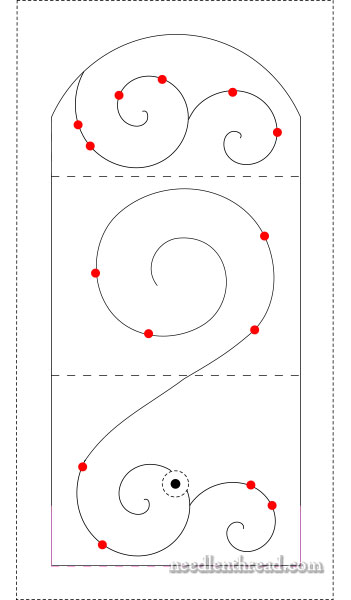
The clusters are situated between a pair of red dots along the vines.
Although it might be tempting to put a lot of clusters on the vines, keep a couple things in mind:
1. The design relies both on the flowers and the vines for its interest. Leave enough room to work the decorative vines! You want to shoot for balance between vines and flowers.
2. If you are working from the kit, I included twice as much thread as I used on the original sample stitched for this demonstration. Still, if you go overboard on the flowers, it is likely you will run out of thread!
Lightly mark the location of your flower clusters using a pencil. Just put a little small perpendicular dash on your scroll line, marking the two ends of each cluster.
If you decide to change the location of a flower cluster as you progress through the project, you definitely can. Any marks you make – as long as they’re kept pretty small – can be covered by the stitching on the vines.
For this type of stitching, use an embroidery or “crewel” needle, with a sharp tip. If you have the Little Blooms kit, there’s a #7 crewel needle in the kit. It’s the one with the shorter eye (compared to the other needle, which is a tapestry needle).
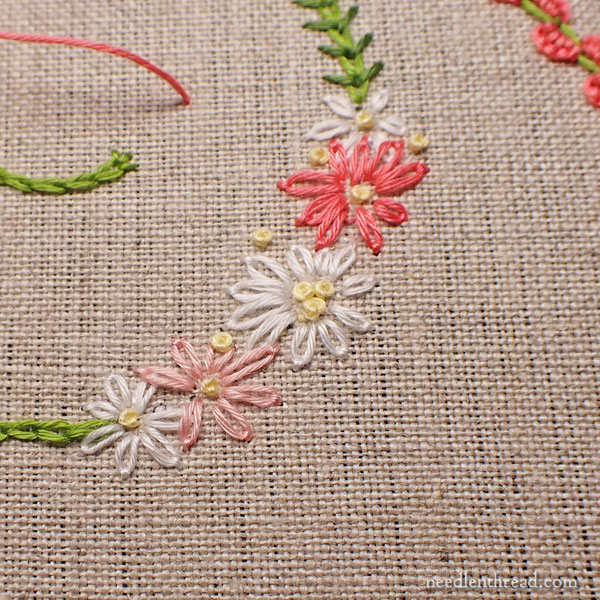
Decide what color you want for the majority of the flowers in the cluster you’re working on. For the example here, I started with white. The cluster I stitched had three white flowers in it – one larger one in the center and a smaller one on each end.
I built the whole cluster around and between these flowers.
The number of flowers in a cluster will depend on various factors: how large you stitch your flowers, how closely together or far apart you space them, how much greenery you want around them, how much space is available for the cluster, and similar considerations.
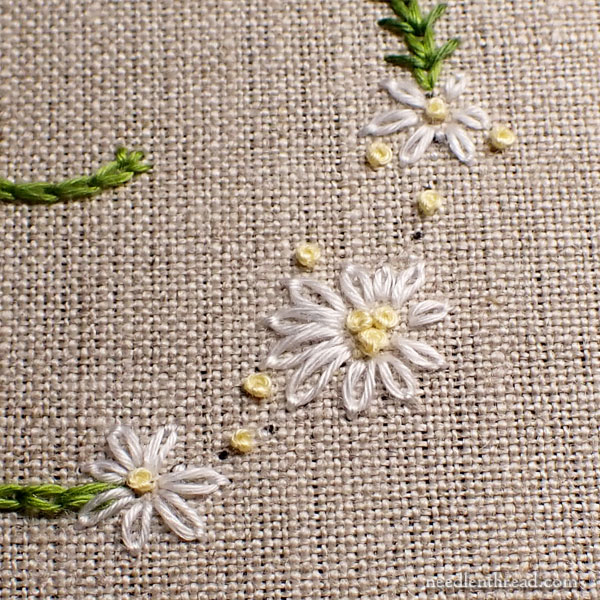
I started near the middle of the space with the largest flower, which is stitched in daisy stitch (detached chain stitch).
Stitch the petals first. They do not need to be equal in size, or equally spaced. It’s ok to leave spaces between petals, where you can fill in later with greenery.
Then I stitched the two smaller flowers on each end, so that the cluster will come to a taper towards each end.
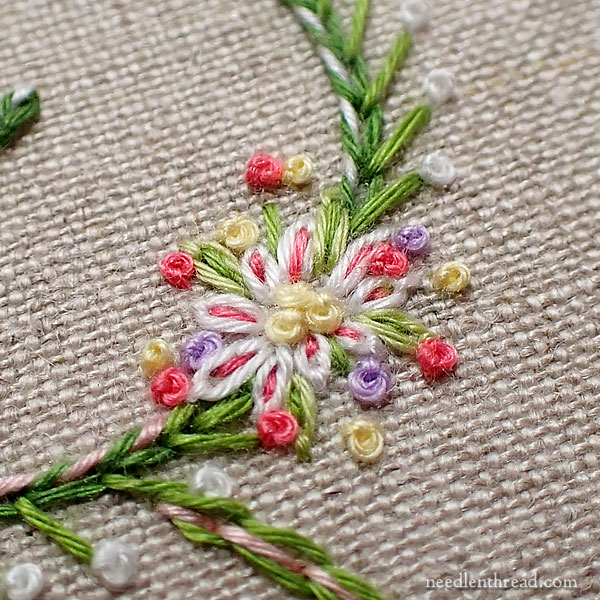
I used light yellow for the French knots….
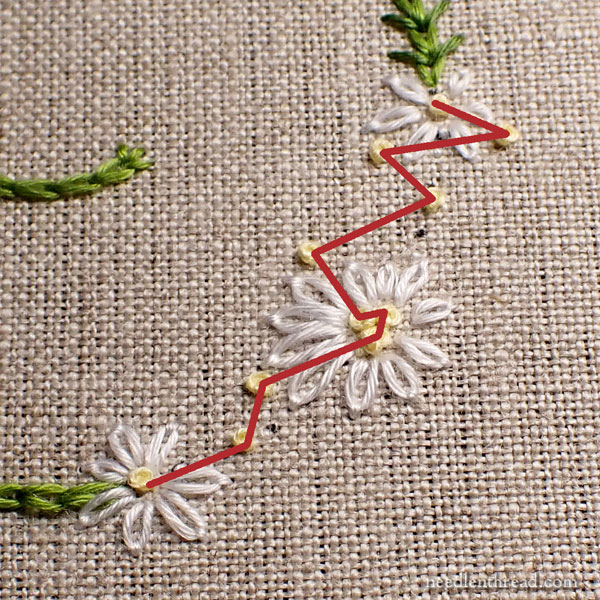
… following a path from one end of the cluster to the other, as indicated by the red line in the photo above.
As I moved along the cluster of flowers with the French knots, I used the knots to “step” my thread from spot to spot, so that I wasn’t carrying a long thread on the back of the fabric.
This approach to using French knots as the “step” between stitching areas is mostly how I worked the scattered French knots. It saves time, because I don’t have to keep starting and stopping to switch to different colors of threads or to avoid carrying a longer thread on the back of the work.
When you’re temporarily finished with a thread but the thread is still long enough to keep stitching with it, “park” the thread by bringing it up in your fabric somewhere else in the design, where it will be out of your way. Take your needle off the parked thread (or leave it, if you have plenty of needles), and start a new color.
Later, when you want to pick up the color again, just use the parked thread.
If space allows, add more flowers to your cluster, using one or more remaining colors in your color palette.
It’s ok if the petals overlap the other flowers. It’s ok if the flower looks a little wonky. It won’t look wonky, once greenery and French knots are tucked in all around it!
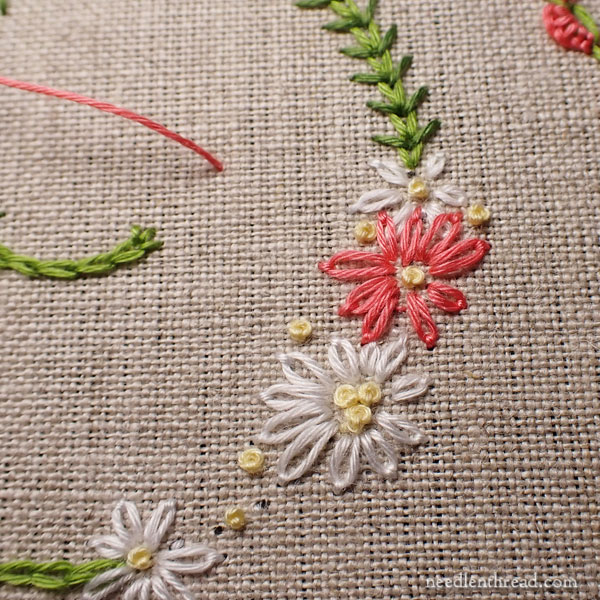
Here, I added a pink flower on the other side of the center.
Now that the basic cluster is in place, it’s just a matter of filling in everywhere, with anything you want to fill with!
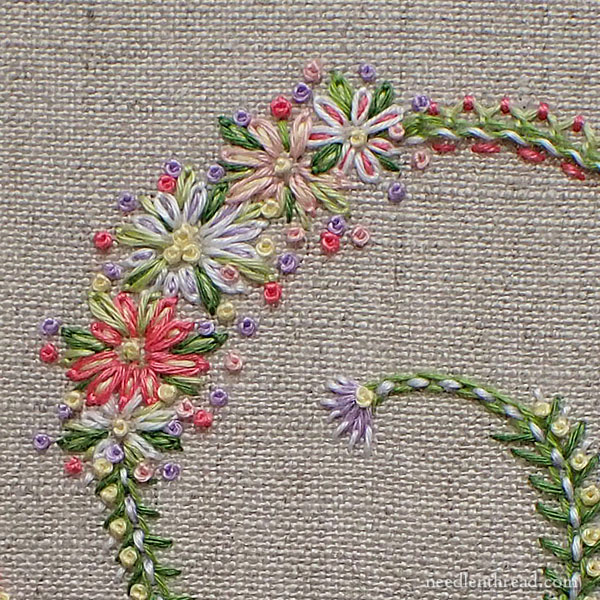
Fill around the flowers and even between petals with green daisy stitches and straight stitches for the greenery, using all shades of green.
Work more French knots around the design and even between flower petals, on top of leaves, and so forth.
Work straight stitches in contrasting colors inside the flower petals to fill them out.
Work straight stitches in other shades of green inside the daisy stitch leaves.
Tuck straight stitches in for greenery where full daisy stitches won’t fit, or where you just want a little variety.
On the right side of the cluster above, you can see that I used a straight stitch flower instead of one worked with daisy stitches. This is especially useful if you want to work an extra-small flower.
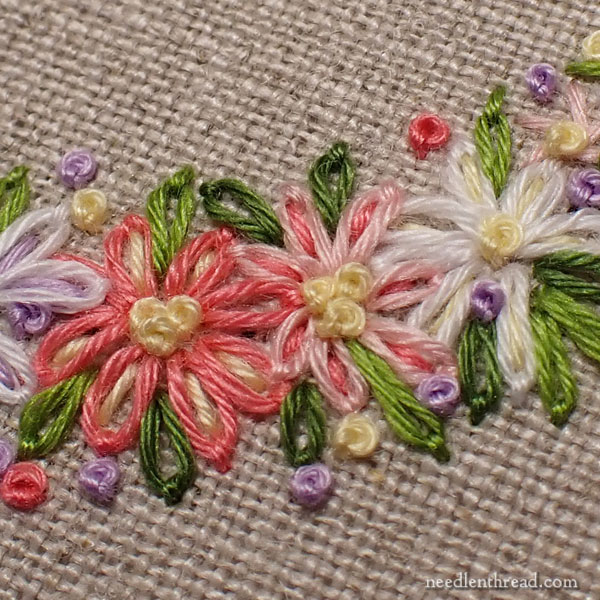
You can see the straight stitches worked inside the daisy stitch petals in these flowers, but notice that the greenery leaves are empty. Mix things up! Fill some, don’t fill others.

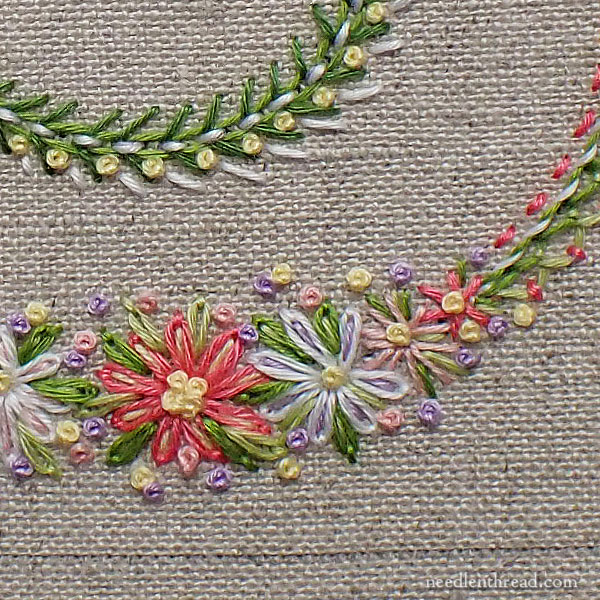
When you finish a cluster, if it needs “rounding out” or balancing, go back over it and work more French knots in the peripheral areas.
Mix up your colors however you want, but remember that you should try to keep the color distribution on the whole design somewhat balanced.
In some spots, you might just have a small single flower instead of a whole cluster – especially on some of the scrolls at the two ends of the design.
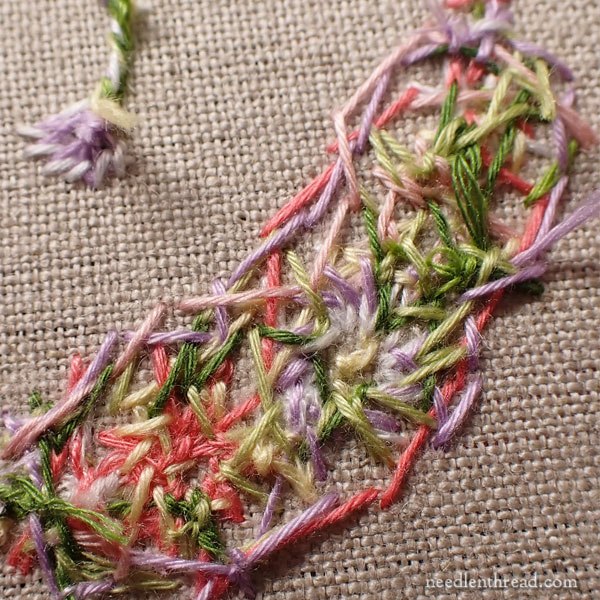
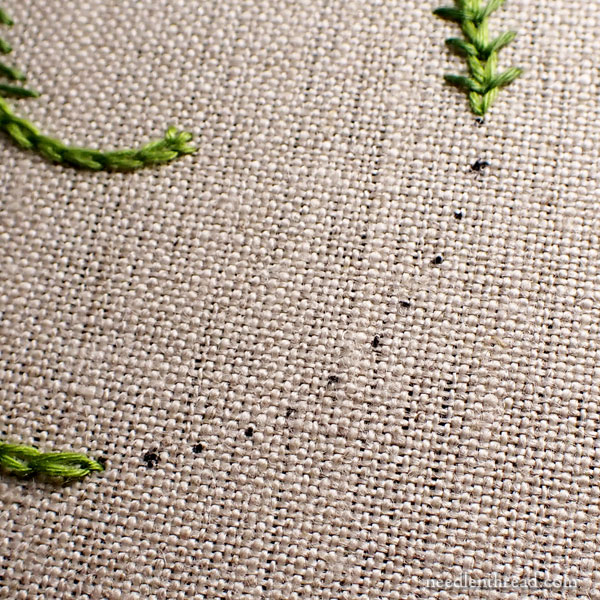
If you’re thinking the back might end up looking a bit messy, you’re right! But that’s ok! Notice that there are no long lengths of carried threads on the back, thanks to “stepping” with the French knots.
And that’s it! Go forth and stitch your flower bunches! I hope you have a lot of fun stitching them!
This part of the project will take a little bit of time. Look for the next installment later next week!