Last week, we (just barely) met the deadline for the goldwork altar cover project that’s been developing for almost a year now. You can find the backstory on this project here.
After the crunch (which was particularly crunchy!), it took a few days to get things back into working order here in the studio, and then it took a weekend to recuperate in general on all the normal aspects of life that were pretty much on hold since the last week of March.
As of today, we’re back to our normal operations – still catching up, but everything should even out again this week!
Today, I’ll show you the finish. And then later in the week – delayed, but not forgotten! – we’ll be back to our regular program, including Little Blooms.
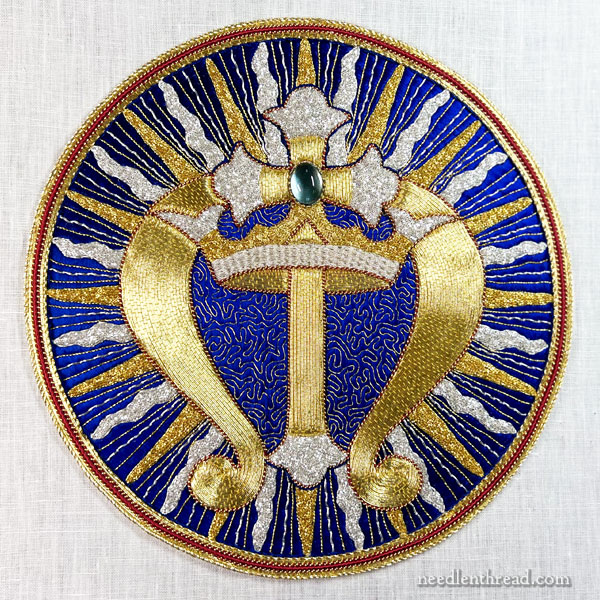
This is the finished central medallion for the altar cover. It is just a tad smaller than 8″ in diameter.
I worked the design in flat silk (the blue background), gold passing thread, a never-ending ton of gold and silver chip work using bright check purl, stretched pearl purl twisted with flat silk, gold and silver rococo, different types of gold and silver twist, and a red silk faceted gimp.
The central stone is a blue topaz cabochon set in a delicate gold bezel customized with flattened side “loops” to fix it to the ground fabric before building up the goldwork around it.
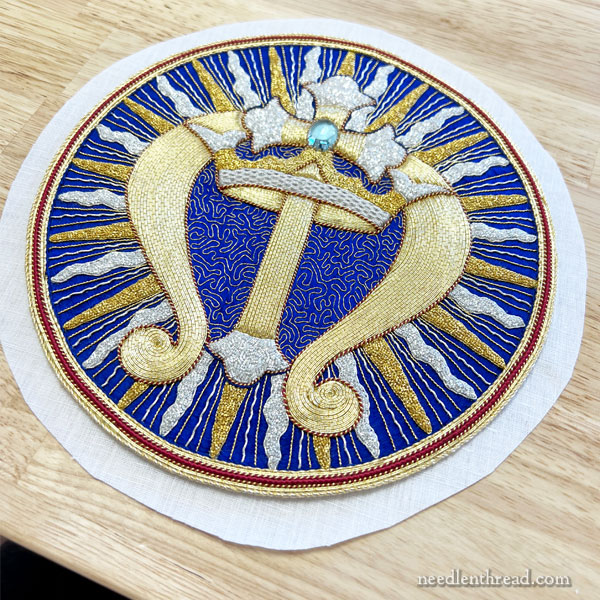
The photo above was taken while the piece was still on the frame, just after I finished it. I did not clock my hours on the medallion alone, but I estimate approximately 220 hours on the medallion from start to finish, over the almost five weeks it took to embroider it.
I learned many lessons about timing and planning for something this size. So Many Lessons! Primarily, this type of work can’t be undertaken last minute – and when it comes to hand-embroidered goods like this, especially if you are not relying on a crew of many, then anything inside a year is pretty much “last minute.” A year out seems like a long time on any project, but don’t delay because you think the deadline is in the distant future. That year goes fast.
Cutting out the embroidery is always the nerve-racking part!
Before the embroidery was removed from the slate frame, I pasted the back with rice paste – the same kind that you’d use to paste the back of, say, Japanese embroidery or similar.
The paste adds a little stiffness to the piece (but not too much stiffness) and it adds extra security to the threads on the back of the work.
I’m guessing there will be eyebrows raised at this point and some folks may say, “But you should never use paste on embroidery.” There will probably be folks who mention that conservation efforts are always more problematic when paste is used.
Just keep in mind that this embroidered piece is not a museum piece. It is not meant to last forever. It is meant for church use. It will be handled carefully, but it will be used every day – that’s what it was made for. And some day, it will have to be replaced. And that’s normal. It is being used in a climate-controlled environment, in a new church, so I think it has a good chance of lasting a while. But to think it will last in pristine shape for a long, long time is not realistic.
The pasting helps it hold up better and will add some longevity to its life.
Initially, I planned on using a turned edge appliqué for the medallion, but I was not pleased with the results when I tried it.
So, before appliquéing the medallion to the velvet cloth, I trimmed the edges of the ground linen down to about 1/8″ from the stitching.
Then, I pinned the medallion in place and used gold silk thread and blue silk thread, waxed, to tack the medallion in place using invisible tiny stitches throughout the design, tucking the tacking stitches into the embroidered areas. Then, I worked around the entire design, tacking in gold silk thread underneath the gold twist on the edge.
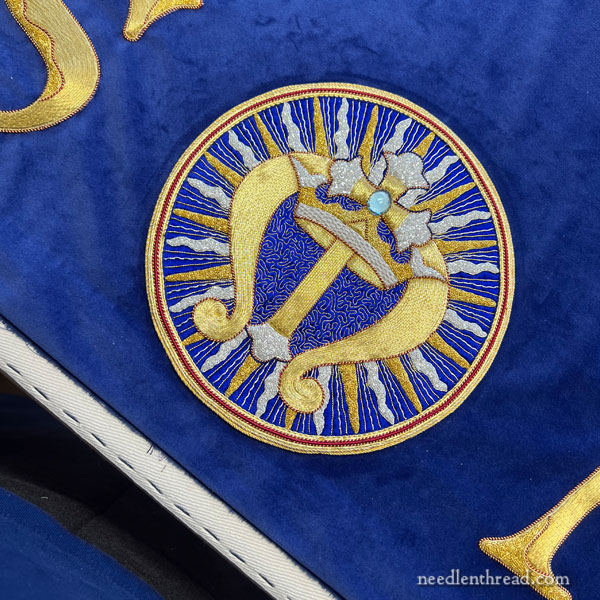
Finally, to finish the appliqué, I added another layer of twist that was sewn onto the velvet over the 1/8″ edge of linen.
Before officially handing the cover over, we fitted it on the altar a final time to make sure that it hung as planned.
We had quite a bit of last minute adjusting to do – including re-working the cloth using a different lining approach. The entire cloth was hand-hemmed and the lining sewn in by hand, so that took time, too.

This is the cloth hung on the altar, before the altar was dressed with linens. (Normally, the altar cover covers an altar that has linens on it already.) Since the church wasn’t in use yet, we were able to come and go to fit the cloth and to make adjustments as needed.
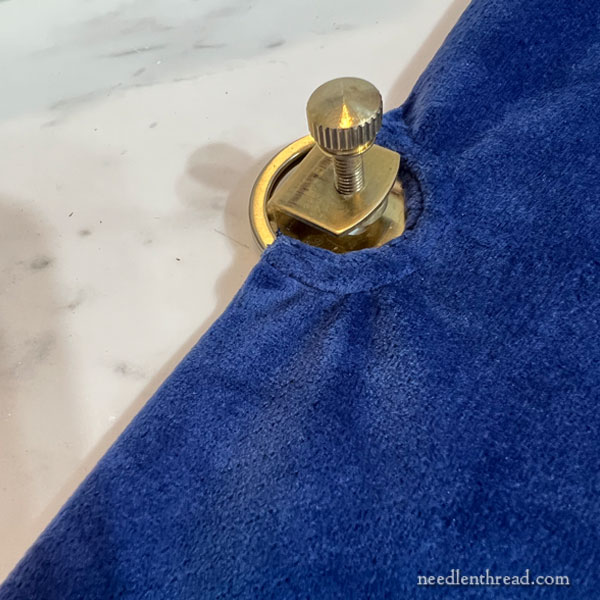
Something unique to the altar cover is this little get-up.
Most altars like this one have several inset pieces of hardware like the one pictured above fixed to the marble at intervals across the altar. The hardware features a small screw that has a broad, flat base. The hardware is used to hold the altar linens in place.
Altar covers sit on top of this screw mechanism or they sit just in front of it, leaving about 1/2″ of the linen exposed. This 1/2″ tends to get dusty pretty quickly.
Because of the weight of this altar cover, we needed some kind of solution to hold the cover in place so that it didn’t slip. Using regular cotton fabric to practice with – and a whole wide variety of types of rings and things – I figured out a solution for these inset rings that would fit over the linen hardware.
After fiddling around to make sure it would work and it didn’t look too awful, we had to “translate” it to the velvet cloth. While I was finishing up the medallion, Anna practiced on scrap velvet before sewing the rings into the altar cover.
There are six rings like this sewn into the top hem of the velvet cover, that fit over the six pieces of hardware on the 11′ 7″ wide altar. I am really pleased that these worked out, because I wasn’t sure they would! They caused me many a sleepless night while trying to figure them out!
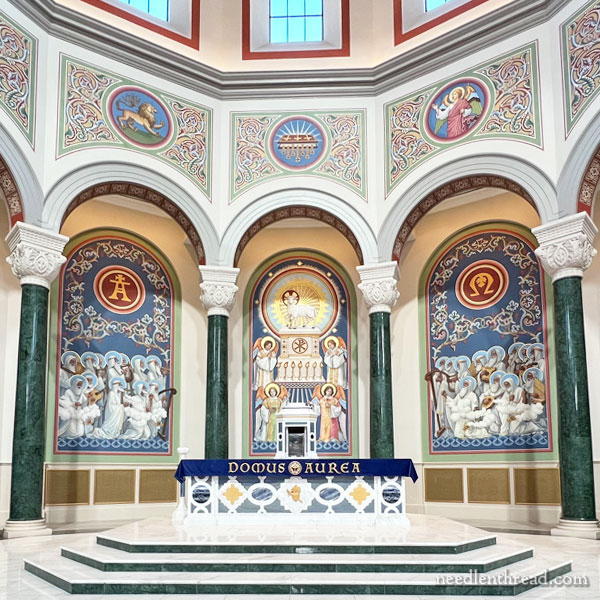
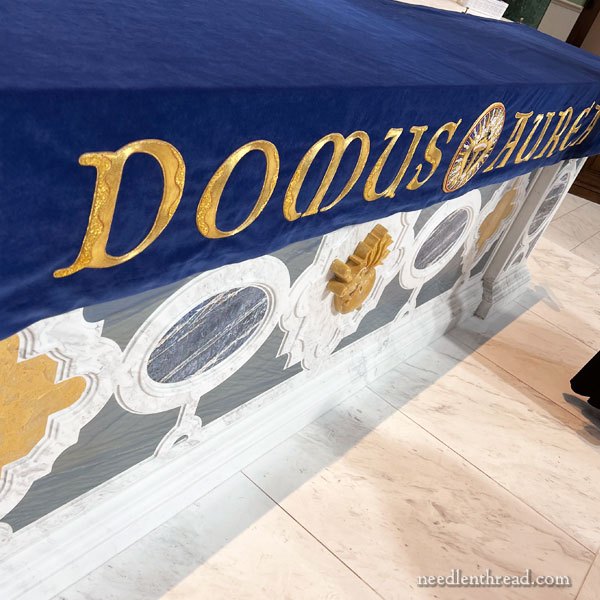
Here’s a view a little further back from the altar, still within the sanctuary of the church.
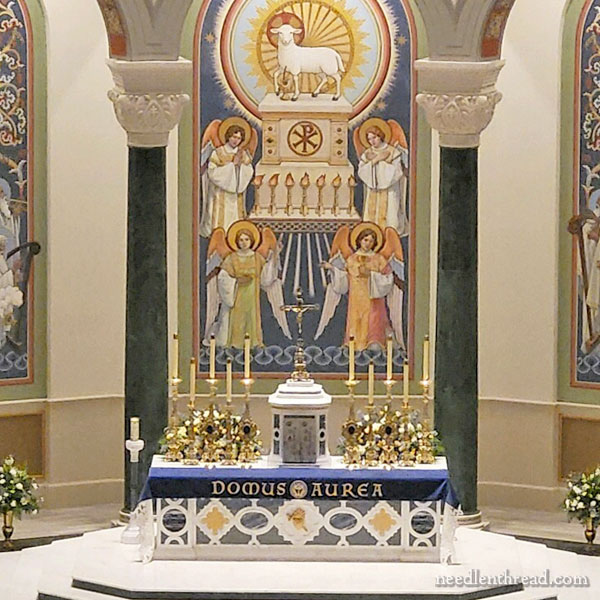
I wasn’t able to get a photo of the altar when it was all set up, but someone else sent me a picture taken with a phone and zoomed in from the choir loft. So, even though the picture is a little grainy, it will give you an idea of what the cover looks like in use every day. The letters are definitely readable!
So, that’s the end of that particular project!
And now it’s time to get back on schedule.
Coming Up
We’ll get Little Blooms under way again this week. I’m sorry we had to delay it, but hopefully, we’ll have clear sailing now!
Whew. It was a rough few weeks. It’s so good to be back to normal again!
